
Why Do Tomatoes Turn Black on the Bottom? Understanding Blossom End Rot
If you’ve ever discovered an ugly black spot on the bottom of your tomatoes, you’re dealing with a common garden problem called blossom end rot. This frustrating condition starts as a small, water-soaked patch that gradually darkens and expands into a leathery, sunken lesion. While it’s disheartening to see your prized tomatoes develop these unsightly blemishes, understanding the root cause—calcium deficiency—and its triggers can help you protect your future harvests. Let’s explore why this happens and what you can do about it.
Contents
- 1 What Does Blossom End Rot Look Like?
- 2 Common Causes of Calcium Deficiency in Plants
- 3 Which Garden Vegetables Are Most Affected
- 4 Prevention and Treatment Methods
- 5 Best Soil Management Practices
- 6 Watering Techniques to Avoid the Problem
- 7 Natural and Chemical Solutions
- 8 Frequently Asked Questions
- 8.1 Can Blossom End Rot Spread From One Tomato Plant to Another?
- 8.2 Are Tomatoes With Blossom End Rot Safe to Eat?
- 8.3 Does Blossom End Rot Occur in Hydroponic Tomato Growing Systems?
- 8.4 How Quickly Can Blossom End Rot Develop on a Tomato?
- 8.5 Will Pruning Affected Tomatoes Help Prevent Future Blossom End Rot?
What Does Blossom End Rot Look Like?
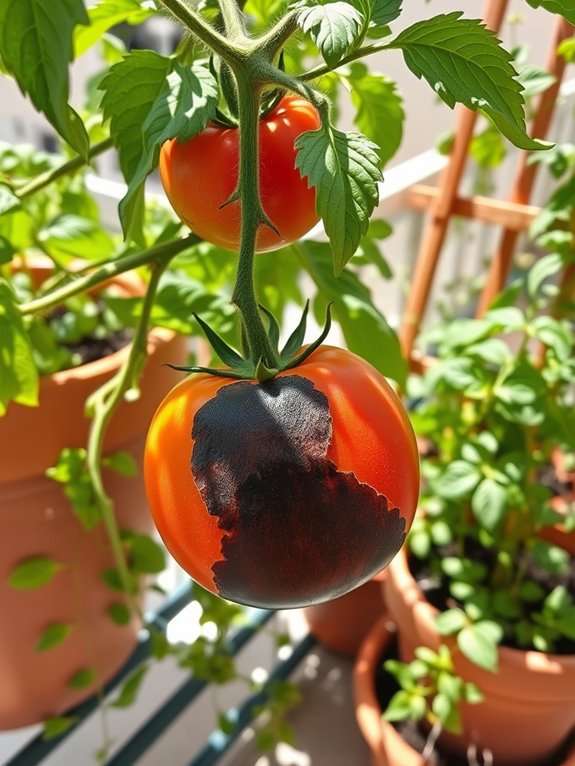
When you’re examining your tomatoes for blossom end rot, you’ll notice a distinctive dark, leathery patch developing at the bottom (blossom end) of the fruit. This discoloration starts as a small, water-soaked spot that gradually expands into a sunken, brown-to-black lesion with a dry, tough texture.
As the condition progresses, you’ll see the affected area grow larger, often covering up to half the tomato’s bottom surface. The dark patch becomes more pronounced, taking on a flattened appearance with concentric rings that feel papery to the touch. While the rest of your tomato might look perfectly healthy with bright red coloring, the affected portion will remain obviously damaged, making the fruit unsuitable for eating or preserving.
Common Causes of Calcium Deficiency in Plants
Although calcium deficiency in plants can seem mysterious, several common factors contribute to this frustrating problem in your tomato garden. Your soil’s pH level may be too high or too low, preventing your plants from absorbing available calcium. Inconsistent watering patterns, including long dry spells followed by heavy watering, can disrupt calcium uptake through the root system. You’ll also find that excessive nitrogen fertilizer, sandy soils, and rapid plant growth during hot weather create conditions where plants can’t access enough calcium.
Root damage from tilling or nematodes often interferes with proper nutrient absorption, while high salt levels in your soil can block calcium uptake. Cold soil temperatures early in the growing season may slow down the movement of calcium through your plants.
Which Garden Vegetables Are Most Affected
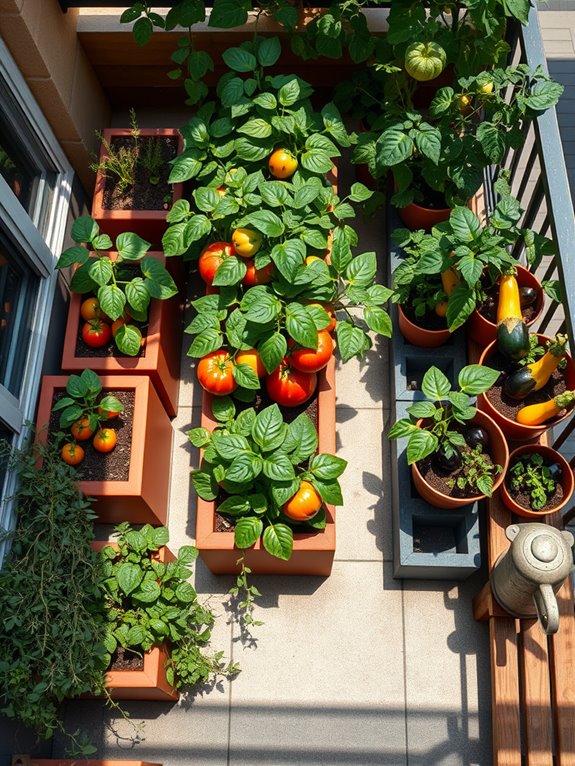
Several garden vegetables commonly suffer from calcium deficiency, with tomatoes facing the greatest risk of black, sunken spots on their fruits. You’ll also notice similar dark patches affecting peppers, eggplants, and squash, especially during periods of inconsistent watering or high humidity. These warm-season crops are particularly vulnerable when they’re setting and developing fruit.
While less common, you might spot calcium deficiency in your leafy greens like lettuce, cabbage, and celery. In these vegetables, the young leaves often curl inward and develop brown spots along their edges. Your Brussels sprouts and cauliflower can show symptoms too, with their growing tips turning brown and their overall growth becoming stunted. The good news is that you can prevent these issues in most vegetables through proper soil amendment and consistent watering practices.
Prevention and Treatment Methods
To prevent black spots from ruining your tomatoes, you’ll need to implement a combination of soil testing, proper amendments, and consistent watering practices. Start by testing your soil’s pH level and calcium content, then add limestone or gypsum if needed. You’ll want to maintain even moisture by mulching with clean straw or shredded leaves around your plants.
Make sure you’re watering deeply and regularly, especially during fruit formation. If you notice early signs of blossom end rot, remove affected fruits and spray remaining ones with a calcium solution. Consider installing a drip irrigation system or using self-watering containers to maintain steady moisture levels. You can also strengthen your plants by adding crushed eggshells to the soil before planting and using calcium-rich fertilizers throughout the growing season.
Best Soil Management Practices
Since healthy tomatoes depend on rich, well-structured soil, proper soil management forms the foundation of your growing success. You’ll need to maintain consistent soil moisture, add organic matter, and test your soil’s pH regularly to keep it between 6.0 and 6.8.
Mix in composted manure, leaf mold, or well-aged compost to improve your soil’s structure and water retention. You can also add crushed eggshells, calcium supplements, or gypsum to boost calcium levels. When you’re preparing your garden bed, work these amendments into the top 8-12 inches of soil using a garden fork or tiller. During the growing season, apply a 2-3 inch layer of organic mulch around your plants to regulate soil moisture and temperature. Remember to rotate your tomato plants yearly to prevent nutrient depletion and reduce disease risks.
Watering Techniques to Avoid the Problem
Building on proper soil management, correct watering techniques play a key role in preventing black spots on your tomatoes. You’ll want to establish a consistent watering schedule that keeps the soil evenly moist but never waterlogged. Water deeply at the base of your plants early in the morning, allowing moisture to penetrate 6-8 inches into the soil.
Don’t let your soil cycle between bone-dry and soaking wet conditions, as this irregular watering pattern stresses the plants and reduces calcium uptake. Install a 2-3 inch layer of organic mulch around your tomatoes to help retain moisture and maintain steady soil conditions. During hot spells, you might need to water daily, while cooler periods may only require watering every 2-3 days. A drip irrigation system can help you deliver water consistently and efficiently.
Natural and Chemical Solutions
While many gardeners immediately reach for harsh chemicals, several natural remedies can effectively combat black spots on your tomatoes. You’ll find that crushed eggshells, bone meal, or garden lime work well to boost calcium levels in your soil. Simply spread these amendments around the base of your plants and water them in thoroughly.
If you prefer a chemical solution, you can apply calcium chloride or calcium nitrate directly to your plants. Mix one tablespoon of either supplement with a gallon of water, then spray the solution on your tomato leaves weekly. You’ll also find calcium-rich foliar sprays at your local garden center that are specifically formulated for preventing blossom end rot. Remember to follow the product’s instructions carefully and avoid over-applying any chemical treatments.
Frequently Asked Questions
Can Blossom End Rot Spread From One Tomato Plant to Another?
You’ll be relieved to know that blossom end rot spreads like molasses in winter – which means it doesn’t spread at all! It’s not a disease but a calcium deficiency that affects individual plants independently.
Are Tomatoes With Blossom End Rot Safe to Eat?
You can safely eat tomatoes affected by blossom end rot if you cut away the dark, leathery bottom portion. The rest of the fruit is perfectly fine, though it’s best to harvest affected tomatoes early.
Does Blossom End Rot Occur in Hydroponic Tomato Growing Systems?
Yes, you’ll find that blossom end rot can occur in hydroponic systems. If you don’t maintain proper calcium levels and pH balance in your nutrient solution, your hydroponic tomatoes will develop this condition.
How Quickly Can Blossom End Rot Develop on a Tomato?
One day your tomato looks perfect, the next it’s showing dark spots. You’ll notice blossom end rot developing within 24-48 hours as small water-soaked areas that quickly expand into black, leathery patches.
Will Pruning Affected Tomatoes Help Prevent Future Blossom End Rot?
While you should remove affected tomatoes to prevent waste, pruning won’t stop future blossom end rot. Instead, you’ll need to address the calcium deficiency through proper watering and soil amendments to prevent new cases.