
10 Garden Sight Line Techniques That Draw the Eye
When you’re designing your garden, you’ll discover that sight lines are like invisible threads that pull visitors through your outdoor space. By mastering a few key techniques, you can transform a basic backyard into an engaging journey that unfolds with each step. From elegant archways that frame secret gardens to winding paths that reveal hidden treasures, these proven methods will help you create magnetic views that captivate guests and keep them wondering what’s around the next corner.
Contents
- 1 Frame Views With Architectural Elements
- 2 Create Linear Pathways and Allées
- 3 Install Focal Point Features
- 4 Layer Plants by Height
- 5 Use Symmetrical Plantings
- 6 Incorporate Curved Sight Lines
- 7 Design With Vanishing Points
- 8 Position Strategic Garden Structures
- 9 Establish Repeating Elements
- 10 Implement Color Progression
Frame Views With Architectural Elements
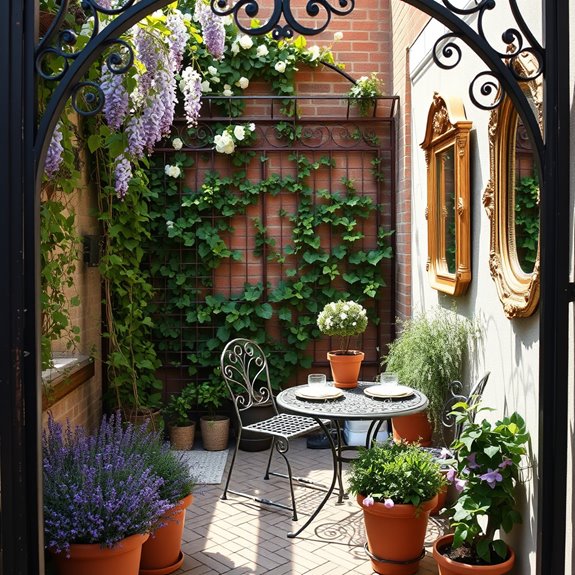
Architectural elements can transform an ordinary garden view into a captivating masterpiece, creating living portraits within carefully crafted frames. Stone archways draped with climbing roses, elegant pergolas wrapped in wisteria, and thoughtfully positioned columns work together to direct the eye toward spectacular focal points. These structural elements partner with plants to create deliberate viewing windows that celebrate both the immediate garden space and distant landscapes.
The sensory journey through framed garden views unfolds like a carefully choreographed dance. Each archway or portal reveals a new scene, building anticipation as visitors move through the space. The experience changes throughout the day as sunlight shifts, casting dramatic shadows and highlighting different aspects of the composed views. Morning light might stream through a rose-covered arbor, while evening sun creates a golden halo around a distant gazebo framed by classical pillars.
Strategic placement of decorative elements enhances these framed vistas. Antique mirrors positioned to reflect garden scenes can double the impact of carefully composed views, while ornamental gates or trellises add layers of visual interest. Weather-resistant artwork, sculpture, or architectural salvage pieces can serve as focal points within these framed spaces, adding personality and historical context to the garden’s story.
Creating this effect in your own garden starts with identifying natural sight lines and potential focal points. Begin with a single strong frame element, such as an arbor or pair of columns, positioned to highlight your garden’s best feature.
Layer plants of varying heights around the frame, being mindful of seasonal changes. Even small gardens can employ this technique using scaled-down elements like container-mounted trellises or decorative screens to create intimate framed views that make the space feel larger and more intentional.
Create Linear Pathways and Allées
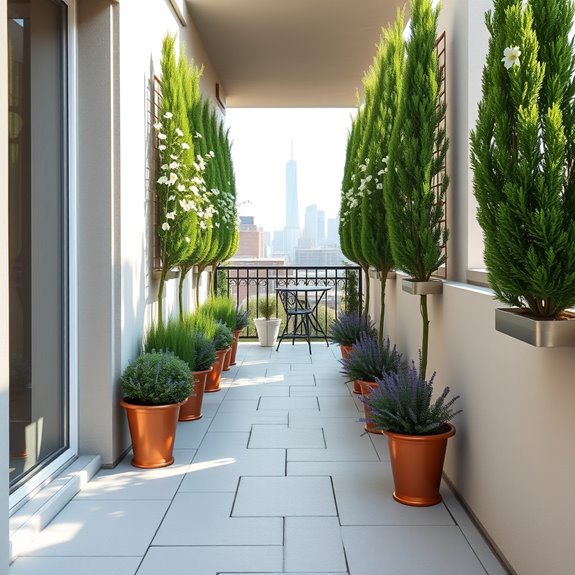
Linear Pathways and Allées create a captivating sense of journey and grandeur in any garden space. These straight, intentional walkways flanked by perfectly matched pairs of trees, shrubs, or flowering plants draw the eye forward while creating an enchanting tunnel effect. Classical elements like pleached lime trees, boxwood hedges, or elegantly trained hornbeams stand as living walls, while the ground might feature crisp gravel paths or neat paving stones lined with lavender or lamb’s ear.
The sensory experience of walking through a well-designed allée engages all the senses. The crunching of gravel underfoot, the gentle rustle of leaves overhead, and the subtle fragrance of bordering plants like Russian sage or climbing roses create an immersive garden moment. The changing light throughout the day casts intricate shadows across the path, while the linear design provides a sense of peace and order.
Practical considerations for linear pathways include ensuring proper spacing for mature plant growth and maintaining clear sight lines. The path width should accommodate comfortable walking space – typically 4-6 feet for primary walkways. Drainage must be considered when installing hard surfaces, and regular pruning is essential to maintain the crisp, formal appearance characteristic of allées.
When personalizing a linear garden design, consider incorporating focal points like sculptures, fountains, or distinctive plant specimens at pathway ends to create destination points. Mix formal elements with informal plantings to soften edges, or use contemporary materials like steel edging and LED lighting to modernize the traditional concept.
Creating this classic garden feature can be scaled to any space. Start with a clear path definition using simple materials like gravel or pavers, then frame it with matching pairs of container plants or small upright shrubs.
Even in modest gardens, maintaining proportion and symmetry while choosing appropriately sized plants will achieve the desired effect of an elegant, guided journey through your outdoor space.
Install Focal Point Features
A well-placed focal point transforms an ordinary garden into a captivating destination, drawing the eye through the landscape with purpose and intention.
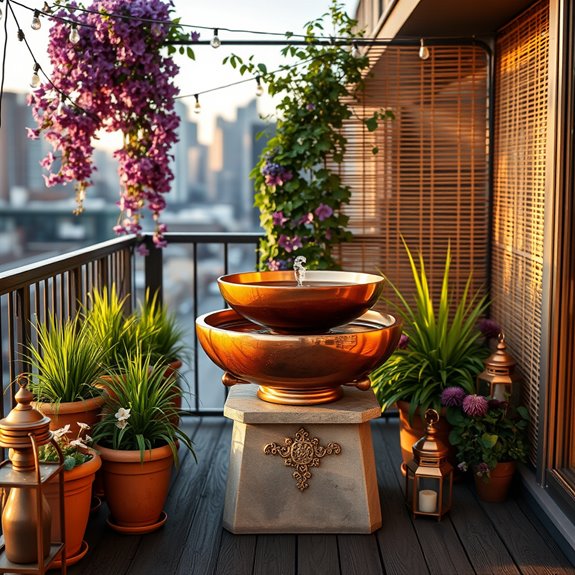
Strategic placement of striking elements like a sculptural Japanese maple, a weathered stone fountain, or a beautifully crafted arbor covered in climbing roses creates visual anchors that guide visitors through the space. These attention-grabbing features serve as natural resting points for the eye, allowing the garden’s story to unfold organically.
The sensory experience of a thoughtfully designed focal point engages visitors on multiple levels. The gentle splash of water from a tiered fountain provides a soothing soundtrack while attracting birds and butterflies.
Fragrant climbing jasmine or wisteria draped over an architectural element adds layers of scent that enhance the visual drama. These multisensory elements create memorable moments that encourage people to pause and fully appreciate the garden’s beauty.
When selecting decorative focal elements, consider pieces that reflect your garden’s overall style while making a bold statement.
A modern sculpture in polished metal can energize a contemporary landscape, while antique garden gates or weathered obelisks add romantic charm to traditional settings. Lighting these features dramatically extends their impact into evening hours, creating magical nighttime views and expanding the garden’s usable hours.
Creating your own focal points doesn’t require an expansive space or extensive budget.
Start with a single striking element positioned at the end of a path or visible from primary viewing areas. Layer supporting plants around it to enhance its presence, using repetition of color or texture to lead the eye.
Even small gardens can accommodate carefully chosen focal points that transform the space from ordinary to extraordinary.
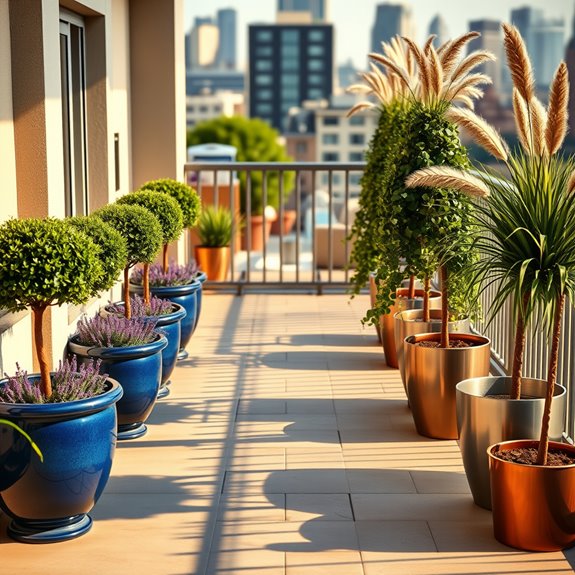
Layer Plants by Height
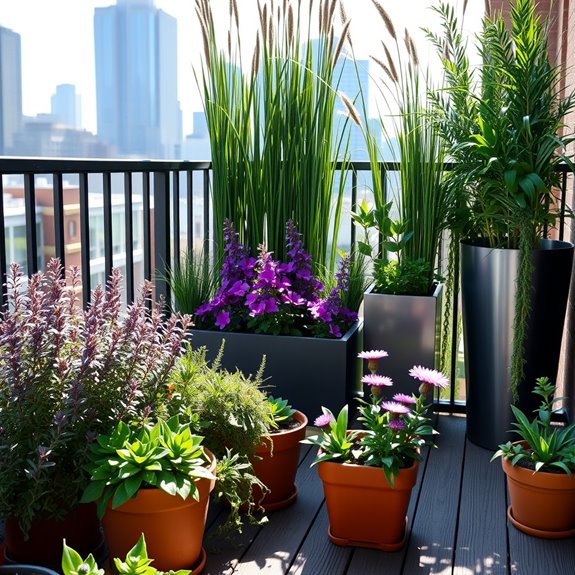
A well-layered garden creates a mesmerizing visual journey, drawing the eye from low-growing sedums and creeping thyme at ground level through mid-height flowering perennials like salvias and coneflowers, up to statuesque ornamental grasses and climbing vines. This natural stadium arrangement ensures every plant gets its moment to shine while creating depth and intrigue in even the smallest spaces. The careful placement of varying heights transforms a flat garden into a living tapestry of textures and colors.
The sensory experience of a layered garden is truly immersive. As you move through the space, different plants reveal themselves at varying eye levels – perhaps brushing past the soft, fuzzy leaves of lamb’s ear at knee height, while butterfly bush branches gently sway at shoulder level. The multi-tiered arrangement creates natural corridors of movement and discovery, making even a modest garden feel like an exciting expedition.
When planning a layered garden, consider the practical aspects of plant maintenance and growth patterns. Place taller plants where they won’t overshadow smaller specimens, typically at the back of borders or in the center of island beds.
Account for mature plant sizes and seasonal changes, ensuring adequate spacing between layers. Installing proper irrigation systems becomes crucial, as reaching plants in back rows requires thoughtful planning.
Creating your own layered garden is achievable in any space. Start with three basic height zones: ground covers and low-growing plants (under 12 inches), medium-height plants (1-3 feet), and tall architectural specimens (3+ feet).
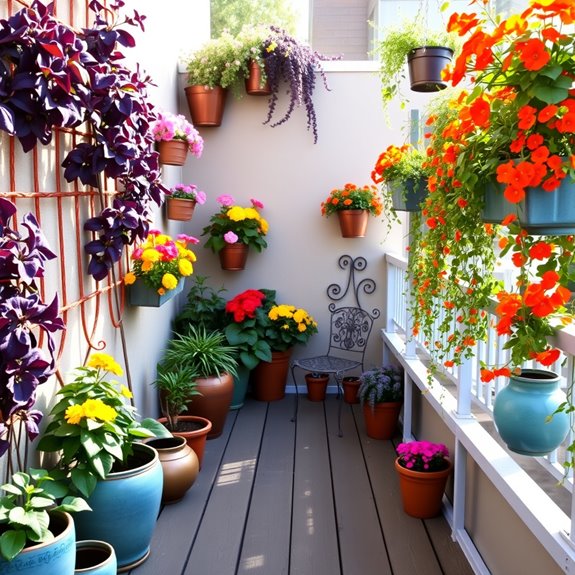
Work with these proportions according to your available space, maintaining the ratio of roughly 30% low, 40% medium, and 30% tall plants. Even a small balcony can accommodate this principle using containers of varying heights to achieve the same dramatic effect.
Use Symmetrical Plantings
Symmetrical plantings create an elegant, formal atmosphere that brings classical garden design to any outdoor space. Like mirror images facing each other, matching boxwood topiaries, identical flowering urns, or pairs of ornamental grasses frame pathways and focal points with sophisticated precision. This balanced approach draws the eye naturally through the garden while creating a sense of order and intentional design that feels both grand and peaceful.
The experience of walking through symmetrically planted spaces taps into our innate appreciation for balance and harmony. As you move along the central axis, the matching plantings on either side create a sense of embrace and enclosure, making even modest gardens feel more expansive and purposeful. The repetition of forms provides a soothing rhythm that helps quiet a busy mind.
When planning symmetrical plantings, consider practical factors like mature plant sizes, maintenance requirements, and seasonal changes. Choose specimens that naturally maintain similar growth habits, or be prepared to regularly trim and shape them to preserve the mirrored effect. Using identical containers helps maintain visual consistency even if plants grow at slightly different rates.
Creating this classic look is achievable in any space by starting with a clear center line and working outward with matching pairs. Begin with two identical containers flanking an entrance or pathway. Add matching plants in graduated heights, keeping taller specimens toward the back.
Even tiny gardens can embrace symmetry through miniature topiary pairs or matching herb planters. The key is consistency in plant selection, container style, and careful placement to maintain that satisfying sense of balance.
Incorporate Curved Sight Lines
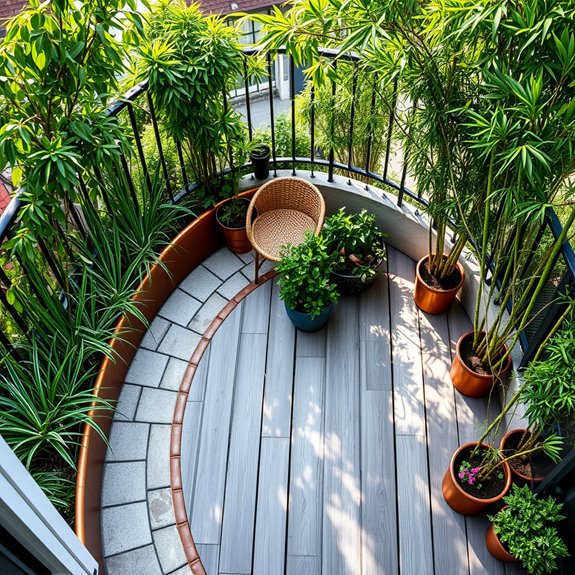
Graceful, winding pathways and strategically placed elements create an enchanting journey through your garden space. Rather than revealing everything at once, curved sight lines draw the eye along meandering routes, building anticipation and intrigue. Flowing borders of ornamental grasses like Fountain Grass and Japanese Forest Grass create natural curves, while taller architectural plants like Bamboo and flowering shrubs strategically placed along bends provide partial screening that invites exploration.
The sensory experience of following curved garden paths engages both body and mind. Each turn reveals new perspectives and hidden focal points, creating a sense of discovery and wonder. The gentle flow of movement feels natural and calming, mimicking the organic curves found in nature. The changing angles also create interesting shadows and light patterns throughout the day, adding another layer of visual interest.
Practical implementation of curved sight lines requires thoughtful planning. Start by mapping out primary viewing angles and determining key focal points. Use flexible garden hoses or rope laid on the ground to experiment with different curve patterns before making permanent changes. Consider sight lines from both standing and seated positions, and ensure curves are gentle enough for comfortable navigation while maintaining visual flow.
Beginning gardeners can incorporate curved elements by starting small. Create a simple curved border using low-growing plants or decorative edging. Position container gardens in gentle arcs rather than straight lines.
Even in compact spaces, strategic placement of just a few elements can establish flowing sight lines that make the space feel larger and more dynamic. Remember that subtle curves often work better than dramatic sweeps in smaller gardens.
Design With Vanishing Points
Masterfully arranged garden elements that draw the eye toward a distant focal point create an enchanting sense of depth and intrigue. Strategic placement of tall ornamental grasses, climbing vines, and vertical structures frames natural sight lines, making even modest spaces feel expansive and purposeful.
Japanese forest grass, climbing hydrangeas, and carefully positioned bamboo create layers of green that seem to recede into the distance, while architectural elements like arbors or trellises reinforce this captivating visual journey.
The sensory experience unfolds as one moves through the space, with each step revealing new perspectives and hidden details. The rustling of ornamental grasses and the gentle sway of climbing plants create a dynamic environment that changes with every breeze.
Strategic lighting placement enhances these sight lines after dark, illuminating key focal points and creating mysterious shadows that extend the vanishing point effect.
Practical implementation requires careful attention to plant heights and growth patterns. Position the tallest elements at the terminus of your sight line, with gradually decreasing heights as plantings move toward the viewer.
Container gardens can be elevated using stands or tiered platforms to maintain these calculated sight lines, while proper maintenance ensures plants don’t outgrow their designated roles in the visual narrative.
To create your own vanishing point garden, start by identifying your space’s natural sight lines and selecting a compelling focal point. Work with at least three layers of plantings, positioning the most dramatic elements at the furthest point.
Use containers of decreasing size as they approach the viewer, and incorporate mirrors or architectural elements to enhance the illusion of depth. Even the smallest gardens can achieve this effect through thoughtful scaling and precise placement of each element.
Position Strategic Garden Structures
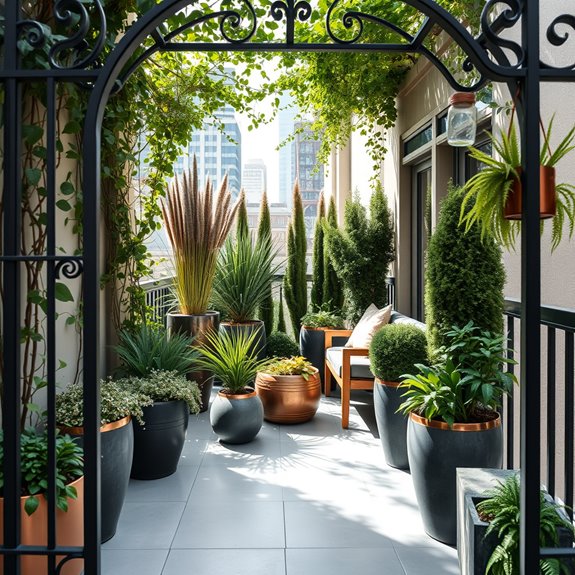
Strategic placement of garden structures creates captivating visual pathways that guide the eye through your outdoor space like chapters in a story. Elegant pergolas draped with climbing roses, well-positioned arbors festooned with wisteria, and carefully placed obelisks supporting clematis vines work together to frame views and create intriguing sight lines.
These architectural elements add vertical interest while establishing distinct garden rooms that reveal themselves gradually as one moves through the space. The sensory journey through strategically positioned structures engages all the senses. The gentle rustle of ornamental grasses beneath an archway, the soft fragrance of jasmine wafting from a pergola overhead, and the cool shade cast by vine-covered structures create an immersive garden experience that unfolds with each step.
Practical considerations for structure placement are crucial for success. Position larger elements like pergolas and gazebos where they’ll provide shade during peak sun hours while framing desirable views.
Consider sight lines from key viewing points – windows, seating areas, and entrances – to ensure structures enhance rather than obstruct important vistas. Weather-resistant materials and proper anchoring are essential for long-term durability.
To create your own structured sight lines, start small with one or two key pieces that frame a favorite garden view or destination. Even in modest spaces, a simple arch or trellis can establish an effective sight line.
Focus on creating layers of interest by combining structures with complementary plants at varying heights. Remember that negative space is as important as the structures themselves – leave room for the eye to rest and views to develop naturally.
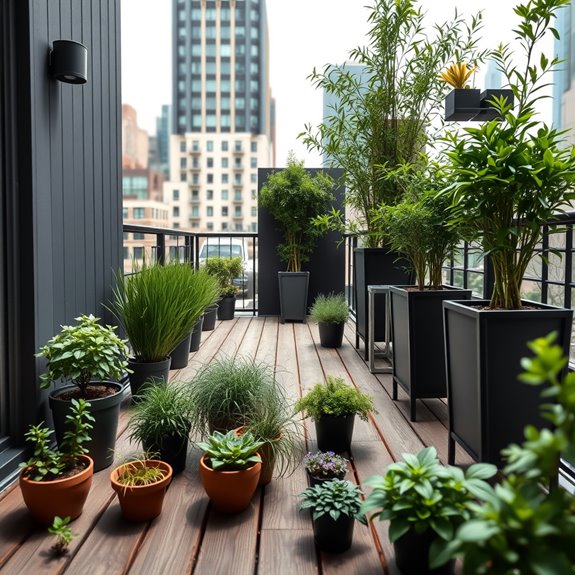
Establish Repeating Elements

Repeating elements create a mesmerizing rhythm throughout your garden space, drawing the eye naturally from one point to the next in a harmonious dance. Whether through a series of identical terra cotta planters lined along a pathway, clusters of ornamental grasses swaying in unison, or a succession of climbing roses training up evenly-spaced trellises, these thoughtful repetitions establish a sense of order and intentional design that transforms any garden into a cohesive masterpiece.
The sensory experience of repeated elements offers a deeply satisfying psychological comfort. As you move through the space, the predictable pattern of lavender clusters releases their calming scent at regular intervals, while the repeated sound of ornamental grasses rustling in the breeze creates a natural symphony.
This measured repetition helps slow your pace and encourages mindful observation of each carefully planned detail.
When selecting decorative elements to repeat, consider both natural and architectural features. Matching lanterns placed at consistent intervals can create magical evening ambiance, while identical stone planters or garden sculptures act as anchoring points throughout the landscape.
Even simple repeated elements like painted stakes or coordinated plant markers can contribute to the overall design harmony.
Creating this organized yet natural look in your own space starts with selecting two or three key elements to repeat. Begin with odd numbers – groups of three or five create the most pleasing visual impact.
Space these elements at regular intervals, adjusting the scale to suit your garden size. Remember that repetition doesn’t mean monotony; vary the heights, depths, or surrounding plantings while keeping your repeated elements consistent to maintain both rhythm and interest in your garden design.
Implement Color Progression
A thoughtfully designed color progression transforms a garden into a mesmerizing journey for the eyes. Starting with cool purples and blues from delphiniums and salvias, the palette flows seamlessly through pink roses and coral penstemons into vibrant yellows of black-eyed susans and finally blazing oranges of lantana. This carefully orchestrated color walk creates depth, drawing visitors through the space while making the garden appear larger and more dynamic.
The sensory experience extends beyond visual delight as varying flower heights create rhythmic movement in the breeze. Tall verbena spikes dance above medium-height coneflowers, while ground-hugging portulaca forms a living carpet. This layered approach ensures the color progression remains visible from multiple angles and creates an immersive experience that changes with each step.
Strategic placement of decorative elements enhances the color flow, with copper planters echoing orange blooms and blue glazed containers complementing cool-toned flowers. Garden art pieces, like metallic wind spinners or painted trellises, can serve as color bridges between planting zones, helping to blend one shade gracefully into the next.
Creating your own color progression garden is achievable in any space. Start by sketching your viewing angles and dividing the area into color zones. Choose plants that bloom in successive colors, considering their heights and bloom times.
Even in small gardens, miniature versions of flowering plants can create the same flowing effect. Remember that foliage colors can contribute to the progression, allowing you to maintain visual interest even when flowers aren’t in bloom.