
10 Garden Ideas Using Decorative Stones
You’ll be amazed at how decorative stones can transform an ordinary garden into a stunning outdoor sanctuary. Whether you’re looking to create peaceful Zen spaces, elegant pathways, or eye-catching water features, stones offer endless possibilities for your landscape design. From smooth river rocks and rustic cobblestones to striking granite boulders and colorful pebbles, these natural elements bring texture, contrast, and year-round visual interest. Let’s explore ten creative ways to incorporate these versatile materials into your garden design.
Contents
- 1 Create a Zen-Inspired Rock Garden
- 2 Design Elegant Stone Pathways
- 3 Build a Stunning Water Feature
- 4 Frame Garden Beds With Stone Borders
- 5 Craft a Mediterranean Gravel Garden
- 6 Install a Decorative Stone Wall
- 7 Layer Different Stone Types for Visual Impact
- 8 Transform Dead Spaces With Rock Mulch
- 9 Incorporate Stone Steps and Terraces
- 10 Accent Your Garden With Stone Sculptures
Create a Zen-Inspired Rock Garden
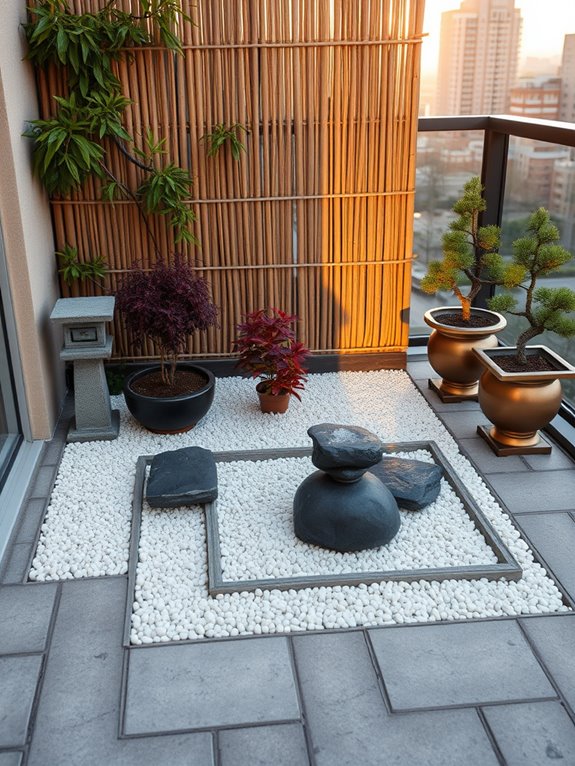
A Zen-inspired rock garden transforms any outdoor space into a serene sanctuary where carefully placed stones create a powerful sense of harmony and contemplation.
Large, weather-worn boulders anchor the design, while smaller stones and gravel form rippling patterns that mimic the gentle flow of water. Traditional elements like bamboo, Japanese maples, and moss patches add natural texture and color, working together to establish a minimalist yet deeply meaningful landscape.
The garden’s beauty lies in its thoughtful simplicity, where each element serves a purpose in creating mental tranquility. Strategic placement of upright stones against a backdrop of raked gravel suggests mountains rising from misty valleys, while carefully pruned evergreen shrubs provide year-round structure.
Small stone lanterns cast gentle shadows at dusk, and the sound of water trickling over rocks adds an auditory dimension to the meditative atmosphere.
Essential Elements:
- Large feature stones or boulders
- Fine gravel or crushed stone
- Bamboo fencing or screens
- Stone lanterns
- Japanese maple or similar specimen trees
- Moss patches
- Raking tools
- Evergreen shrubs
- Small water feature
- Natural stepping stones
Begin implementation by clearing and leveling the chosen area, then installing proper drainage beneath a layer of landscape fabric.
Position the largest stones first, following the principle of asymmetrical balance, and ensure they’re buried one-third deep for stability. Create zones using bamboo screens or fencing, then add layers of gravel that can be raked into traditional patterns.
Position specimen plants sparingly, focusing on quality over quantity, and integrate the water feature where it creates natural flow through the space.
Design adaptations can accommodate any space, from sprawling gardens to intimate balconies. For smaller areas, use container-grown bamboo and dwarf Japanese maples, with a tabletop water feature and miniature stone arrangements.
Consider vertical elements like bamboo screens for privacy, and use different sizes of gravel to create depth perception in limited spaces.
Weather-resistant synthetic materials can replace traditional elements where weight restrictions apply, while maintaining the authentic aesthetic of a Zen garden.
Design Elegant Stone Pathways
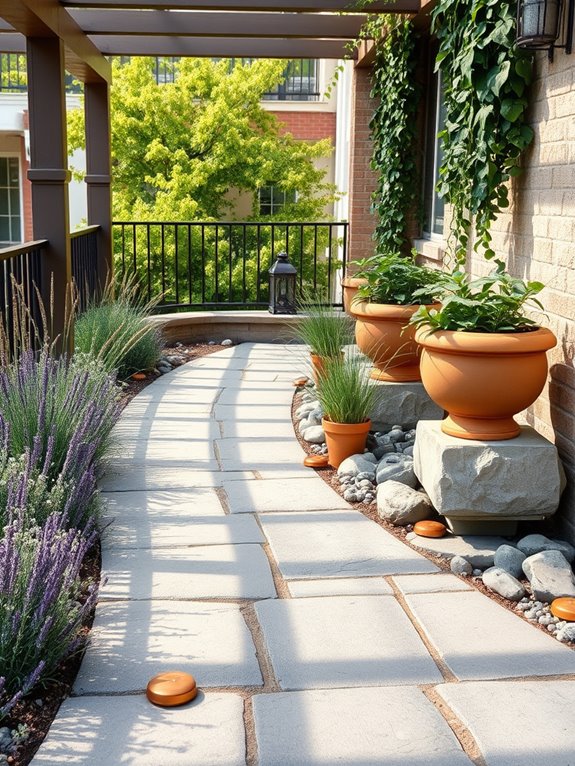
Transform your garden into an enchanting journey with elegant stone pathways that wind through carefully curated landscapes. Natural stone paths, whether crafted from slate, limestone, or river rock, create graceful lines that guide visitors through your outdoor sanctuary.
The interplay of smooth, polished stones alongside rugged, textured pieces creates a sophisticated yet organic feel, while carefully positioned pathway lights cast ethereal shadows across the stone surfaces at dusk.
Flowering perennials like lavender and creeping thyme soften the pathway edges, their delicate blooms spilling onto the stones in a romantic cascade. Ornamental grasses sway gently in the breeze, providing movement and texture, while strategic placement of decorative elements like vintage lanterns or artistic sculptures create focal points along the journey. The overall effect is one of timeless elegance, merging natural beauty with thoughtful design.
Key Elements:
- Natural stone pavers or stepping stones
- Edge stones or border materials
- Pathway lighting fixtures
- Ground cover plants
- Ornamental grasses
- Flowering perennials
- Decorative accents
- Landscape fabric
- Gravel or sand for base
- Soil amendments
- Mulch
Begin implementation by mapping your pathway’s route, considering natural flow and focal points. Prepare the ground by removing existing vegetation and creating a level surface, then lay landscape fabric to prevent weed growth.
Install a proper base of compacted gravel or sand before laying your chosen stones. Maintain consistent spacing between stones and ensure they’re level with the ground surface. Edge the pathway with complementary materials and install lighting fixtures before adding plants.
For successful maintenance and longevity, ensure proper drainage by slightly grading the path away from structures and maintaining gaps between stones. Select plants that won’t overwhelm the pathway and consider their mature size when placing them. Regular weeding between stones and occasional power washing will keep the path looking pristine.
During installation, use polymeric sand between stones to prevent shifting and weed growth.
Design adaptations can accommodate various spaces and styles: Consider using smaller stones or creating narrower paths for compact gardens, opt for lighter-colored stones to brighten shaded areas, and select varying stone sizes to create visual interest.
In sloped areas, incorporate steps or terracing for safety and stability. For modern spaces, choose clean-lined geometric stones, while irregular shapes work better in cottage-style gardens. Always ensure your stone choice complements your home’s architectural style and existing landscape elements.
Build a Stunning Water Feature

Transform your garden into a serene oasis with a stunning water feature that combines the gentle music of flowing water with strategically placed decorative stones.
Picture a mesmerizing cascade of water tumbling over polished river rocks, creating a focal point that draws the eye while providing a peaceful soundtrack to your outdoor sanctuary.
Surrounding the feature, arrange moisture-loving plants like Japanese iris, hostas, and ornamental grasses that sway gracefully in the breeze, their leaves catching droplets of water that sparkle in the sunlight.
The combination of moving water and carefully selected stones creates a natural harmony that evokes the feeling of a mountain stream or woodland spring.
Large, flat stones can serve as informal seating areas, while smaller, rounded pebbles create natural-looking transitions between different areas of the garden.
The sound of water masks urban noise, while the interplay of light on the water’s surface adds a dynamic element that changes throughout the day.
Key Elements:
- Submersible water pump
- Waterproof basin or pond liner
- Selection of decorative stones (various sizes)
- LED underwater lights
- Moisture-loving plants
- Filter system
- Flexible tubing
- Electrical outlet (GFCI protected)
- Construction materials (concrete, mortar, or pre-formed basin)
- Water treatment supplies
Begin installation by selecting the perfect location, considering both visibility and access to electricity.
Excavate the area to accommodate your basin or liner, ensuring proper depth and stable ground beneath.
Install the basin according to manufacturer specifications, positioning the pump and running electrical lines before adding larger stones.
Layer rocks strategically to create natural-looking water flow patterns, using smaller stones to hide tubing and edges.
Test water flow and adjust stone placement to achieve desired effects, then add plants around the feature’s perimeter to soften edges and create a cohesive look.
When designing your water feature, consider scale carefully – smaller spaces might benefit from a simple bubbling fountain, while larger areas can accommodate more elaborate multi-tiered designs.
For balcony gardens, self-contained tabletop fountains provide the same sensory benefits in a compact format.
Ensure proper maintenance by regularly checking water levels, cleaning filters, and treating water to prevent algae growth.
In winter, either drain the system or install a small heater to prevent freezing damage in colder climates.
Frame Garden Beds With Stone Borders
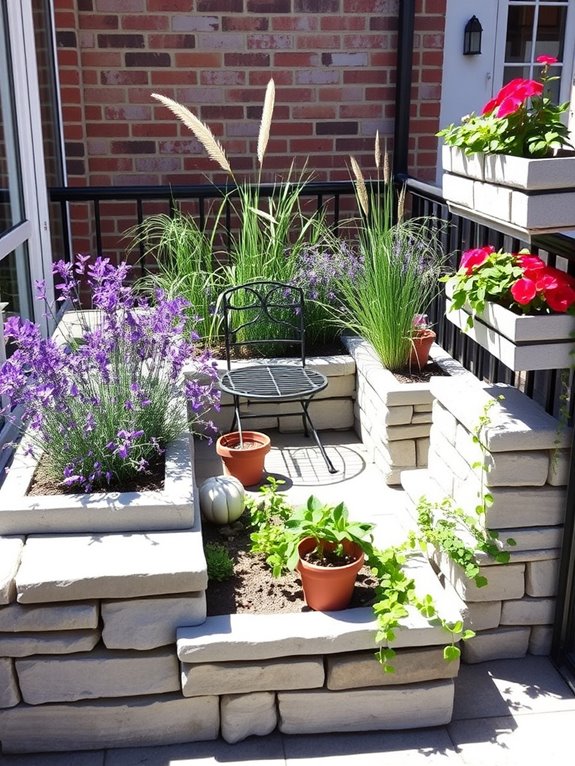
Stone-bordered garden beds create an elegant, defined landscape that draws the eye while establishing clear boundaries between different planting zones. The natural variations in stone colors – from soft grays to warm browns and speckled granites – provide a stunning contrast against vibrant flowers and lush greenery.
Flowering plants like lavender, creeping phlox, and sedum cascade gently over the stone edges, softening the linear borders while maintaining the bed’s structural integrity. These framed garden spaces evoke the timeless charm of English cottage gardens while offering modern architectural appeal.
The raised stone borders not only add visual interest but also create micro-climates for different plant varieties, allowing for creative mixing of heights and textures. Ornamental grasses sway gracefully behind compact perennials, while climbing roses can be trained along decorative trellises, all contained within the protective stone embrace.
Key Elements:
- Natural stone blocks or pavers
- Landscape fabric
- Gravel or crushed stone for drainage
- Selection of perennial plants
- Annual flowers for color
- Ornamental grasses
- Garden soil and compost
- Metal or wooden garden edging
- Ground cover plants
- Mulch
To implement stone borders, begin by marking the bed’s outline and excavating a trench 6 inches deep and twice the width of your stones. Layer landscape fabric in the trench, add 2 inches of gravel for drainage, and position your stones, ensuring they’re level and stable.
Backfill both sides with soil, leaving the top third of stones exposed for visual impact. For curved borders, use smaller stones or flexible edging materials beneath the stone facade.
When maintaining stone-bordered beds, regular weeding between stones is essential, along with seasonal checks for frost heave or settling. Apply mulch annually, keeping it slightly below the stone level to maintain the border’s clean lines.
For stability in regions with freeze-thaw cycles, consider mortaring the stones together or using a dry-stack technique with slightly angled stones that lock together naturally.
Design variations can accommodate any space – use smaller stones or concrete alternatives for compact gardens, or create tiered effects for sloped areas. For balcony gardens, lightweight manufactured stone veneer can achieve the same aesthetic without structural concerns.
Consider incorporating built-in seating or water features into larger stone borders, and plan for adequate lighting to highlight the stone work after dark. Remember to include access points for maintenance and ensure proper drainage to prevent water pooling against the stone.
Craft a Mediterranean Gravel Garden
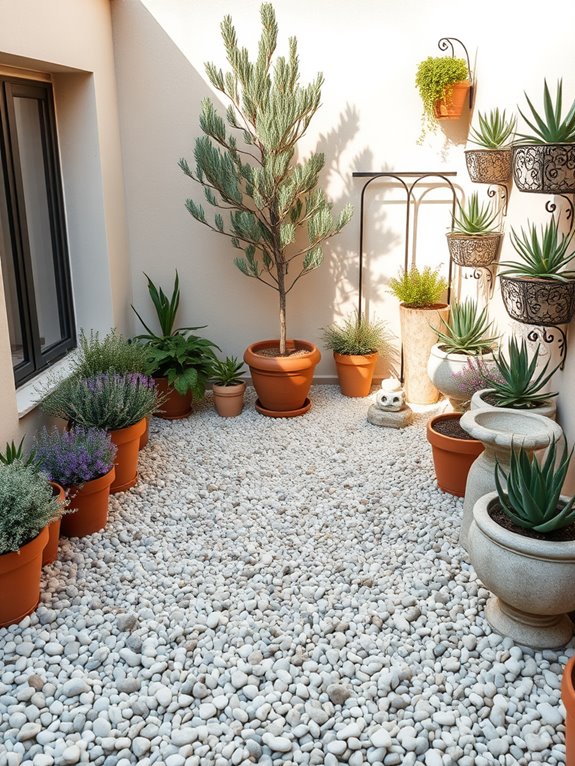
Transport yourself to the sun-drenched coastlines of Greece and Italy with a Mediterranean gravel garden that combines drought-resistant plants with light-colored stones and architectural elements. Silvery olive trees cast dancing shadows across pale gravel paths while fragrant lavender and rosemary release their intoxicating scents in the warm breeze.
Terra cotta pots and weathered stone features create focal points throughout the space, evoking the timeless charm of Mediterranean courtyards. This garden style celebrates the interplay of textures, from the smooth surfaces of worn pebbles to the feathery foliage of ornamental grasses and the spiky forms of agaves and euphorbias.
The careful arrangement of decorative stones in varying sizes creates natural-looking pathways that meander between planting beds, while strategically placed boulders serve as both sculptural elements and seating areas.
Key Elements:
- Light-colored gravel (limestone or marble chips)
- Mediterranean plants (lavender, rosemary, olive trees, cypresses)
- Terra cotta containers
- Stone or concrete urns
- Drought-resistant ornamental grasses
- Architectural plants (agaves, yuccas)
- Natural stone features or fountains
- Mediterranean herbs
- Weathered garden ornaments
- Pale-colored paving stones
Implementation begins with establishing proper drainage by creating a base layer of larger stones covered with landscape fabric. Layer gravel 2-3 inches deep over this foundation, ensuring paths are clearly defined with stone edging.
Group plants with similar water requirements together, placing larger specimens like olive trees or cypresses as anchor points. Create plant clusters in odd numbers, and maintain adequate spacing to allow for mature growth.
When designing your Mediterranean gravel garden, consider the intensity of sunlight and prevailing winds in your space. For smaller areas or balconies, focus on container plantings using drought-resistant specimens and miniature varieties of traditional Mediterranean plants.
Replace large stones with smaller pebbles, and use vertical elements like wall-mounted planters or slim cypresses to maximize space while maintaining the authentic Mediterranean atmosphere.
Install a Decorative Stone Wall
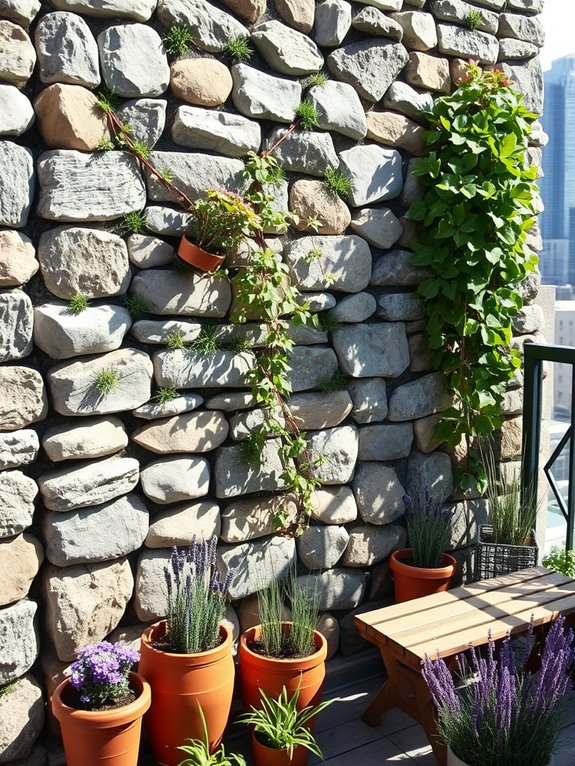
A decorative stone wall transforms an ordinary garden into a stunning architectural masterpiece, creating dramatic vertical interest and timeless appeal. Natural stone walls, whether freestanding or retaining, add structure and definition while providing the perfect backdrop for cascading vines like Virginia creeper, English ivy, or climbing hydrangeas.
The varied textures and earthy tones of stacked stones create an organic tapestry that complements both formal and informal garden designs. The wall becomes a living canvas as plants emerge from carefully placed crevices – think hardy sempervivums, sedums, and small ferns nestled between stones.
At the wall’s base, drought-tolerant perennials like lavender, sage, and ornamental grasses create a softening effect while maintaining the Mediterranean or cottage garden aesthetic. Solar-powered uplighting can dramatically highlight the wall’s texture after sunset, casting enchanting shadows across your garden space.
Key Elements:
- Natural stone materials (limestone, slate, or fieldstone)
- Proper drainage system
- Foundation material
- Mortar or dry-stack technique
- Climbing plant supports
- Crevice plants
- Border plants
- Landscape lighting
- Soil mix for plantings
- Irrigation system
Building a decorative stone wall requires careful planning and proper foundation preparation. Start by excavating a trench at least 6 inches below frost line, filling it with compacted gravel for drainage.
Layer your chosen stones carefully, ensuring each piece is stable and level, whether using mortar or dry-stack technique. For planted walls, incorporate pocket spaces for soil during construction and install irrigation lines before completing the structure. Position larger stones at the base, gradually decreasing size toward the top for stability.
Important considerations include local building codes, proper drainage behind retaining walls, and weight distribution. For smaller spaces or balconies, consider creating a scaled-down version using veneer stones or building a partial wall as a focal point.
Ensure your structure receives adequate sunlight for chosen plants, and select species appropriate for your hardiness zone. Container gardens can be positioned along the wall’s base to create depth and additional planting opportunities in limited spaces.
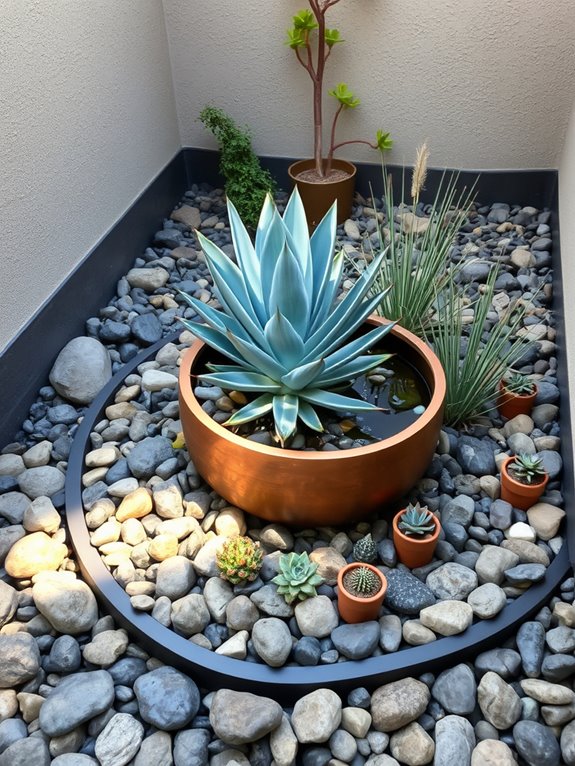
Layer Different Stone Types for Visual Impact
Layering different stone types creates a captivating visual symphony in the garden, where smooth river rocks transition into angular slate pieces, then blend with decorative pebbles in varying sizes and hues. This natural gradient effect draws the eye through the landscape, creating depth and interest while complementing surrounding greenery like cascading creeping thyme, compact sedums, and architectural succulents that peek through the stone arrangements.
The interplay of textures becomes particularly striking when morning dew catches the light, highlighting the distinct characteristics of each stone layer – from polished black Mexican beach pebbles to rustic limestone chunks and delicate white marble chips. These stone combinations form natural-looking paths and focal points, especially when accented with carefully placed ornamental grasses, dwarf conifers, and spring-blooming bulbs that emerge through the rocky terrain.
Key Elements:
- Large foundation stones (6-12 inches)
- Medium decorative rocks (3-6 inches)
- Small polished pebbles (1-2 inches)
- Fine gravel or stone chips
- Landscape fabric
- Edge restraints
- Drought-tolerant plants
- Solar-powered accent lighting
- Drainage materials
To implement this layered stone design, begin by preparing the site with proper drainage and laying high-quality landscape fabric to prevent weed growth. Start with the largest stones as anchor pieces, creating natural-looking groupings that establish the basic flow of the design.
Work progressively smaller, filling spaces between larger stones with medium-sized rocks, then introduce smaller pebbles and gravel to create smooth transitions between different stone types and sizes.
The key to successful maintenance lies in secure edging that keeps distinct stone layers from mixing while allowing for natural-looking transitions. Regular cleaning with a leaf blower helps remove debris, and occasional repositioning of stones maintains crisp layer separation. Adding plants requires careful consideration of root spaces and proper soil pockets within the stone design.
When adapting this style to different spaces, consider the visual weight of stone layers in proportion to the area – smaller spaces benefit from using fewer, more carefully chosen stone types and smaller size gradients. For balcony gardens, create miniature versions using shallow containers with distinct stone layers as top dressing, or design small rock gardens in tiered planters that showcase the layered effect vertically rather than horizontally.
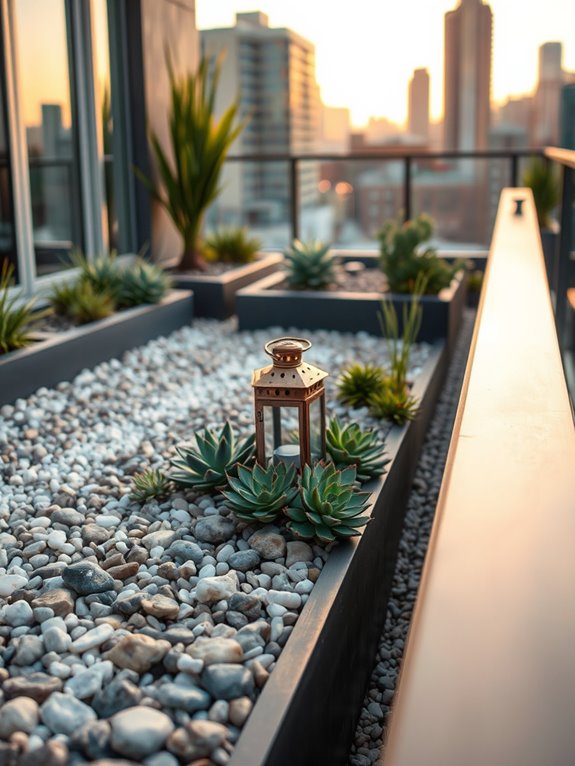
Transform Dead Spaces With Rock Mulch
Turn those challenging dead spaces into stunning focal points with rock mulch landscaping that brings life and texture to formerly unused areas. Picture a harmonious blend of smooth river rocks in varying sizes, interspersed with drought-resistant ornamental grasses that sway gracefully in the breeze.
Desert-adapted plants like blue fescue, red yucca, and compact agave create dramatic silhouettes against the stone backdrop, while carefully placed accent boulders serve as natural sculpture pieces.
The transformation continues with strategically positioned low-voltage lighting that casts enchanting shadows across the rock mulch after sunset, creating an entirely different atmosphere at night. Small water features can be incorporated to add gentle sounds and movement, while hardy succulents in copper-toned containers provide bursts of color throughout the seasons.
This low-maintenance solution turns previously neglected corners into sophisticated, year-round displays.
Key Elements:
- Various sizes of decorative rock (pea gravel, river rock, crushed stone)
- Weed barrier fabric
- Drought-resistant plants
- Accent boulders
- Garden edging
- Landscape lighting
- Container plants
- Decorative containers
- Small water feature (optional)
- Metal or stone sculptures (optional)
Begin the transformation by clearing the space completely and establishing proper drainage. Install high-quality weed barrier fabric, securing it firmly at the edges and overlapping seams to prevent weed growth.
Create defined borders using metal or stone edging, then layer different sizes of rock mulch, starting with larger stones along the edges and transitioning to smaller grades toward the center. Position accent boulders first, followed by installing plants in strategic groupings, ensuring proper spacing for mature growth.
The key to successful rock mulch gardens lies in proper preparation and thoughtful plant selection. Choose plants with similar water requirements and group them accordingly. Consider incorporating a drip irrigation system beneath the rock mulch to maintain consistent moisture levels for plants while minimizing water waste.
Regular maintenance involves occasional raking to redistribute stones and removing any debris that collects between rocks.
For smaller spaces or balcony adaptations, focus on creating miniature versions using lightweight containers filled with succulent arrangements and decorative rock mulch.
Use varying heights of containers and different rock colors to create visual interest in limited space. Consider vertical elements like wall-mounted planters or tall, narrow containers to maximize space usage, and select smaller varieties of architectural plants that won’t overwhelm the area.
Remember that lighter-colored rocks reflect more heat, so in confined spaces, opt for darker stones to reduce temperature fluctuations.
Incorporate Stone Steps and Terraces

Transform your garden into a captivating multi-level paradise with strategically placed stone steps and terraces that create an enchanting journey through your outdoor space. Natural stone steps, whether slate, limestone, or granite, weave through lush greenery, while terraced levels showcase cascading plants like creeping thyme, sedums, and trailing lobelia.
The varying heights add visual interest and create distinct garden rooms, each offering its own unique perspective and purpose. The combination of rough-hewn stone steps and smooth terrace surfaces provides a perfect backdrop for ornamental grasses, hardy succulents, and architectural plants like Japanese maples or dwarf conifers.
Small fountains or water features can be incorporated between levels, creating peaceful sounds as water trickles down the stone surfaces. The terraced design naturally draws the eye upward, making even modest gardens appear larger and more dramatic.
Key Elements:
- Natural stone slabs or pre-cast concrete steps
- Retaining walls for terraces
- Ground cover plants
- Trailing plants
- Accent lighting
- Drainage materials
- Soil stabilizers
- Hand railings (if needed)
- Landing areas
- Erosion control materials
Implementation begins with careful planning and grading of the terrain to ensure proper drainage and stability. Start by establishing the main terrace levels, using retaining walls built from matching stone or complementary materials.
Steps should be installed with consistent rise and run measurements, typically 6-7 inches high and 12-14 inches deep, allowing comfortable passage. Ensure each step is firmly set on a compacted base of gravel and sand, with slight forward tilt for water runoff.
Plant selection and placement are crucial for long-term success. Choose plants that can cascade over walls and steps without becoming invasive or requiring excessive maintenance. Install irrigation systems during construction to ensure proper water distribution across all levels.
Consider incorporating lighting along steps and terrace edges for safety and nighttime ambiance.
Design Tips: For smaller spaces or balconies, create mini-terraces using container gardens at different heights, or install stepped planters along walls. Use lightweight materials like composite stones for upper-story applications.
Consider local climate and exposure when selecting materials and plants, as some stones can become slippery in shady or humid conditions. Always factor in maintenance access when planning terrace width and step placement, ensuring you can easily reach all planted areas for care and upkeep.
Accent Your Garden With Stone Sculptures
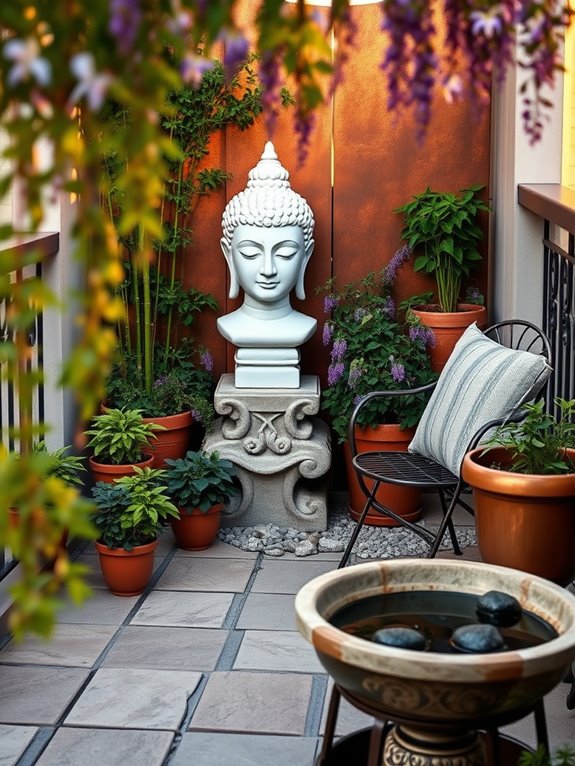
Transform your garden into a captivating outdoor gallery by incorporating stone sculptures among your flourishing plants and thoughtfully designed landscapes. Classical figures, modern abstract pieces, or nature-inspired sculptures create striking focal points that draw the eye and invite contemplation. These timeless art pieces stand proudly among flowering perennials like lavender, roses, and ornamental grasses, creating an enchanting interplay between the permanent and the ephemeral.
The combination of weathered stone against lush greenery evokes the feeling of discovering an ancient garden, where each sculpture tells its own story. Strategic placement of sculptures creates distinct garden rooms or meditation spaces, while smaller pieces can guide visitors along winding paths.
Consider mixing materials like polished marble, rough-hewn granite, or textured limestone to add depth and visual interest throughout the seasons.
Key Elements:
- Stone sculptures (varying sizes and styles)
- Base platforms or plinths
- Accent lighting
- Background plantings
- Pathways
- Mulch or gravel
- Complementary stones
- Supporting plant varieties
- Seating areas
Begin implementation by selecting a focal point for your primary sculpture, considering sight lines from both inside and outside your home. Create a solid foundation using compacted gravel or concrete pad, ensuring proper drainage.
Surround larger pieces with graduated plantings, starting with low-growing ground covers and working up to taller specimens that won’t overshadow the art. For smaller sculptures, create intimate vignettes using complementary plants and additional stone elements like rocks or pebbles.
When designing your sculpture garden, consider seasonal changes and lighting conditions. Choose sculptures that will cast interesting shadows and install outdoor lighting to create dramatic evening effects. Ensure proper maintenance by regularly cleaning sculptures, trimming surrounding plants, and maintaining proper drainage.
For winter protection, consider removable covers for delicate pieces or selecting weather-resistant materials suitable for your climate.
For smaller spaces or balconies, opt for wall-mounted sculptures or smaller free-standing pieces that can serve multiple purposes, such as becoming planters or water features. Scale your plant choices accordingly, using dwarf varieties and vertical growing options.
Consider mobile sculpture installations that can be rearranged seasonally, and incorporate mirrors to create the illusion of more space while reflecting your artistic elements throughout the area.