
9 Garden Ideas to Maximize Vertical Space
If you’re working with limited garden space, don’t let square footage hold you back from creating your dream outdoor oasis. You’ll find that vertical gardening opens up endless possibilities, transforming bare walls and unused corners into thriving green spaces filled with flowers, herbs, and vegetables. From sleek living wall systems to DIY pallet gardens, these nine innovative approaches will help you maximize every inch of vertical real estate while adding visual interest and practical growing areas to your outdoor space.
Contents
- 1 Living Wall Systems and Plant Panels
- 2 Vertical Trellis Gardens for Vining Vegetables
- 3 Hanging Garden Pockets and Pouches
- 4 Repurposed Pallet Herb Gardens
- 5 Multi-Tiered Window Box Displays
- 6 Stackable Container Tower Gardens
- 7 Columnar Fruit Trees and Space-Saving Espaliers
- 8 Vertical Hydroponic Growing Systems
- 9 Wall-Mounted Rain Gutter Planters
Living Wall Systems and Plant Panels
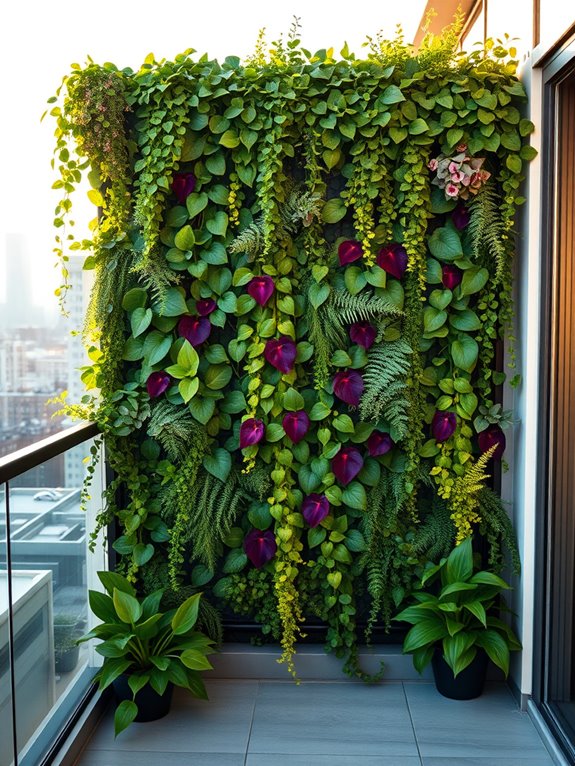
Transform any vertical surface into a lush, living tapestry with a professionally designed living wall system or plant panel arrangement. Imagine cascading ferns draping elegantly alongside vibrant philodendrons, while patches of flowering begonias and delicate moss create intricate patterns across the verdant canvas. The seamless integration of different textures and colors creates a mesmerizing display that turns ordinary walls into spectacular botanical showcases.
This modern approach to gardening combines aesthetic appeal with space-saving efficiency, turning blank walls into dynamic ecosystems. The carefully planned arrangement of plants creates depth and dimension, with shade-loving specimens thriving beneath taller, architectural varieties. Purple heart plants trail dramatically alongside silver-toned succulents, while peace lilies and pothos add varying shades of green, creating a natural art installation that changes with the seasons.
Essential Elements:
- Modular wall mounting system
- Irrigation system with timer
- Growing medium panels or pocket planters
- Waterproof backing material
- Plant selection for varied light conditions
- Drainage collection system
- Support brackets and frames
- Growth medium (specialized soil mix)
- Moisture meters
- Fertilizer injection system
Installation begins with securing a waterproof backing to protect the wall structure, followed by mounting the frame system according to manufacturer specifications. Install the irrigation system, ensuring even water distribution throughout all panels. Position growing medium panels or pockets in a pattern that allows for proper plant spacing and growth.
Start planting from the bottom up, placing larger specimens first and filling in with smaller plants, ensuring root systems are well-established in the growing medium. When designing your living wall, consider the weight capacity of your mounting surface and choose appropriate support systems. Layer plants according to their growth habits and water needs, grouping similar species together.
Regular maintenance includes monitoring irrigation systems, trimming overgrowth, and replacing any struggling plants. For optimal growth, install a fertilizer injection system into the irrigation line to provide consistent nutrients. For smaller spaces or balconies, consider using modular panels that can be added gradually or creating a partial living wall feature.
Choose compact varieties and focus on plants that naturally grow vertically. In areas with limited natural light, incorporate grow lights into the design or select shade-tolerant species. Always ensure proper ventilation around the living wall to prevent moisture-related issues, and install a maintenance pathway or access point for larger installations.
Vertical Trellis Gardens for Vining Vegetables
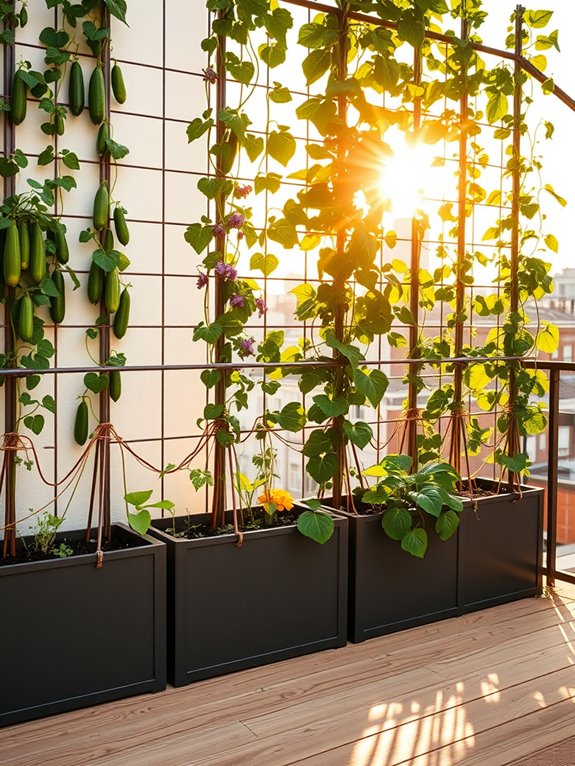
Transform your balcony or patio into a lush, living wall of climbing vegetables with a vertical trellis garden. Picture emerald cucumber vines weaving their way skyward, delicate pea tendrils reaching for the sun, and vibrant pole beans cascading down like a natural curtain. The interplay of textures creates a mesmerizing tapestry of greens, while the geometric patterns of the trellis framework add architectural interest to your outdoor space.
As your vining vegetables mature, they create an ever-changing display of seasonal beauty. Purple pole bean flowers attract beneficial pollinators, while yellow squash blossoms add splashes of sunshine to the vertical canvas. The gentle rustling of leaves in the breeze creates a peaceful atmosphere, and the satisfaction of harvesting fresh vegetables from your living wall brings both practical value and aesthetic pleasure to your outdoor sanctuary.
Essential Elements:
- Sturdy trellis system or metal grid panels
- High-quality potting soil
- Large containers or raised bed base
- Climbing vegetable seedlings
- Plant support clips or soft ties
- Drip irrigation system
- Garden twine
- Plant markers
- Hand tools
Installing a vertical trellis garden begins with securing your trellis system firmly to a wall or creating a freestanding structure. Position containers or build a raised bed at the base, filling with rich, well-draining potting soil. Space climbing vegetables according to their mature size, typically 8-12 inches apart.
Install a drip irrigation system before planting to ensure consistent moisture. Train young vines onto the trellis using soft plant ties, guiding them in the desired growing pattern. Regular maintenance involves weekly checks of support ties, pruning to maintain airflow, and harvesting vegetables at peak ripeness.
Remove any yellowed or diseased foliage promptly to maintain plant health and aesthetic appeal. Fertilize every two weeks during the growing season with a balanced organic fertilizer to support healthy growth and abundant harvests.
Design Tips and Adaptations: For smaller balconies, focus on compact varieties like determinate tomatoes or bush cucumbers, and consider using multiple levels of horizontal supports to maximize growing space. In windy locations, install wind breaks or choose sturdier trellis materials.
For year-round interest, integrate evergreen climbers among seasonal vegetables, and consider installing grow lights for darker locations or extending the growing season. Always check weight restrictions for balconies and ensure proper drainage to protect building structures.
Hanging Garden Pockets and Pouches
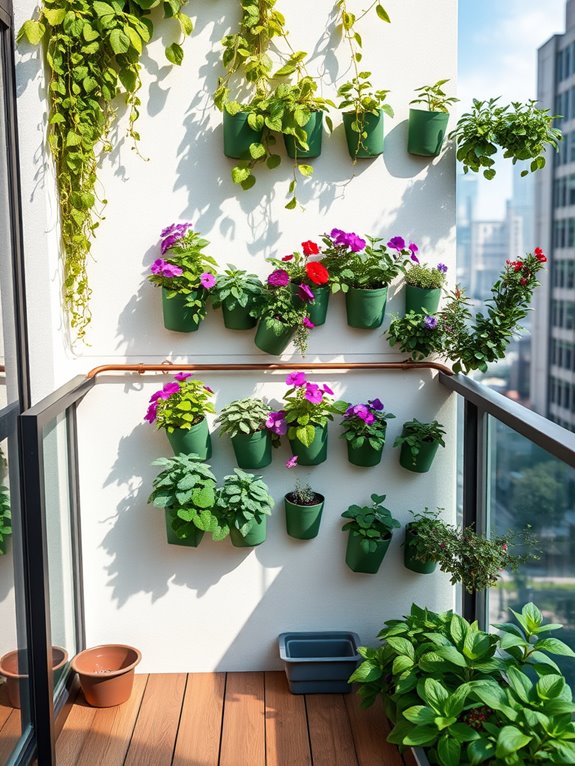
Transform your vertical space into a lush, cascading oasis with garden pockets and pouches that seem to float against walls and railings. Delicate trailing vines like String of Pearls and Golden Pothos spill from fabric pouches, while compact herbs and colorful annuals peek out from structured pockets, creating a living tapestry of greenery. The varied textures and depths create an enchanting dimensional effect, making even the smallest spaces feel like secret gardens.
The strategic placement of hanging pockets at different heights creates rhythm and movement, drawing the eye upward while maximizing growing space. Mix flowering plants like trailing petunias and lobelia with practical herbs such as thyme and mint, combining beauty with functionality. The result is an ever-changing display that brings nature’s vitality to urban spaces, turning blank walls into vibrant vertical landscapes.
Essential Elements:
- Fabric or plastic hanging pocket planters
- Heavy-duty mounting hardware
- Lightweight potting mix
- Drip irrigation system or self-watering pouches
- Plants suitable for vertical growing
- Moisture-resistant backing material
- Drainage collection system
- Support brackets or hanging rails
Install a moisture-resistant backing board first if mounting on sensitive surfaces, then secure heavy-duty brackets or rails that can support the weight of multiple planted pouches. Position irrigation lines before hanging the pockets, ensuring each level receives adequate water. Start planting from the bottom row up, using lightweight potting mix and incorporating slow-release fertilizer. Allow space between pockets for plant growth and air circulation.
Design Tips: Consider weight distribution and water flow when planning your layout. For small balconies, focus on one statement wall with 3-4 levels of pockets, while larger spaces can accommodate wrapping configurations. Choose drought-tolerant plants for higher positions where watering may be challenging. In windy locations, select low-profile pouches and secure plants with garden ties. For year-round interest, incorporate both evergreen and seasonal plants, and position scented varieties at nose level for an enhanced sensory experience.
Repurposed Pallet Herb Gardens
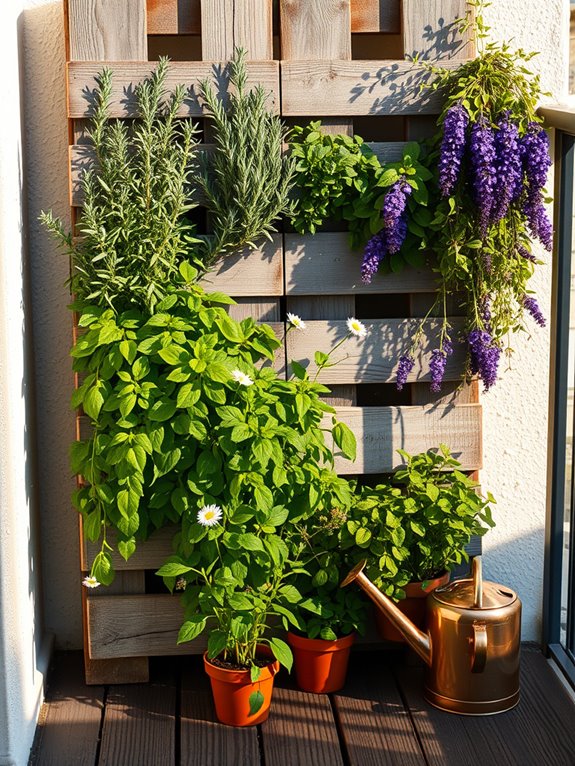
Transform your outdoor space into a rustic-chic oasis with a repurposed pallet herb garden that marries sustainability with style. Weather-worn wooden pallets, thoughtfully mounted on your wall or fence, create a striking vertical canvas where cascading herbs spill from between the slats. Fresh rosemary, thyme, and sage peek out from the weathered wood, while trailing oregano and creeping thyme add dynamic movement to the design. The natural grain of the wood provides an earthy backdrop that highlights the varied textures and shades of green.
The garden comes alive with layers of aromatic plants, creating an engaging sensory experience in even the smallest outdoor space. Purple and white flowering herbs like lavender and chamomile add delicate blooms throughout the growing season, while practical cooking herbs ensure your garden is as functional as it’s beautiful. The vertical arrangement makes harvesting easy and creates an ever-changing living wall that draws the eye upward, making your outdoor space feel larger and more dynamic.
Key Elements:
- Wooden pallet (food-grade, heat-treated)
- Landscape fabric
- Potting soil
- Herb plants (mix of culinary and ornamental)
- Mounting brackets and hardware
- Drainage materials
- Small gravel or stones
- Drip irrigation system (optional)
- Plant markers
- Wood sealant (food-safe)
The implementation begins with careful pallet selection and preparation. Sand the wood smooth and treat it with a food-safe sealant to protect against moisture. Line the back and bottom of each planting row with landscape fabric, creating pockets that will hold soil while allowing proper drainage.
Mount the pallet securely at a slight angle to ensure water flows toward the plants rather than pooling against the wall. Layer the bottom of each pocket with gravel before adding high-quality potting soil mixed with slow-release fertilizer.
Design Adaptations and Tips: Choose compact herb varieties for smaller spaces and ensure your wall or fence can support the weight of a fully planted pallet. For balconies, consider using multiple smaller pallets or half-pallets to create a modular system that can be adjusted seasonally.
Install a simple drip irrigation system for consistent watering, especially important for upper rows that tend to dry out faster. Position sun-loving herbs like basil and sage in upper rows, while shade-tolerant varieties like mint and parsley can thrive in lower sections.
Multi-Tiered Window Box Displays
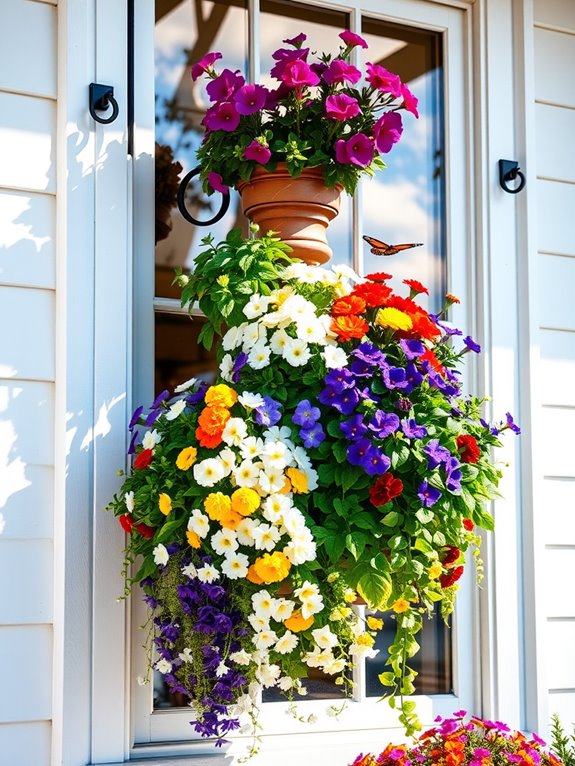
Transform your windows into cascading displays of color and life with multi-tiered window box displays that create a stunning vertical garden right outside your home. These layered arrangements combine trailing vines, upright blooms, and compact foliage plants to craft a living tapestry that changes with the seasons.
Picture delicate calibrachoa spilling over edges, while purple salvia stands tall in the center tier, complemented by compact herbs and petite marigolds that add pops of cheerful color throughout the arrangement.
The visual impact of these tiered displays creates an enchanting garden view from both inside and outside your home. Each level plays its part in the composition, with the top tier featuring sun-loving plants like geraniums and lavender, the middle showcasing compact flowering plants like pansies and verbena, and the bottom tier dedicated to cascading varieties such as ivy, bacopa, and trailing lobelia.
This arrangement provides depth and dimension while maximizing growing space in a limited area.
Essential Elements:
- Multi-tiered window box system (2-3 levels)
- Mounting brackets and hardware
- Quality potting soil with slow-release fertilizer
- Drought-resistant plants for top tier
- Medium-height flowering plants for middle
- Trailing plants for bottom tier
- Irrigation system or self-watering mechanisms
- Decorative elements (moss, stones, small garden stakes)
Install the tiered system by securing sturdy mounting brackets to your window frame or wall, ensuring each level can support the weight of soil, plants, and water.
Position boxes with proper spacing between tiers to allow plants to grow and cascade naturally. Begin planting with the largest specimens in the back of each tier, working forward with medium-sized plants, and finishing with trailing varieties at the edges.
Incorporate a mix of textures and heights within each level while maintaining a cohesive color scheme throughout the entire display.
When designing your multi-tiered window box display, consider your window’s sun exposure and adjust plant selection accordingly.
For north-facing windows, focus on shade-loving plants like coleus and impatiens. South-facing windows can support more sun-loving varieties. Ensure each tier has proper drainage holes and consider installing a drip irrigation system to maintain consistent moisture levels across all boxes.
For smaller windows, reduce the number of tiers or use narrower boxes while maintaining the same design principles.
Stackable Container Tower Gardens
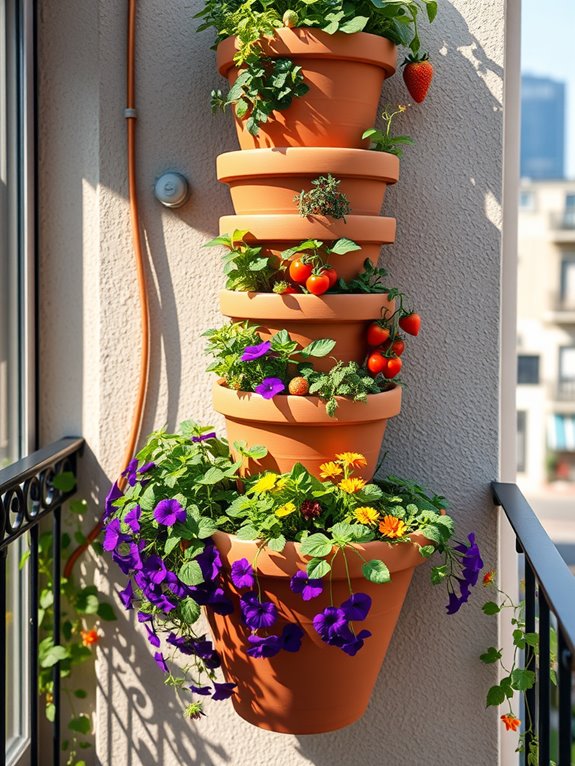
A stackable container tower garden transforms ordinary vertical space into a living tapestry of cascading greenery and blooms. Vibrant strawberries peek out between levels, while trailing herbs like thyme and oregano spill over edges, creating a lush, multi-tiered display. The graduated heights of stackable containers create visual interest, drawing the eye upward through layers of different textures and colors, from compact leafy lettuces to delicate flowering nasturtiums.
The beauty of a tower garden lies in its architectural presence, commanding attention while maximizing growing space in the most efficient way possible. Terra cotta pots in graduating sizes create a warm, Mediterranean feel, while modern plastic stackers in sleek grays or whites offer contemporary appeal. The vertical arrangement allows for creative plant combinations, with shade-loving plants thriving under the protective canopy of upper-level foliage.
Key Elements:
- Stackable container system or graduated pot sizes
- Quality potting soil
- Drainage materials (gravel, pottery shards)
- Drip irrigation system or self-watering mechanisms
- Various plants suitable for different light levels
- Support structure or sturdy base
- Plant markers
- Fertilizer appropriate for container gardens
Implementing a tower garden starts with selecting a location that receives adequate sunlight and can support the weight of multiple containers. Begin with the largest container at the base, ensuring proper drainage holes and a sturdy foundation. Layer containers progressively smaller as you build upward, rotating each level slightly to create optimal growing spaces and ensure even sun exposure.
Consider incorporating a central support pole or structure for added stability, especially in windy locations.
For maintenance, establish a consistent watering schedule, recognizing that upper levels may dry out more quickly than lower ones. Install a simple drip irrigation system that allows water to flow from top to bottom, ensuring all plants receive adequate moisture. Monitor soil moisture levels regularly, as container gardens typically require more frequent watering than traditional garden beds.
When designing your tower garden, consider your specific space constraints and light conditions. For smaller balconies, opt for compact tower systems with built-in irrigation. In larger spaces, create multiple towers of varying heights for dramatic effect.
Choose plants appropriate for your specific growing zone, and consider seasonal rotations to maintain year-round interest. Remember that container depth affects root development, so match plant selections to container sizes, placing shallow-rooted plants in upper levels and deeper-rooted varieties toward the base.
Columnar Fruit Trees and Space-Saving Espaliers

Transform your limited vertical space into a fruitful paradise with columnar fruit trees reaching skyward like living pillars, their branches hugging close to central stems while laden with apples, pears, or cherries.
These architectural beauties create natural walls of greenery that change with the seasons – from spring’s delicate blossoms to summer’s ripening fruit, followed by autumn’s golden foliage.
Espalier fruit trees add another dimension, their artfully trained branches spreading like natural latticework against walls or fences.
The combination of columnar and espalier trees creates a sophisticated, European-inspired garden atmosphere that maximizes productivity in minimal space.
Imagine walking through your garden corridor, reaching out to pluck fresh fruit from branches that have been carefully guided to grow in space-saving patterns.
The formal geometry of espaliered branches contrasts beautifully with the vertical simplicity of columnar trees, creating a living gallery of horticultural art.
Essential Elements:
- Columnar fruit trees (apple, pear, or cherry varieties)
- Support structures for espalier (wire systems, trellises)
- Wall anchors and tensioning hardware
- Pruning tools (sharp shears, loppers)
- Plant ties and training materials
- Well-draining containers or prepared soil beds
- Irrigation system or watering equipment
- Organic fertilizer
- Mulch materials
Start by selecting a location with 6-8 hours of daily sunlight and installing your support structure for espaliers along walls or fences.
Space columnar trees 2-3 feet apart in a row or strategic grouping, ensuring adequate soil depth of at least 2 feet.
For espaliers, attach horizontal wires to your support structure at 18-inch intervals, creating the framework for training branches.
Both types require regular pruning to maintain their forms – columnar trees need vertical shoot reduction, while espaliers require ongoing training and tying of branches to maintain their pattern.
When designing your vertical fruit garden, consider your climate zone and choose appropriate varieties.
For smaller spaces, focus on dwarf rootstocks and limit yourself to 2-3 trees.
Container gardeners should select extra-dwarf varieties and ensure pots are at least 20 inches deep.
Remember that fruit trees need pollinators, so either choose self-fertile varieties or plant compatible pairs.
Consider incorporating climbing plants or herbs between trees to maximize space usage while maintaining adequate air circulation.
Vertical Hydroponic Growing Systems

Modern elegance meets scientific innovation in a vertical hydroponic growing system, where crisp lines of cascading greenery create a living wall of nutritious abundance. Leafy lettuce varieties in vibrant greens and deep purples grow alongside compact herbs like basil, mint, and cilantro, their roots suspended in crystalline nutrient solution. The clean, minimalist design of white PVC pipes or sleek metal channels contrasts beautifully with the organic shapes of thriving plants, while gentle water sounds create a peaceful ambient atmosphere.
The system transforms any vertical space into a productive garden that appears to defy gravity. Strawberry plants dangle their fruit at eye level, while compact cherry tomatoes climb upward on strategic supports. LED grow lights can add a modern purple-pink glow to the setup, creating an otherworldly ambiance during evening hours while ensuring optimal growing conditions year-round. The overall effect is one of sophisticated urban farming that doubles as living art.
Key Elements:
- Vertical hydroponic tower or wall system
- Nutrient reservoir and pump
- Growing medium (clay pellets, rockwool, or coco coir)
- LED grow lights
- Timer and automation system
- Water-resistant backdrop or liner
- Mounting hardware and supports
- Nutrient solution and pH testing kit
- Plant containers or net pots
- Drainage collection system
Installing a vertical hydroponic system begins with securing a sturdy mounting system to your wall or free-standing frame. The main nutrient reservoir sits at the base, connecting to a pump that circulates water through the vertical growing channels.
Plants are positioned in individual ports or containers, their roots reaching into the nutrient solution that flows past them. A timer controls water flow cycles, while strategically placed LED lights provide supplemental lighting when needed.
The system requires regular monitoring of nutrient levels and pH, typically checking once per week. Clean lines and efficient spacing are achieved by arranging plants according to their mature size, with larger plants at the bottom and compact varieties toward the top. Maintenance includes periodic cleaning of pipes and filters, pruning plants, and refreshing the nutrient solution every 2-4 weeks.
For space adaptation, smaller balconies can utilize single-tower systems that occupy just two square feet of floor space, while larger areas can accommodate multiple towers or full wall systems.
Consider using a modular design that allows for future expansion, and ensure adequate access for maintenance. If dealing with limited natural light, incorporate adjustable grow lights that can be positioned optimally for each level of plants. In windy locations, add windbreaks or secure additional anchor points to prevent system movement.
Wall-Mounted Rain Gutter Planters
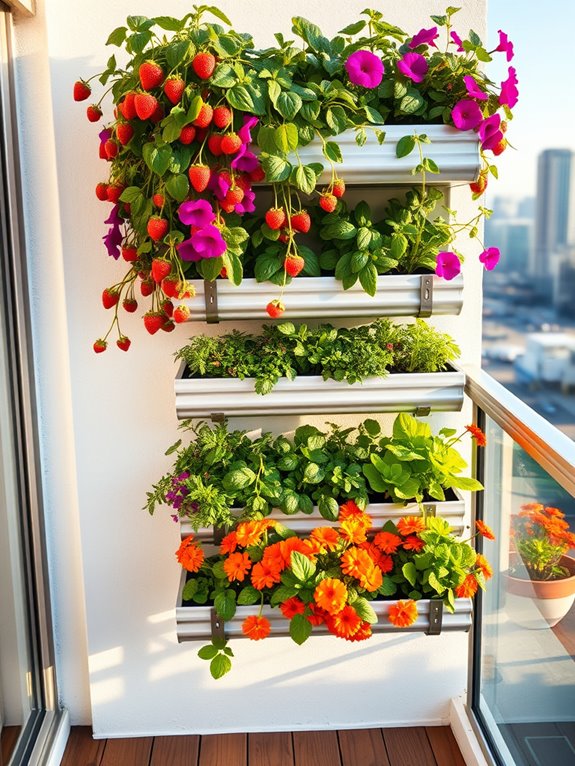
Transform your outdoor vertical space into a cascading garden oasis using repurposed rain gutters as innovative planters. These sleek, horizontal lines of greenery create a modern yet natural aesthetic, with trailing herbs spilling over edges and compact flowering plants adding bursts of color against your wall. The metallic sheen of aluminum gutters provides an industrial-chic contrast to the soft textures of strawberry vines, wave petunias, and aromatic creeping thyme.
The multi-tiered arrangement allows for creative plant combinations, with each level featuring different colors and textures. Picture vibrant lettuce varieties mixing with purple trailing lobelia, while compact marigolds and dwarf zinnias add bold splashes of orange and yellow.
The vertical design maximizes growing space while creating a living tapestry that changes with the seasons, bringing life to previously unused wall areas.
Key Elements:
- Vinyl or aluminum rain gutters
- End caps and mounting brackets
- Drill with bits for drainage holes
- Weather-resistant screws
- Potting soil designed for containers
- Selection of compact and trailing plants
- Irrigation system or watering can
- Level and measuring tape
- Wall anchors
- Gutter sealant
Begin installation by measuring your wall space and planning the gutter arrangement, ensuring each level has proper spacing for plant growth and maintenance access. Drill drainage holes every 12 inches along the bottom of the gutters, then seal all end caps and joints to prevent leakage.
Mount the brackets securely into wall studs or using appropriate anchors, maintaining a slight slope for proper drainage. Fill gutters with lightweight potting mix, leaving an inch of space at the top for watering, and plant your chosen varieties with trailing plants at the edges and upright specimens toward the center.
For optimal success, consider weight distribution, sun exposure, and water management when designing your rain gutter garden. Small spaces can utilize a single row of gutters, while larger walls can accommodate multiple tiers spaced 12-24 inches apart vertically.
Choose self-watering systems for higher installations, and group plants with similar water needs together. Weather-resistant varieties and perennials work best in exposed locations, while sheltered areas can support more delicate annuals and herbs.