
6 Garden Ideas for a Rustic Look
You’ll discover that creating a rustic garden doesn’t require expensive new materials or complicated designs. Instead, embrace the charm of weathered wood, antique metal pieces, and natural stone elements to craft an authentic country atmosphere. From repurposed barn wood planters to vintage farm equipment transformed into eye-catching focal points, these six ideas will show you how to blend practicality with timeworn beauty. Let’s explore how these elements can transform your outdoor space into a cozy, lived-in sanctuary.
Contents
Repurposed Wood Containers and Planters
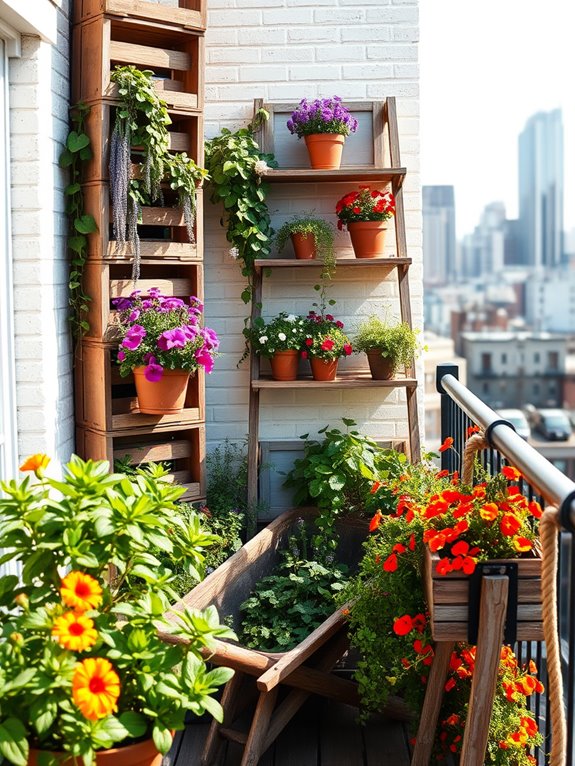
Transform your garden into a charming rustic retreat with repurposed wood containers and planters that tell stories of the past. Weathered wooden crates, vintage barrels, and reclaimed timber boxes create an authentic farmhouse aesthetic while housing vibrant cascading flowers and aromatic herbs. The natural patina of aged wood contrasts beautifully with lush greenery, creating a captivating interplay between the old and the new.
Picture trailing vines spilling over the edges of a repurposed ladder shelf, terra cotta pots nestled in weathered wooden boxes, and vintage wheelbarrows overflowing with bright petunias and geraniums. These authentic wooden vessels develop character over time, their graying surfaces and subtle imperfections adding depth and interest to your garden space while providing the perfect backdrop for both flowering plants and edible gardens.
Key Elements:
- Reclaimed wooden crates and boxes
- Old wooden barrels (halved or whole)
- Vintage wheelbarrows
- Wooden ladder shelves
- Salvaged timber planks
- Rustic wooden pallets
- Antique wooden buckets
- Weathered window boxes
- Natural rope or twine
- Galvanized hardware
Begin by sourcing wooden containers from salvage yards, flea markets, or online marketplaces, ensuring proper drainage by drilling holes in the bottom. Arrange larger pieces like barrels and wheelbarrows as focal points, then layer smaller containers at varying heights using wooden crates or ladder shelves.
Line containers with landscape fabric before adding high-quality potting soil, and select plants that complement the rustic aesthetic, such as herbs, wildflowers, and trailing vines. When designing your space, consider the weight-bearing capacity of balconies and ensure proper water drainage.
For smaller spaces, focus on vertical arrangements using wall-mounted wooden boxes or ladder shelves. Protect wooden containers from excessive moisture by elevating them slightly off the ground and applying a natural wood sealer to extend their lifespan.
Remember to position plants according to their sunlight requirements and maintain adequate spacing for proper air circulation between containers.
Vintage Farm Equipment as Garden Art
Transform your garden into a nostalgic countryside retreat by incorporating vintage farm equipment as artistic focal points. Weathered metal plows, antique wagon wheels, and rusty cultivators create an authentic farmhouse aesthetic while telling stories of agricultural heritage. These industrial artifacts contrast beautifully with soft, flowing ornamental grasses and climbing vines, creating a captivating interplay between hard and soft textures.
The charm of repurposed farm equipment lies in its ability to add height, structure, and visual interest to garden spaces. An old metal windmill becomes a towering sculpture, while vintage milk cans serve as unique planters filled with cascading petunias and geraniums. The natural patina of aged metal equipment provides warm copper, rust, and bronze tones that complement the surrounding greenery and flowering plants.
Key Elements:
- Vintage farm implements (plows, wheels, cultivators)
- Antique metal containers or machinery parts
- Climbing plants and vines
- Ornamental grasses
- Rustic wooden supports
- Gravel or mulch pathways
- Weather-resistant sealants
- Period-appropriate plants
- Accent lighting
When implementing vintage farm equipment as garden art, start by selecting pieces that are structurally sound and safe for outdoor display. Clean the equipment thoroughly and apply a weather-resistant sealant to prevent further deterioration. Position larger pieces like plows or wagon wheels as anchor points in the garden, then arrange smaller items in clusters to create visual interest.
Install proper support systems for heavier pieces and ensure they’re stable in various weather conditions.
Extra Tips: Consider scale when selecting vintage equipment – smaller gardens or balconies can utilize compact pieces like hand tools or milk cans as artistic elements. For apartment dwellers, wall-mounted vintage tools or small machinery parts can create vertical interest without consuming floor space.
Ensure all pieces are properly secured, especially in windy conditions, and regularly inspect for stability. Choose equipment that complements your existing garden style and regional agricultural history for an authentic look.
Natural Stone Pathways and Borders

Natural stone pathways and borders transform an ordinary garden into a timeless sanctuary that seems carved from the wilderness itself. Weathered flagstones, irregular slate pieces, and rounded river rocks create meandering paths that guide visitors through the landscape, while rugged boulder borders frame garden beds with primitive elegance.
Native grasses and creeping thyme peek between the stones, softening their edges and creating a seamless blend between hardscape and nature. The pathways wind past weathered wooden benches and copper lanterns, their surfaces collecting patches of moss that add character and age. Natural stone borders rise and fall like ancient walls, providing perfect niches for alpine plants and trailing succulents.
The overall effect is one of stumbling upon a secret garden that has existed for centuries, where every stone tells a story and each step reveals new botanical treasures.
Key Elements:
- Flagstones or slate pieces
- River rocks of varying sizes
- Border boulders
- Creeping groundcover plants
- Native grasses
- Alpine plants
- Moss patches
- Copper or iron accessories
- Wooden elements
- Gravel or pea stone for path base
Creating natural stone pathways begins with establishing a solid foundation. Excavate the path area to a depth of 6 inches, add landscape fabric to prevent weed growth, and create a 4-inch base layer of compacted gravel.
Arrange larger stones first, maintaining consistent gaps of 1-2 inches, then fill spaces with smaller stones or groundcover plants. For borders, start with the largest boulders as anchor points, working inward with progressively smaller stones while maintaining natural-looking groupings.
Design success depends on proper stone selection and placement. Choose stones with complementary colors and textures, mixing sizes for visual interest. Ensure pathway stones are flat enough for safe walking and set them slightly above ground level for proper drainage.
Border stones should be buried approximately one-third of their height for stability.
Adaptation Tips: Smaller spaces can utilize mini versions of stone pathways using stepping stones and pebble borders. Apartment balconies can incorporate container gardens with stone borders or create the illusion of a pathway using different-sized pavers.
Consider vertical stone elements like small rock gardens or water features to maximize limited space. Weather-resistant synthetic stones offer a lighter alternative for upper-floor installations where weight restrictions apply.
Weathered Metal Trellises and Gates
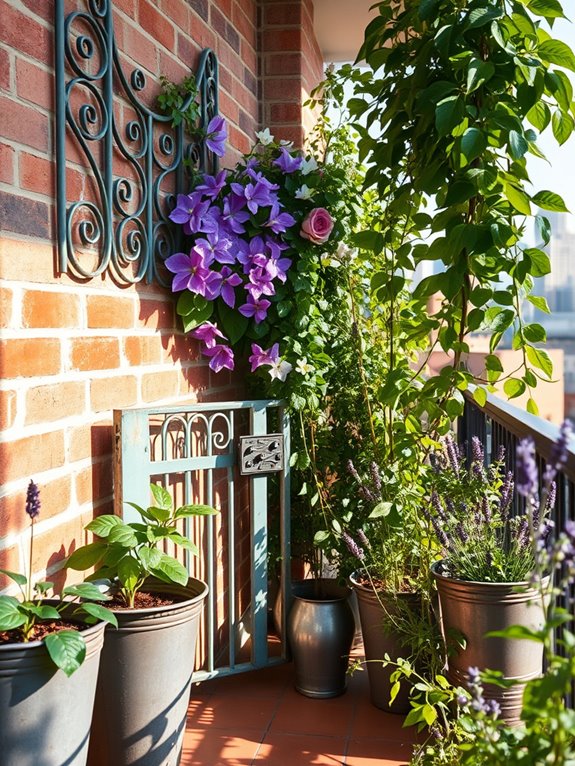
Weathered metal trellises and gates transform an ordinary garden into a nostalgic countryside retreat, where rusted ironwork creates striking silhouettes against climbing roses and twining vines. The natural patina of aged metal elements adds character and depth, while their sturdy frames provide essential support for flowering clematis, morning glories, and fragrant jasmine.
These architectural pieces become living sculptures as plants weave through their intricate patterns, creating a perfect balance between structure and wild beauty. The combination of weathered metal with lush greenery evokes memories of secret gardens and forgotten estates, where time has softened harsh edges into romantic focal points.
Copper trellises that have developed a soft green verdigris complement the surrounding foliage, while iron gates with flaking paint reveal layers of history beneath. These elements create inviting entryways and vertical interest points that draw the eye upward, making even modest spaces feel grand and established.
Key Elements:
- Vintage metal gates
- Wrought iron trellises
- Copper or steel garden arches
- Climbing roses and vines
- Metal obelisks
- Weathered fence panels
- Antique hardware
- Support stakes and ties
- Plant-friendly metal coatings
- Rust-resistant fasteners
Position larger metal structures like gates and arches as primary focal points, anchoring them securely in concrete footings to ensure stability. Install trellises against walls or as freestanding dividers, spacing them appropriately to allow for plant growth while maintaining accessibility for maintenance.
Consider the mature size of climbing plants when placing metal supports, allowing at least 6 inches between the structure and any walls to promote air circulation and prevent moisture damage. Treatment of metal elements is crucial for longevity while maintaining the desired aged appearance.
Apply clear sealants to arrest further deterioration while preserving the weathered patina. For new metal pieces, accelerate the aging process naturally using vinegar solutions or commercial aging products, but avoid harsh chemicals that might harm plants. Ensure all metal elements are properly grounded to prevent lightning damage and check annually for structural integrity.
When designing with weathered metal elements, consider scale carefully – smaller spaces benefit from delicate, vintage-style trellises that create depth without overwhelming the area, while larger gardens can accommodate substantial gates and archways.
For balcony gardens, use wall-mounted folding trellises or lightweight aluminum pieces artificially aged to achieve the rustic look without excess weight. Position metal elements to catch morning or evening light, creating dramatic shadows that add another dimension to the garden’s appeal throughout the day.
Reclaimed Barn Wood Garden Structures
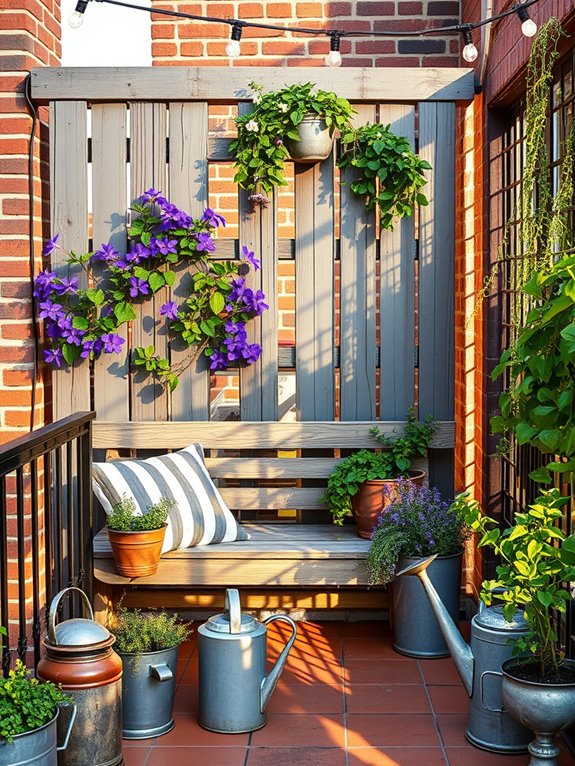
Weathered barn wood structures stand as rustic sentinels in the garden, their silvery-gray patina creating a timeless backdrop for climbing roses and twining clematis. These reclaimed pieces tell stories of agricultural heritage while serving as dramatic focal points, whether fashioned into pergolas, arbors, or simple plant stands.
The natural aging of the wood complements cottage garden favorites like foxgloves, hollyhocks, and trailing nasturtiums, creating an authentic farmhouse aesthetic that feels both established and evolving. The interplay between rough-hewn beams and delicate greenery creates a captivating contrast that draws the eye and soothes the soul.
Barn wood structures provide perfect support for climbing hydrangeas and wisteria, while their sturdy presence anchors garden rooms and defines pathways. These architectural elements cast ever-changing shadows throughout the day, adding depth and movement to the garden space while providing essential vertical interest.
Key Elements:
- Reclaimed barn wood beams and posts
- Vintage hardware (hinges, brackets, nails)
- Climbing plants and vines
- Gravel or stone pathways
- Solar-powered accent lighting
- Vintage garden tools as decoration
- Weather-resistant sealants
- Complementary rustic containers
- Natural stone or brick elements
When implementing barn wood structures, begin by selecting pieces that have been properly cleaned and treated for outdoor use. Position larger structures like pergolas to maximize natural light patterns and create intentional shade areas.
Ensure all vertical supports are properly anchored at least 2-3 feet deep in concrete footings. Connect beams using traditional joinery methods or contemporary hidden fasteners, maintaining authentic appearance while ensuring structural integrity. Layer plantings around the base of structures, starting with larger shrubs and graduating to smaller perennials and ground covers.
Design adaptations can accommodate various space constraints and style preferences. For small gardens or balconies, consider using barn wood for wall-mounted trellises, container surrounds, or compact seating areas.
Maintain wood integrity by applying UV-resistant sealants annually, checking for loose joints or hardware biannually, and trimming back aggressive vines to prevent moisture accumulation against the wood. Position structures to avoid direct water from irrigation systems, and ensure adequate airflow around all wooden elements to prevent rot and extend their lifespan.
Mason Jar and Galvanized Metal Accents
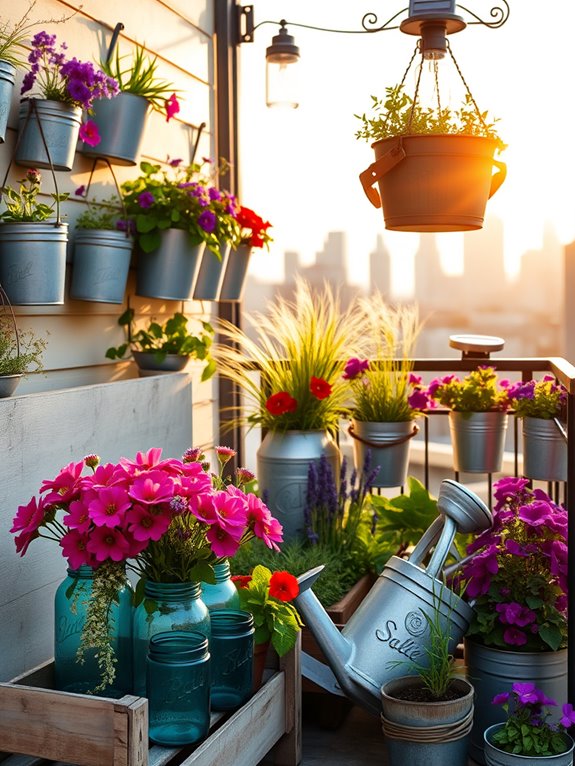
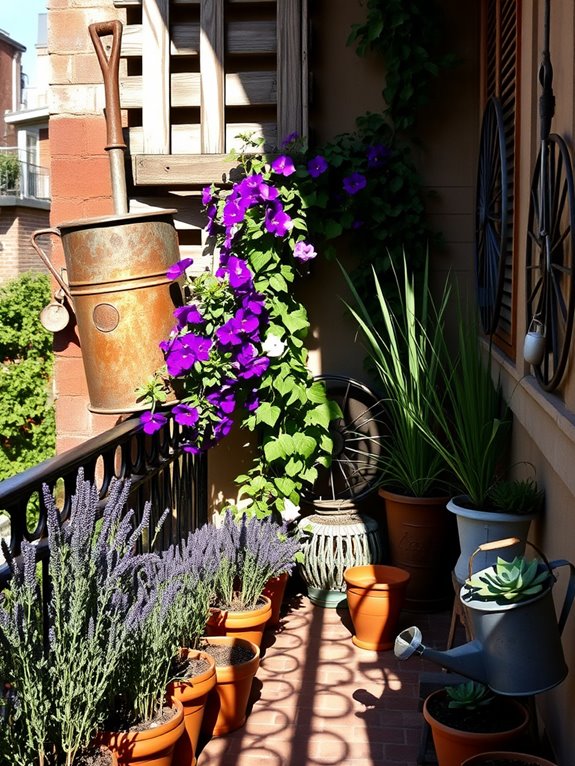
Mason jars and galvanized metal elements create a charming, nostalgic atmosphere that instantly transports visitors to a simpler time. Weathered mason jars in various sizes catch sunlight while holding vibrant wildflowers like black-eyed susans, zinnias, and Queen Anne’s lace. Galvanized metal watering cans, buckets, and planters develop a beautiful patina over time, complementing the garden’s natural elements while providing functional beauty.
The industrial-meets-rural aesthetic comes alive when mason jars are suspended from shepherd’s hooks or mounted on rustic wooden fences, creating magical lighting effects at dusk when filled with solar lights or tea candles. Galvanized metal troughs overflow with cascading petunias and trailing vines, while vintage metal milk cans serve as striking focal points when filled with tall ornamental grasses or flowering shrubs.
Key Elements:
- Assorted mason jars (various sizes)
- Galvanized metal containers
- Vintage watering cans
- Metal milk cans
- Wire hanging baskets
- Metal shepherd’s hooks
- Solar lights or battery-operated LED candles
- Rustic wooden supports
- Metal plant markers
- Galvanized buckets
- Metal wind chimes
- Wire mesh panels
Arrange larger galvanized containers as anchor pieces in corners or along pathways, filling them with plants of varying heights. Create visual interest by clustering mason jars in odd-numbered groupings, either mounted on walls or suspended at different heights. Incorporate metal elements at various levels, from ground-level planters to hanging baskets, ensuring proper drainage holes in all containers.
Maintain the metal finish by occasionally cleaning with mild soap and water, allowing natural patina to develop while preventing rust. When designing this style of garden, consider weight distribution for hanging elements and ensure all mounting surfaces can support your displays.
For smaller spaces like balconies, use vertical arrangements with wall-mounted mason jar holders and stackable galvanized planters. Choose compact plant varieties and consider using miniature versions of metal elements to maintain the aesthetic without overwhelming the space. Weather-resistant sealants can help protect metal surfaces in harsh climates while preserving their rustic charm.