
10 Garden Ideas for Perennial Borders
The idea that perennial borders must be complex and high-maintenance isn’t always true. You’ll find that creating a stunning garden border can be both manageable and rewarding when you break it down into practical steps. As you plan your garden’s transformation, you’ll want to consider everything from soil preparation and plant selection to seasonal color schemes and visual balance. Let’s explore how you can turn that empty stretch of yard into a vibrant, year-round display that’ll make your neighbors stop and stare.
Contents
- 1 Selecting the Right Location and Soil Preparation
- 2 Planning Your Border’s Color Scheme
- 3 Layering Plants by Height and Structure
- 4 Incorporating Year-Round Interest
- 5 Companion Planting for Maximum Impact
- 6 Maintaining Healthy Border Spacing
- 7 Creating Focal Points With Statement Plants
- 8 Managing Seasonal Transitions
- 9 Implementing Low-Maintenance Design Strategies
- 10 Border Edging and Definition Techniques
Selecting the Right Location and Soil Preparation
Sunlight dances through the carefully planned layers of perennial borders, creating a living tapestry of color and texture that evolves throughout the seasons. Tall delphiniums and foxgloves stand like elegant sentinels at the back, while mid-height phlox and coneflowers create a robust middle ground. The front edge sparkles with compact varieties like creeping phlox and hardy geraniums, their blooms spilling gracefully onto carefully placed stepping stones.
The border’s location against a weathered stone wall or classic wooden fence provides the perfect backdrop for this horticultural theatre, while the rich, well-prepared soil beneath supports deep root systems that return year after year with increasing vigor. Morning light catches dewdrops on unfurling leaves, and afternoon shadows create depth and mystery among the plantings, making every viewing angle a unique experience.
Key Elements:
- 6+ hours of daily sunlight
- Well-draining soil with organic matter
- Border depth of 4-8 feet
- Permanent backdrop (wall, fence, or hedge)
- Access path for maintenance
- Irrigation system or water source
- pH testing kit
- Quality topsoil and compost
- Edge restraints or border materials
Begin by testing your soil pH and amending it to achieve the ideal 6.0-7.0 range for most perennials. Remove all existing vegetation and dig the bed to a depth of 18-24 inches, incorporating organic matter throughout. Create a slight slope away from any structures to ensure proper drainage, and install an edging material to maintain clean lines and prevent grass invasion.
Consider installing a drip irrigation system before planting to ensure consistent moisture delivery to establishing roots. The success of your perennial border lies in proper spacing and placement. Position taller plants toward the back, ensuring they won’t shade out shorter specimens. Leave adequate space between plants for mature growth, typically 18-24 inches for medium-sized perennials. Create planting pockets in groups of three or five for visual impact, and maintain clear access paths for maintenance.
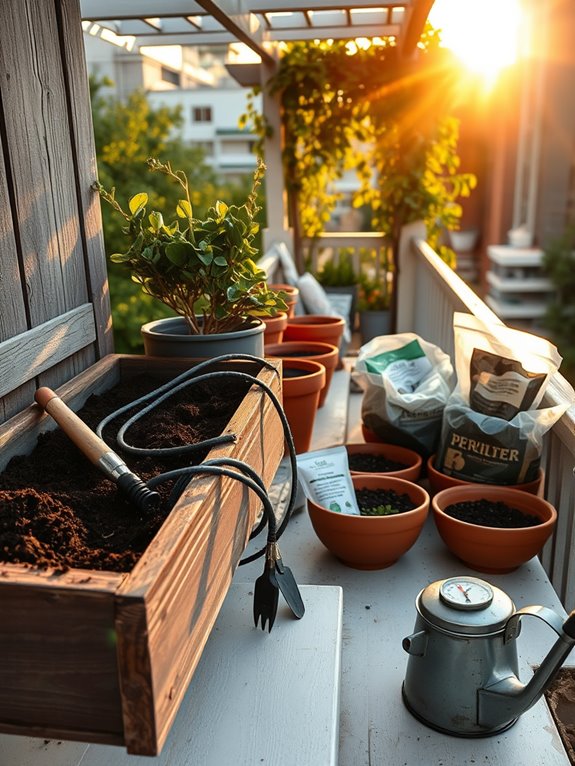
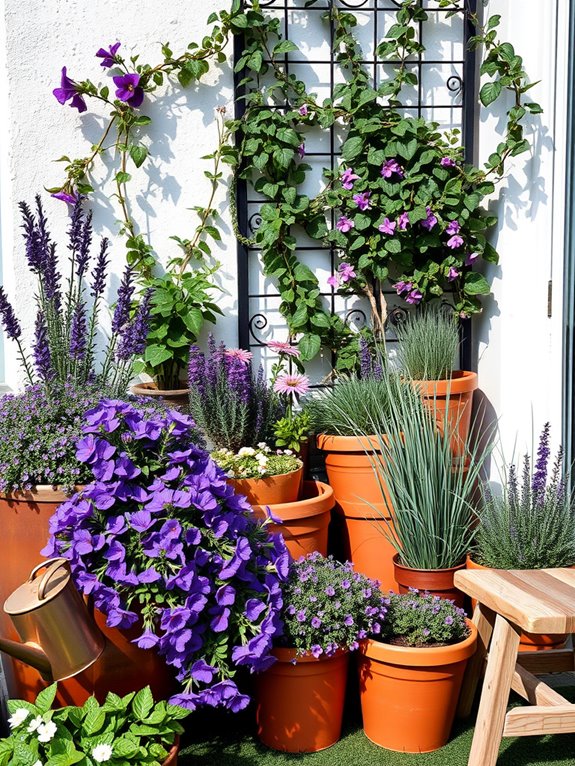
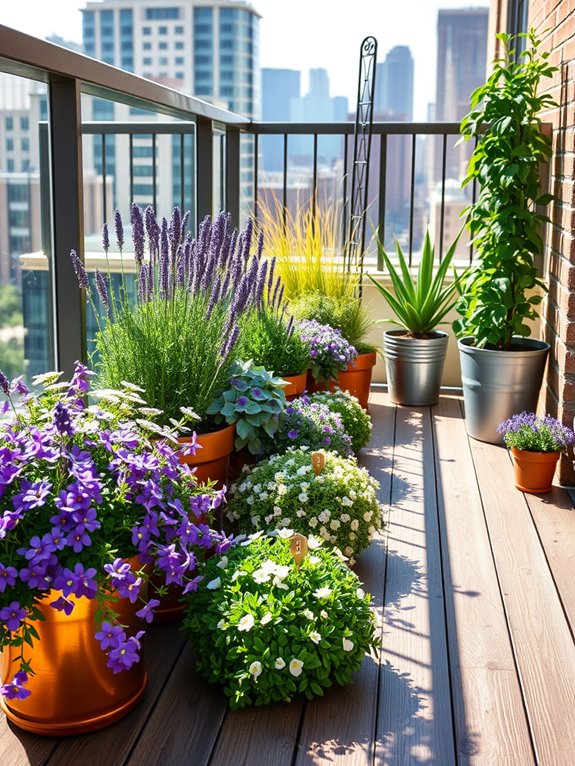
When adapting this design for different spaces, consider scale carefully. Small gardens might focus on dwarf varieties and vertical elements, while larger areas can accommodate sweeping curves and bold plant groupings. For urban settings or balconies, use container groupings of varying heights and create the backbone with structural evergreens in pots. Replace traditional backdrop elements with trellises or screen panels to achieve the same layered effect in limited spaces.
Planning Your Border’s Color Scheme
Color in perennial borders creates a living canvas that evolves throughout the growing season, painting your garden with waves of harmonious hues. Picture deep purple salvias rising above golden coreopsis, while pink echinacea and white shasta daisies create a gentle rhythm that draws the eye through the landscape. The thoughtful arrangement of colors can transform a simple border into an enchanting retreat that shifts from the soft pastels of spring to the rich jewel tones of late summer.
These carefully orchestrated color schemes affect not only the visual impact but also the emotional resonance of your garden space. Cool blues and purples from delphiniums and Russian sage create a sense of depth and tranquility, while bright yellows and oranges from rudbeckia and helenium inject energy and warmth. White flowers like gaura and artemisia act as natural spotlights, brightening shady corners and creating magical moonlit gardens in the evening hours.
Essential Elements:
- Anchor plants in primary colors
- Complementary color combinations
- Neutral foliage plants
- White flowers for highlighting
- Sequential blooming varieties
- Color-coordinated containers
- Seasonal accent plants
- Structural elements in coordinating colors
Begin your color scheme by selecting three to four main colors that will define your border’s personality. Plant larger groups of each color rather than single specimens, creating bold swathes that provide visual impact.
Layer your plantings with taller specimens at the back, medium-height plants in the middle, and shorter varieties in front. Consider bloom times carefully, ensuring continuous color throughout the growing season by incorporating early, mid-season, and late-blooming perennials.
When maintaining your color scheme, regularly deadhead spent blooms to encourage continued flowering and prevent self-seeding that might disrupt your careful color planning. Group plants with similar water and sunlight needs together to ensure all specimens thrive.
Monitor your border throughout the season, noting any gaps in color or timing that need to be addressed in future planning.
Design Adaptations and Tips:
For smaller spaces or balcony gardens, focus on a limited color palette to prevent visual overwhelm, perhaps choosing just two main colors plus white as an accent.
Use containers in coordinating colors to extend the scheme vertically, and incorporate plants with colorful foliage to maintain interest when flowers aren’t blooming.
Consider dwarf varieties of larger perennials to maintain the desired color scheme in a compact space, and use mirrors or metallic elements to reflect and amplify your chosen colors throughout the garden.
Layering Plants by Height and Structure
Creating depth and drama through layered perennial borders transforms an ordinary garden into a living masterpiece. Tall, architectural plants like purple delphiniums and copper-tinted fennel create a majestic backdrop, while mid-height phlox and coneflowers fill the middle ground with waves of color. In the foreground, low-growing sedums and creeping thyme spill over pathway edges, creating a seamless transition between different heights and textures.
The layered approach mirrors nature’s own design, creating distinct vertical planes that draw the eye through the garden space. Ornamental grasses like Miscanthus add movement and structure throughout the seasons, while flowering spires of foxgloves and hollyhocks punctuate the border with dramatic vertical accents. This thoughtful arrangement creates a sense of journey and discovery, revealing new details as visitors move through the space.
Essential Elements:
- Tall background plants (6+ feet): Delphiniums, Hollyhocks, Joe Pye Weed
- Mid-height plants (3-5 feet): Phlox, Coneflowers, Salvias
- Lower plants (1-3 feet): Black-Eyed Susans, Geraniums, Catmint
- Ground cover plants: Creeping Thyme, Sedums, Low-growing Veronica
- Structural elements: Ornamental grasses, Small shrubs
- Support systems: Stakes, Plant rings, Trellises
Start the layout by establishing the tallest plants at the back of the border, spacing them according to their mature width. Create sweeping drifts of mid-height plants in groups of three or five, ensuring each group flows naturally into the next. Position lower-growing plants toward the front, allowing them to soften edges and fill gaps. Maintain clear paths through the border for maintenance access, and install support structures early in the season before plants require them.
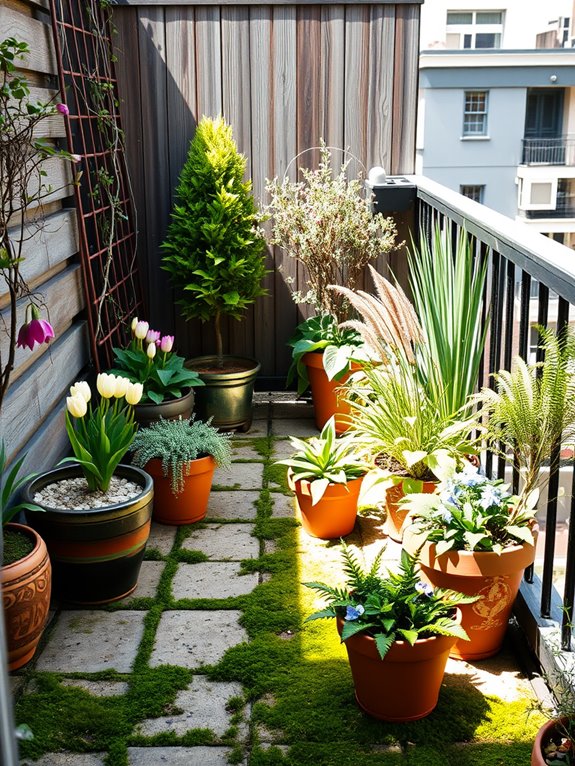
When designing layered borders for different spaces, consider scale carefully. For smaller gardens or balconies, choose compact varieties of traditional border plants, such as dwarf delphiniums or miniature salvias. Container gardening can achieve the same layered effect by using tall planters at the back, medium-height containers in the middle, and trailing plants in front-facing pots. Ensure adequate spacing between plants to prevent overcrowding, and remember that proper soil preparation and regular maintenance are essential for long-term success.
Incorporating Year-Round Interest
A truly captivating perennial border maintains its allure throughout all seasons, transforming from delicate spring bulbs to summer’s vibrant blooms, autumn’s rich foliage, and winter’s architectural elements. The garden dances through time with evergreen boxwoods and holly providing structure, while ornamental grasses like Miscanthus and Pennisetum sway gracefully, their plumes catching morning frost. Hellebores peek through winter snow, giving way to daffodils and tulips in spring, followed by summer’s exuberant display of coneflowers, salvias, and Russian sage.
The secret to year-round interest lies in layering plants with different peak seasons, creating a continuously evolving tapestry of colors, textures, and forms. Spring-flowering shrubs like Viburnum and Forsythia give way to summer’s abundant perennials, while autumn brings the fiery foliage of Japanese maples and the berry-laden branches of Callicarpa. Even in winter, the garden maintains its dignity with sculptural seed heads, bark patterns, and the subtle colors of evergreen foliage.
Key Elements:
- Evergreen shrubs for structure
- Early spring bulbs
- Mid-season flowering perennials
- Late-summer bloomers
- Fall foliage plants
- Winter-interest plants
- Ornamental grasses
- Structural elements (obelisks, trellises)
- Berrying shrubs
- Plants with attractive seed heads
- Specimen plants with interesting bark
Begin by establishing the backbone of evergreen shrubs, positioning them at regular intervals to create rhythm and year-round structure. Layer shorter plants in front and taller specimens behind, ensuring each season has its moment to shine. Group plants in odd numbers, repeating key species throughout the border to create cohesion. Incorporate hardscape elements like obelisks or artistic branches to maintain visual interest during dormant periods.
When selecting plants, focus on those offering multiple seasons of interest – roses with attractive hips, hydrangeas with dried flower heads, or grasses that remain standing through winter. Consider maintenance by grouping plants with similar water and pruning needs together, and plan for accessibility to perform seasonal tasks.
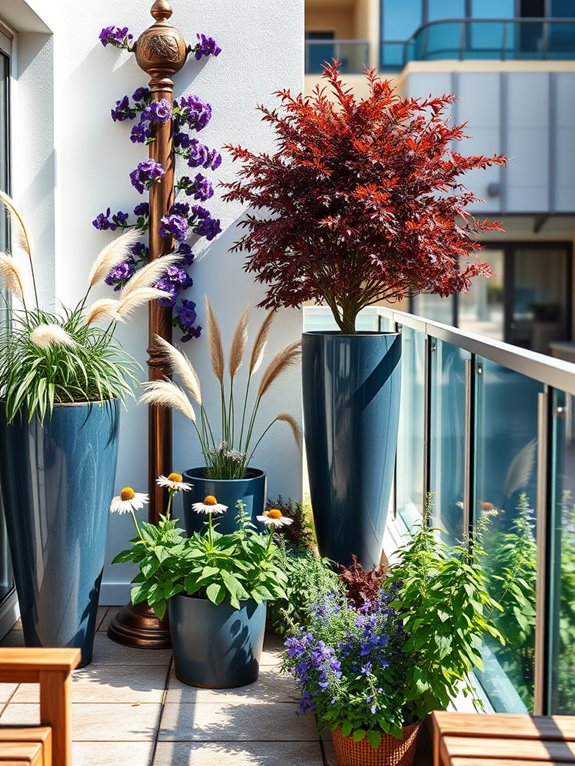
For smaller spaces or balconies, focus on containers with year-round appeal by combining dwarf evergreens with seasonal perennials and bulbs. Use vertical elements like climbing vines on trellises to maximize space, and select compact varieties of striking plants.
Consider using containers that themselves add visual interest through color or texture, and position them to create layers of height and depth, mimicking the design principles of larger borders.
Companion Planting for Maximum Impact
A thoughtfully designed companion planting border creates a masterpiece of color, texture, and movement that evolves throughout the growing season. Tall, architectural plants like purple coneflowers and black-eyed susans rise above shorter, mounding perennials such as lamb’s ear and creeping phlox, while ornamental grasses like feather reed grass provide vertical interest and gentle movement in the breeze.
The carefully orchestrated combinations maximize visual impact through contrasting flower shapes, complementary colors, and varying bloom times. This layered approach not only delights the eye but also creates beneficial plant partnerships that strengthen the garden’s ecosystem. Deep-rooted plants like yarrow grow alongside shallow-rooted species like coral bells, efficiently sharing soil resources.
Fragrant herbs such as lavender and sage intermingle with flowering perennials, attracting pollinators while naturally deterring unwanted pests. The result is a vibrant, self-sustaining garden space that provides continuous interest from spring through fall.
Key Elements:
- Tall backdrop plants (4-6 feet)
- Mid-height flowering perennials (2-3 feet)
- Ground cover plants (under 1 foot)
- Ornamental grasses
- Herbs and pollinator-friendly plants
- Complementary color combinations
- Varying leaf textures and shapes
- Plants with different bloom times
- Support structures or stakes
- Mulch for weed control
Begin implementation by arranging plants in layers, with taller specimens at the back of the border and progressively shorter plants toward the front. Space plants according to their mature size, allowing room for growth while maintaining a full appearance.
Create clusters of odd-numbered plants (3, 5, or 7) rather than single specimens to achieve a natural, flowing look. Incorporate plants with similar water and sunlight needs together to simplify maintenance.
Maintain your companion border by deadheading spent blooms, dividing overcrowded perennials every 2-3 years, and refreshing mulch annually. Regular monitoring helps identify beneficial plant partnerships and allows for adjustments in placement as needed.
For smaller spaces or balcony gardens, focus on dwarf varieties and vertical growing options. Use containers of varying heights to create the layered effect, and select compact versions of traditional companion plants.
Consider wall-mounted planters or trellises to maximize vertical space, and choose plants that provide multiple seasons of interest through foliage, flowers, and seedheads. Remember that even miniature companion gardens can incorporate the same principles of complementary growth habits and mutual benefits.
Maintaining Healthy Border Spacing
A thoughtfully spaced perennial border creates a mesmerizing tapestry of colors and textures that flows seamlessly through the seasons. Tall, architectural plants like delphiniums and hollyhocks stand as majestic sentinels at the back, while mid-height perennials such as salvias and coneflowers create a lush middle ground. The front edge softens into a cascade of low-growing plants like creeping phlox and hardy geraniums, each group maintaining its distinct space while harmoniously blending with its neighbors.
This carefully orchestrated spacing transforms the border into a living, breathing canvas where each plant has room to reach its full potential without overcrowding its companions. The deliberate gaps between plantings allow air circulation, reducing disease pressure and creating convenient access points for maintenance. These thoughtful intervals also showcase individual specimens while maintaining the cohesive flow that makes perennial borders so captivating.
Key Elements:
- Measuring tape or spacing guide
- Plant labels or markers
- Garden twine
- Quality mulch
- Edge defining materials
- Height reference stakes
- Plant support structures
- Spacing reference chart
- Pruning tools
- Soil amendment materials
To implement proper border spacing, begin by creating a scaled drawing of your border area, marking out three distinct zones: back (tallest), middle, and front (shortest). Place larger specimens first, using the mature spread size as your spacing guide, typically allowing 18-24 inches between tall perennials and 12-18 inches for medium-height plants. The front edge plants should be spaced 6-12 inches apart, depending on their mature size.
Maintain healthy spacing by regularly monitoring plant growth and dividing overgrown specimens every 3-4 years. Use permanent markers or stakes to remember original spacing points, especially during dormant seasons. This helps maintain the design’s integrity and prevents aggressive spreaders from overtaking their neighbors while ensuring adequate air circulation and access for maintenance.
For adaptable design options, consider using removable plant supports and adjustable spacing techniques that can evolve with your garden. In smaller spaces or balcony gardens, focus on dwarf varieties and vertical growing options, maintaining proportional spacing by reducing distances by one-third. Container gardening allows for more precise control over spacing, while raised beds can help maintain clear boundaries between different plant groupings.
Remember that proper spacing may initially make the border look sparse, but patience will reward you with a fuller, healthier garden as plants mature to their intended sizes.
Creating Focal Points With Statement Plants
Statement plants command attention and create mesmerizing focal points that draw the eye through a perennial border. Towering delphiniums reach skyward with their majestic blue spires, while architectural cardoons spread their silvery, thistle-like leaves in dramatic gestures.
These dramatic specimens rise above lower-growing companions, creating a natural rhythm and hierarchy within the garden space that guides visitors along planned viewing paths and creates moments of awe and discovery. The interplay between these bold architectural elements and their supporting cast transforms an ordinary border into a dynamic landscape.
Statuesque burgundy cannas provide tropical drama, while the structural forms of ornamental grasses like Stipa gigantea catch light and movement. Strategic placement of these statement plants creates visual anchors that hold the garden design together, particularly when complemented by classic garden structures like obelisks or decorative stakes that add height and permanent visual interest.
Key Elements:
- Tall perennials (delphiniums, hollyhocks, verbascum)
- Architectural foliage plants (cardoons, cannas, elephant ears)
- Ornamental grasses
- Garden structures (obelisks, trellises, stakes)
- Supporting medium-height plants
- Ground cover plants
- Decorative mulch
- Path markers or stepping stones
When implementing focal points with statement plants, begin by positioning the tallest specimens at strategic intervals, typically every 8-10 feet along the border. Place them slightly toward the back of the border, but not entirely against the back wall, allowing some plants to grow behind them for depth.
Create triangular groupings of three statement plants of varying heights to establish natural-looking arrangements. Ensure each focal point has enough space for root development and future growth, typically allowing 3-4 feet diameter for large specimens.
For maintenance, stake tall plants early in the season before they reach full height, using natural materials like bamboo or metal supports that blend into the foliage. Regular feeding and adequate irrigation are crucial for statement plants to achieve their full dramatic potential.
Remove spent blooms promptly to maintain visual appeal and encourage repeat flowering where possible. When adapting this style to different spaces, consider scale-appropriate alternatives for smaller gardens or balconies.
Use container-friendly statement plants like compact banana plants or tall ornamental grasses, and employ vertical growing techniques with climbers on decorative supports. In tiny spaces, a single dramatic specimen in an attractive container can create just as much impact as a larger grouping, while wall-mounted planters can maximize vertical growing space for cascading statement plants.
Managing Seasonal Transitions
Managing seasonal transitions in a perennial border creates a masterful symphony of color and texture that evolves throughout the year. Early spring bulbs push through melting snow, giving way to fresh perennial growth, while late-blooming flowers extend the garden’s vibrancy well into autumn. Hellebores and snowdrops kick off the show, followed by daffodils and tulips, creating layers of interest that seamlessly flow into the emergence of summer perennials like salvias, coneflowers, and Russian sage.
The secret to a successful transitional border lies in its strategic plant placement and careful timing. Tall grasses provide structure and movement year-round, while deciduous ferns offer delicate spring fronds that mature into robust summer specimens. Late-season stars like sedums and asters take center stage as earlier bloomers fade, their seed heads adding architectural interest through winter months alongside ornamental grasses and evergreen framework plants.
Key Elements:
- Early spring bulbs (snowdrops, crocus, daffodils)
- Mid-spring perennials (bleeding heart, columbine)
- Summer bloomers (daylilies, coneflowers, salvias)
- Late-season plants (asters, sedums)
- Ornamental grasses
- Evergreen backbone plants
- Structural elements (obelisks, trellises)
- Multi-season interest plants
- Ground covers for transitional spaces
To implement a successful transitional border, begin by establishing the evergreen framework plants that will provide year-round structure. Plant these approximately 3-4 feet apart, allowing space for perennials between them. Layer spring bulbs in drifts throughout the border in fall, placing them beneath areas where summer perennials will later grow.
Group plants in odd-numbered clusters, with taller specimens toward the back and shorter ones in front, creating natural-looking drifts that flow into each other. Maintain the border’s transitions by deadheading spent blooms and cutting back early-season perennials after they finish flowering, which allows later-blooming plants to take the spotlight.
Consider leaving some seed heads and dried stems standing through winter for visual interest and wildlife habitat. Mulch in spring and fall to suppress weeds and protect plant roots during seasonal changes.
Essential tips: For smaller spaces, focus on plants that offer multiple seasons of interest, such as hardy geraniums with long bloom periods and attractive foliage, or compact grasses that provide year-round structure.
Container gardens can effectively manage transitions by swapping out seasonal elements while maintaining structural plants as anchors. In balcony gardens, use vertical elements like climbing vines on trellises to maximize space, and select dwarf varieties of transitional plants that won’t overwhelm the limited area.
Implementing Low-Maintenance Design Strategies
A low-maintenance perennial border transforms your garden into a self-sustaining paradise where nature does most of the work. Clusters of drought-resistant Russian sage sway alongside sturdy black-eyed susans, while carpet-forming sedums spread naturally between stepping stones. Hardy ornamental grasses like feather reed grass create year-round structure, their golden plumes catching the light and dancing in autumn breezes.
The design emphasizes grouping plants with similar water and sunlight needs, creating distinct zones that practically care for themselves. Evergreen shrubs like boxwood and deer-resistant barberry provide permanent structure, while long-blooming perennials such as coneflowers and salvias offer months of color with minimal deadheading. Mulched pathways and automated irrigation systems further reduce maintenance needs.
Key Elements:
- Drought-tolerant perennials
- Spreading ground covers
- Ornamental grasses
- Evergreen shrubs
- Self-cleaning plants
- Mulch or gravel paths
- Drip irrigation system
- Weather-resistant edging
- Weed barrier fabric
- Native plant species
Implementation begins with thorough soil preparation and the installation of a reliable irrigation system. Group plants in masses of odd numbers, placing taller specimens at the back of the border and progressively shorter ones toward the front. Install permanent edging to prevent grass invasion and apply a thick layer of mulch to suppress weeds.
Position plants with adequate spacing to allow for mature growth, reducing the need for future division or relocation. Strategic plant selection is crucial for seasonal interest without constant maintenance. Choose varieties that naturally complement each other’s growth habits and bloom times.
For example, pair early-spring bulbs with late-emerging perennials to maximize space usage, or select plants that naturally suppress weeds through dense growth patterns. For adaptation to different spaces, consider vertical elements like climbing vines on trellises for small gardens, or container groupings for balcony gardens.
Use dwarf varieties of favorite perennials in restricted spaces, and incorporate self-watering containers to reduce maintenance further. Focus on plants with multiple seasons of interest, such as those with attractive seed heads or winter silhouettes, to maximize impact in limited areas.
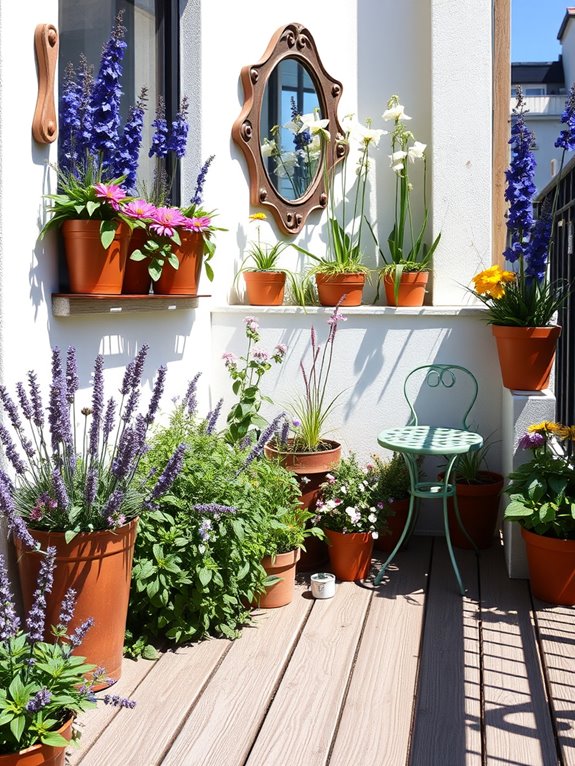
Border Edging and Definition Techniques
Crisp, clean lines define a well-executed perennial border, where thoughtfully placed edging creates the perfect frame for your flowering masterpiece. Traditional materials like brick, stone, or steel bring structure and sophistication, while ornamental grasses like festuca glauca or carex morrowii cascade gracefully over harder edges, softening the transition between path and planting bed.
This interplay of rigid and flowing elements establishes a professional finish that elevates the entire garden design. The border’s definition becomes particularly striking when low-growing plants like creeping thyme, dianthus, or dwarf lavender are incorporated along the edges, creating a living boundary that buzzes with pollinators and releases gentle fragrance with every brush of wind.
These botanical borders complement structural edging while preventing soil erosion and keeping taller perennials from flopping onto walkways, resulting in a garden that appears both naturally abundant and perfectly contained.
Essential Elements:
- Edging material (brick, steel, natural stone, or concrete)
- Ground cover plants for softening edges
- Small ornamental grasses
- Compact flowering perennials
- Landscape fabric for weed control
- Decorative gravel or mulch
- Garden tools for installation
- Level and string line
- Edge restraints or stakes
Installation begins with marking the border’s precise outline using string lines and stakes to ensure smooth curves or straight edges. Dig a trench 4-6 inches deep and wide enough to accommodate your chosen edging material, ensuring proper drainage.
Install the edging material according to manufacturer specifications, typically setting it 1-2 inches above soil level to create a clean mowing edge and prevent grass invasion. For living edges, plant low-growing specimens 12-18 inches apart, allowing room for spread while maintaining immediate visual impact.
Design Tip: Consider your climate and maintenance preferences when selecting both hardscape and plant materials. For smaller spaces or balcony gardens, use container-friendly edging options like copper strips or modular plastic edging that can be easily modified.
Layer plants vertically in tiered containers to maximize space, and choose dwarf varieties that won’t overwhelm limited areas. Remember that edging materials should complement your home’s architecture and existing garden features while providing practical functionality for your specific needs.