
8 Garden Ideas for Outdoor Kitchens
Studies show that 67% of homeowners dream of having an outdoor kitchen, but many overlook the incredible potential of integrating a garden into their design. You’ll transform your cooking space into a vibrant culinary oasis by incorporating fresh herbs, climbing vines, and edible landscapes that engage all your senses. Whether you’re working with a compact patio or sprawling backyard, these eight creative garden solutions will help you craft an outdoor kitchen that’s both beautiful and functional.
Contents
- 1 Design a Fresh Herb Garden Station
- 2 Create a Living Privacy Screen With Climbing Plants
- 3 Install a Vertical Garden Wall
- 4 Plan a Pollinator-Friendly Planting Area
- 5 Build Raised Beds for Edible Landscaping
- 6 Incorporate a Water Feature and Garden Lighting
- 7 Add Container Gardens for Seasonal Vegetables
- 8 Set Up a Succulent Display Area
Design a Fresh Herb Garden Station
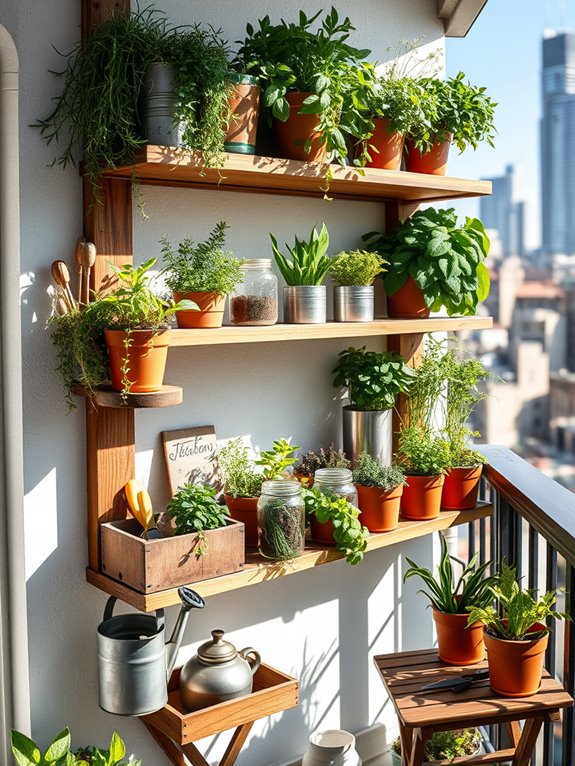
A fresh herb garden station transforms any outdoor kitchen into a living pantry, where cascading stems of rosemary and thyme mingle with the upright stalks of basil and sage. The multi-tiered design features weathered terra cotta pots and sleek stainless steel planters arranged on rustic wooden shelving, creating a functional yet aesthetically pleasing focal point.
Fragrant herbs catch the sunlight, casting gentle shadows while releasing their aromatic oils into the air. The space comes alive with varying textures and heights, from the delicate leaves of cilantro to the bold, structural forms of bay laurel.
Copper plant markers catch the light, while mason jar propagation stations add a practical touch of charm. The combination of traditional and modern elements creates an inviting workspace that seamlessly connects cooking and gardening.
Essential Elements:
- Tiered shelving system
- Selection of culinary herbs (minimum 6 varieties)
- Mix of containers (terra cotta, metal, ceramic)
- Plant markers or labels
- Watering can or irrigation system
- Pruning shears
- Organic potting soil
- Drainage trays
- Growing lights (optional)
- Small tool storage
Position the herb station within arm’s reach of the main cooking area, ensuring adequate sunlight exposure (6-8 hours daily). Install the shelving unit against a wall or create a freestanding structure, allowing space between levels for plant growth.
Group herbs according to their water needs: Mediterranean herbs like oregano and rosemary together, and moisture-loving plants like mint and basil in another section. Incorporate a maintenance station with small tools and supplies tucked discreetly into the design.
For smaller spaces or balcony gardens, consider vertical gardening solutions such as wall-mounted planters or hanging systems. Dwarf varieties of herbs work well in confined spaces, while self-watering containers help maintain consistent moisture levels.
Incorporate fold-down shelving or mobile cart options to maximize flexibility in limited areas. Remember to position strongly aromatic herbs like sage and rosemary where their scents won’t overwhelm outdoor dining spaces.
Create a Living Privacy Screen With Climbing Plants
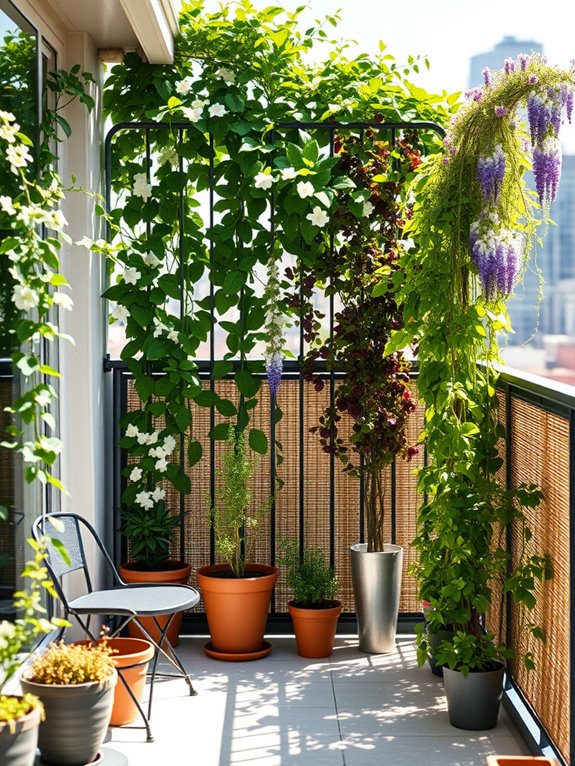
Transform your outdoor kitchen into a secluded oasis by creating a natural privacy screen with lush climbing plants. Imagine tendrils of fragrant jasmine and vibrant clematis weaving their way up sturdy trellises, creating a living wall that shields your culinary sanctuary from neighboring views. The gentle movement of climbing roses, with their delicate blooms and deep green foliage, adds romantic charm while sweetly scented honeysuckle attracts butterflies and hummingbirds, bringing your space to life.
This verdant backdrop serves multiple purposes, not only providing privacy but also creating a microclimate that helps regulate temperature and reduce wind exposure in your outdoor kitchen area. The various textures and heights of climbing plants like Virginia creeper, which displays stunning fall colors, and the evergreen star jasmine create visual interest throughout the seasons while establishing a seamless connection between your cooking space and garden.
Key Elements:
- Sturdy trellis system or metal framework
- Selection of climbing plants (mix of flowering and evergreen)
- High-quality potting soil
- Irrigation system or watering setup
- Plant supports and ties
- Decorative planters or raised beds
- Ground anchors and mounting hardware
- Pruning tools
Installing a living privacy screen requires careful planning and proper infrastructure. Begin by securing sturdy trellises or metal frameworks at least 6-8 feet tall, ensuring they’re firmly anchored and can support mature plants.
Position larger planters or prepare raised beds at the base, filling them with well-draining, nutrient-rich soil. Select a combination of fast-growing and slower-maturing climbers, planting them approximately 18-24 inches apart to allow for proper growth while maintaining adequate coverage.
Regular maintenance involves training young plants to grow in the desired direction, using soft plant ties to secure stems to the support structure. Establish a consistent watering schedule, focusing on deep watering to encourage strong root development.
Prune regularly to control growth and maintain the desired shape, removing dead or tangled growth to prevent overcrowding.
Design Adaptations: For smaller spaces, choose compact climbing varieties and consider using vertical gardening systems that can be mounted directly to walls.
Container gardens with mobile trellises offer flexibility for rearranging your space as needed. In windy areas, incorporate wind-resistant species and ensure extra-secure anchoring of support structures. For year-round privacy, mix evergreen varieties with deciduous climbers and consider installing grow lights for darker areas where plants might struggle during winter months.
Install a Vertical Garden Wall

Transform your outdoor kitchen space with a stunning vertical garden wall that brings nature right to your fingertips while cooking. Lush cascades of herbs like trailing rosemary and oregano create an aromatic tapestry, while compact vegetables such as cherry tomatoes and lettuce varieties add pops of color and fresh ingredients within arm’s reach. Ornamental plants like ferns, pothos, and flowering petunias weave between the edibles, creating a living piece of art that serves both form and function.
The vertical garden wall becomes a natural focal point, drawing the eye upward and making even modest cooking spaces feel larger and more dynamic. The varied textures and heights of the plants create visual interest, while the vertical orientation maximizes growing space without compromising valuable floor area. The wall comes alive with movement as gentle breezes rustle through the foliage, creating a peaceful backdrop for outdoor entertaining.
Key Elements:
- Mounting system or framework
- Growing containers or pocket planters
- Irrigation system
- Growing medium
- Plant selection (herbs, vegetables, ornamentals)
- Lighting fixtures
- Drainage system
- Weather-resistant materials
- Support brackets
- Maintenance tools
Installing a vertical garden wall begins with securing a sturdy framework to your existing wall structure, ensuring it can support the weight of plants, soil, and water. Install a proper irrigation system with adjustable drip lines to ensure even water distribution throughout the wall.
Select containers or pocket planters appropriate for your chosen plants, arranging them in a pattern that allows for proper growth and easy maintenance access. Consider the light requirements of each plant species when deciding placement, with sun-loving herbs and vegetables positioned in brighter spots and shade-tolerant species in less exposed areas.
Start small and expand gradually to better manage maintenance and growth. Choose plants suited to your climate and cooking preferences, grouping those with similar water needs together. Monitor soil moisture levels regularly, as vertical gardens can dry out more quickly than traditional beds. Implement a regular fertilization schedule, as nutrients can leach more rapidly in vertical systems.
Consider installing a catchment system at the base to collect and reuse water runoff. Adapt your vertical garden wall design based on available space by using modular systems that can be expanded or reduced as needed. For smaller spaces, focus on compact varieties and prioritize frequently used cooking herbs.
Consider incorporating grow lights for areas with limited natural sunlight, and install retractable covers for protection during extreme weather. Remember that plant roots in vertical systems have limited space, so regular pruning and replacement of plants may be necessary to maintain healthy growth and appearance.
Plan a Pollinator-Friendly Planting Area
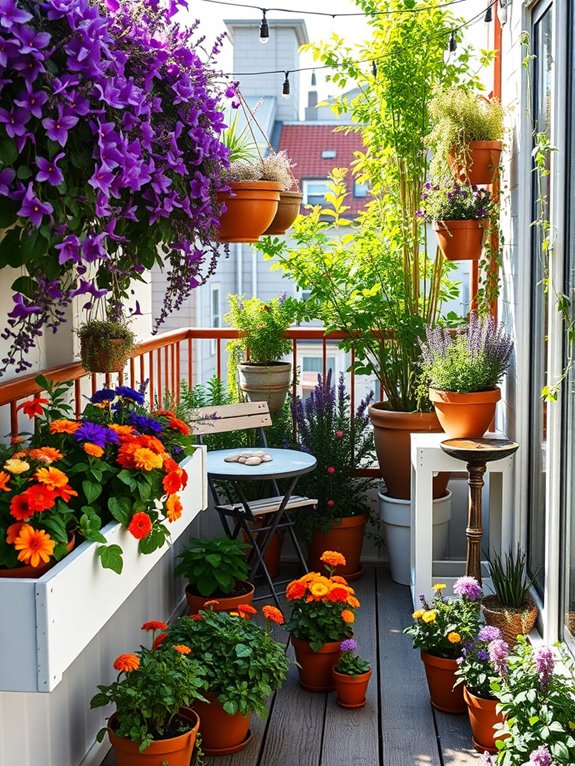
Transform your outdoor kitchen area into a vibrant oasis by incorporating a pollinator-friendly planting space that buzzes with life and natural energy.
Imagine clusters of purple coneflowers swaying in the breeze, while bright orange butterfly weed and deep blue salvia create a tapestry of colors that attracts butterflies, bees, and hummingbirds. Ornamental grasses provide movement and structure, while native wildflowers add bursts of seasonal color throughout your cooking space.
The garden becomes a living extension of your culinary area, where herbs like flowering oregano, lavender, and borage serve double duty as both cooking ingredients and pollinator magnets.
Stone pathways weave between raised beds filled with nectar-rich blooms, creating an enchanting atmosphere where you can watch beneficial insects at work while preparing outdoor meals. Solar-powered garden lights illuminate the plantings at dusk, extending the magical ambiance into the evening hours.
Essential Elements:
- Native flowering perennials
- Flowering herbs
- Water source or shallow bird bath
- Large rocks or stones for insect resting spots
- Mix of early, mid, and late-season bloomers
- Variety of flower shapes and sizes
- Chemical-free maintenance approach
- Landing zones between plantings
- Vertical growing structures
- Multi-level planting areas
When implementing your pollinator garden, start by selecting a sunny location within view of your cooking area.
Create layers of plants, positioning taller species like joe pye weed and goldenrod toward the back, medium-height plants like black-eyed susans in the middle, and shorter options such as creeping thyme along the edges. Group plants in clusters of three to five specimens to create visible “landing pads” for pollinators.
Ensure continuous blooms throughout the growing season by combining spring bulbs, summer perennials, and fall-flowering plants. Install a small water feature or shallow dish with stones for pollinators to drink and rest.
Maintain the garden by deadheading spent blooms, but leave some seed heads in fall for winter interest and bird food.
For smaller spaces or balcony gardens, focus on container plantings with compact varieties like dwarf butterfly bush, compact zinnia varieties, and trailing nasturtiums.
Use vertical space by incorporating wall-mounted planters or trellises for climbing plants like morning glories or cardinal climbers.
Consider creating a “pollinator window box” near your outdoor cooking area, featuring compact herbs and flowers that attract beneficial insects while keeping them at a comfortable distance from your food preparation area.
Build Raised Beds for Edible Landscaping
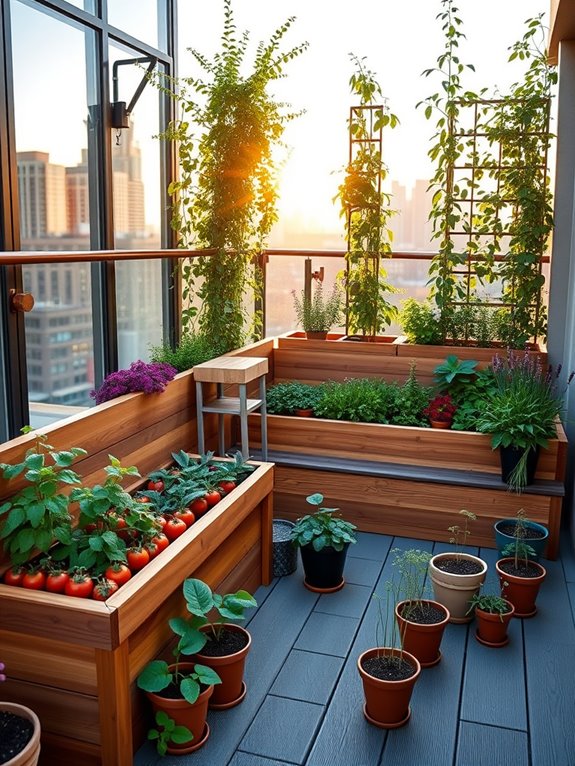
Transform your outdoor kitchen area into a culinary paradise with strategically placed raised beds bursting with fresh herbs, vegetables, and edible flowers. Picture sleek cedar or composite wood beds in varying heights, creating a dynamic visual landscape while putting fresh ingredients within arm’s reach. The beds showcase a tapestry of purple basil, bright nasturtiums, compact tomato plants, and cascading oregano, all arranged in attractive patterns that complement your cooking space.
The raised beds frame the kitchen area like living walls, offering both beauty and function. Vertical elements like trellised snap peas and climbing beans add height and drama, while low-growing thyme and strawberries spill over the edges, softening the geometric lines of the beds. Solar-powered accent lighting illuminates the beds at night, creating an enchanting atmosphere for evening entertaining while highlighting the architectural elements of both plants and structures.
Key Elements:
- Raised bed materials (cedar, composite wood, or metal)
- Irrigation system components
- Quality soil mix
- Edible plants (herbs, vegetables, fruits)
- Vertical growing supports
- Path materials
- Solar lighting
- Mulch
- Plant markers
- Storage solutions for garden tools
Begin installation by positioning beds to maximize sun exposure and create efficient paths between cooking areas and plantings. Install beds at varying heights (18-36 inches) to create visual interest and ensure comfortable harvesting. Incorporate an automatic drip irrigation system during construction, laying lines before filling with a high-quality soil mix specifically formulated for raised beds.
Arrange plants considering height, spread, and companion planting principles, keeping frequently used herbs closest to the cooking area. Design your layout to include wider paths (minimum 36 inches) between beds for easy access with garden tools or serving trays. Consider incorporating built-in storage benches or tool storage within the bed design for convenience.
Maintain clean lines and professional appearance by using consistent materials and adding defined borders between beds and walking surfaces. For smaller spaces or balcony adaptations, focus on vertical growing solutions and modular beds that can be reconfigured as needed. Use stackable planters or wall-mounted systems to maximize growing space in tight areas.
Consider self-watering containers for areas with limited water access, and choose compact varieties of vegetables and herbs specifically bred for container growing. In windy locations, ensure beds are properly secured and protected, and incorporate windbreaks into the design when necessary.
Incorporate a Water Feature and Garden Lighting
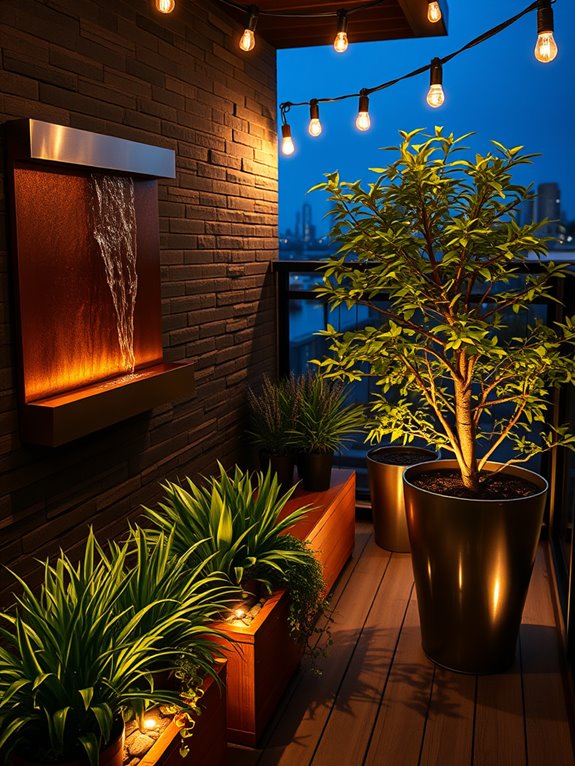
Tranquil water features and strategic lighting transform an outdoor kitchen garden into a mesmerizing sanctuary that delights both day and night. A gentle cascade tumbling over natural stone creates a soothing backdrop while cooking, while carefully placed uplights illuminate ornamental grasses like Maiden Hair and Japanese Forest Grass that sway gracefully in evening breezes. The interplay of light and water adds depth and movement, making the space feel larger and more dynamic.
Thoughtfully positioned LED path lights guide guests through herb gardens of lavender and thyme, while submersible lights in water features create dramatic reflections across cooking and dining areas. The combination of flowing water and ambient lighting softens the hard edges of kitchen equipment and creates an enchanting atmosphere perfect for outdoor entertaining. Strategically placed spotlights highlight architectural plants like Japanese Maples and tall bamboo, casting interesting shadows that dance across garden walls.
Key Elements:
- Water feature (fountain, cascade, or pond)
- LED path lights
- Spotlights for accent lighting
- Submersible lights
- Moisture-loving plants
- Weather-resistant light fixtures
- Timer system for lights
- Water pump and filtration system
- Decorative stones and pebbles
- Electrical outlets (GFCI protected)
Installing a water feature requires careful planning for both practical and aesthetic purposes. Begin by selecting a location that’s visible from the cooking area but won’t interfere with foot traffic. Install necessary plumbing and electrical connections before positioning the water feature, ensuring proper drainage and pump access.
Layer lighting elements starting with essential path lighting, then add accent lights for plants and water features, connecting all to a central timer system. The hardscape surrounding the water feature should include varying heights of plants that thrive in moist conditions, creating a natural transition between water and garden areas.
Position taller plants behind the water feature and shorter ones in front, using rocks and pebbles to disguise edges and create a more organic look. Regular maintenance includes cleaning filters, adjusting light timers seasonally, and monitoring water levels.
For smaller spaces or balconies, consider wall-mounted water features or tabletop fountains combined with compact LED strip lighting. Use vertical gardening techniques to maximize space, and opt for smaller varieties of architectural plants. Mirrors can be strategically placed to reflect both water and light, creating the illusion of a larger space.
Weather-resistant furniture and equipment covers are essential to protect electrical components from water damage, and installation of a moisture sensor can help regulate water levels automatically.
Add Container Gardens for Seasonal Vegetables
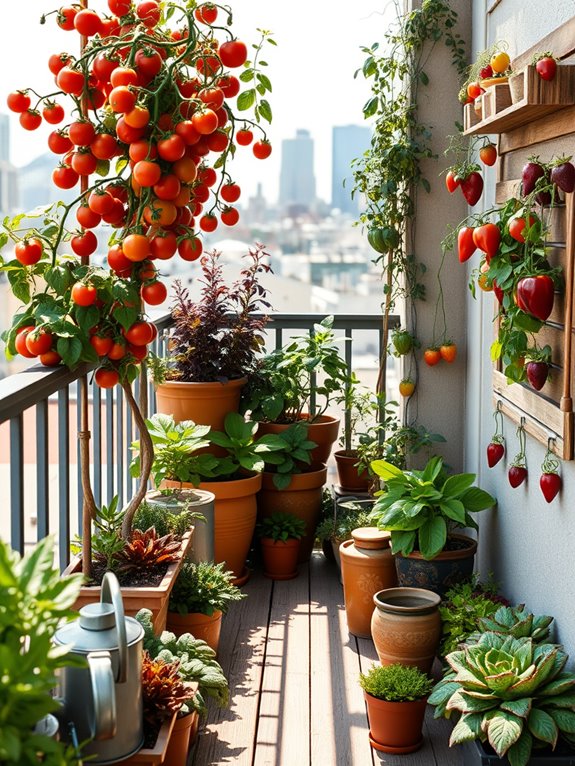
Transform your outdoor kitchen into a chef’s paradise by incorporating vibrant container gardens filled with fresh seasonal vegetables and herbs. Imagine stepping out to harvest sun-ripened tomatoes, fragrant basil, and crisp lettuce just steps from your cooking space. Terra cotta pots of varying heights create visual interest while hosting a bounty of edibles, from climbing pea vines to compact pepper plants, all arranged to complement your cooking area’s design.
The container garden becomes an extension of your culinary workspace, with wooden planter boxes and decorative ceramic pots adding both functionality and style. Trailing herbs cascade over pot edges, while vertical growing systems maximize space and create living walls of edible greenery. The mix of textures and heights, from tall okra plants to low-growing thyme, creates a dynamic visual display that changes with each growing season.
Essential Elements:
- Container assortment (terra cotta, ceramic, wooden planters)
- Vertical growing systems
- Drip irrigation setup
- Quality potting soil
- Plant supports and trellises
- Seasonal vegetable seedlings
- Culinary herbs
- Decorative pot feet or risers
- Plant markers
- Organic fertilizer
Position containers to maximize sunlight exposure while maintaining easy access from the cooking area. Arrange larger containers at the back, creating tiers with medium and small pots in front. Install a simple drip irrigation system to ensure consistent watering, essential for container-grown vegetables. Group plants with similar water needs together, and ensure all containers have adequate drainage holes and quality potting mix enhanced with organic matter.
When designing your container garden space, consider weight restrictions for elevated surfaces and ensure proper spacing between pots for air circulation. For smaller balconies, focus on compact varieties and vertical growing solutions.
Choose vegetables that thrive in your specific climate zone and consider succession planting to maintain continuous harvests. In challenging weather, use portable containers that can be moved to protected areas while maintaining the garden’s aesthetic appeal and functionality.
Set Up a Succulent Display Area
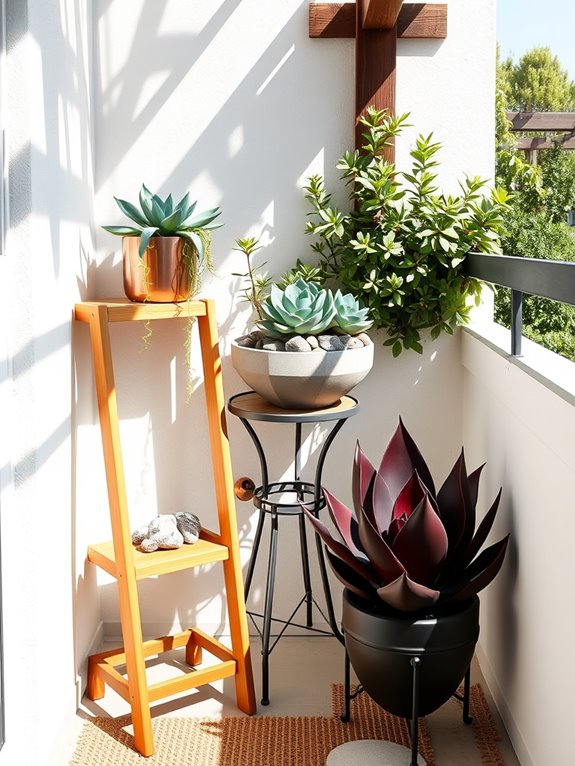
A succulent display area brings a touch of desert-inspired sophistication to your outdoor kitchen space, creating a striking visual centerpiece that requires minimal maintenance. Imagine a carefully curated collection of jade plants, echeverias, and sedums arranged in geometric patterns, their fleshy leaves showcasing nature’s artwork in subtle blue-greens, dusty purples, and warm terra cotta hues.
Architectural agaves and towering euphorbia add dramatic height variations, while cascading string of pearls and burro’s tail create soft, organic movement along the edges.
The display becomes even more enchanting when housed in a mix of contemporary and rustic containers, from sleek concrete planters to weathered copper vessels. Natural elements like smooth river rocks, crushed granite, and bleached driftwood complete the desert garden aesthetic, while strategically placed solar-powered accent lights create magical shadow plays during evening entertaining.
Essential Elements:
- Various succulent species (minimum 5-7 different types)
- Containers of different heights and materials
- Cactus/succulent potting mix
- Decorative rocks and pebbles
- Landscape fabric
- Drainage materials
- Plant stands or shelving
- Accent lighting
- Watering can with narrow spout
- Small gardening tools
Begin implementation by selecting a location that receives at least 6 hours of sunlight daily, preferably with some afternoon shade in hot climates. Arrange containers at varying heights using plant stands or built-in shelving, ensuring proper spacing for growth and maintenance access.
Layer containers from back to front, placing larger specimens like agaves or tall euphorbias in the background, medium-sized rosette-forming succulents in the middle, and trailing varieties at the edges. Ensure each container has adequate drainage holes and fill with specialized cactus mix.
Maintenance involves minimal watering (only when soil is completely dry), occasional fertilizing during growing season, and removal of dead leaves. Protection from excessive rainfall may be necessary in humid climates, so consider installing a clear awning or moving sensitive specimens under cover during wet periods.
Design Adaptations: For smaller spaces, focus on miniature varieties and wall-mounted containers to maximize vertical space. Combine succulents with herbs that share similar water requirements, such as lavender or rosemary, to create a dual-purpose display.
In areas with limited sunlight, opt for shade-tolerant succulents like Haworthia or Gasteria, and use mirrors or light-colored surfaces to reflect available light. For larger areas, create multiple themed vignettes or incorporate a dedicated propagation station to expand your collection over time.