
7 Garden Ideas for Miniature Gardens
When you place a tiny red door against the moss-covered trunk of your jade plant, you’re creating more than just a decoration—you’re building a miniature world of possibilities. You’ll find that these small-scale gardens offer endless creative options, from whimsical fairy hideaways to serene Japanese-inspired retreats. Whether you’re working with a vintage teacup or a shallow terra cotta bowl, your miniature garden can transform an ordinary windowsill or tabletop into an enchanting landscape that captures nature’s beauty in perfect miniature.
Contents
Selecting the Perfect Container and Location
Creating a miniature garden begins with choosing the perfect vessel to house your tiny botanical world. Picture an aged terra cotta pot with a weathered patina, or a vintage teacup whose delicate curves cradle a landscape in miniature. These small-scale containers become magical settings where diminutive plants like baby tears, miniature ferns, and tiny succulents create living tapestries that draw the eye and spark imagination.
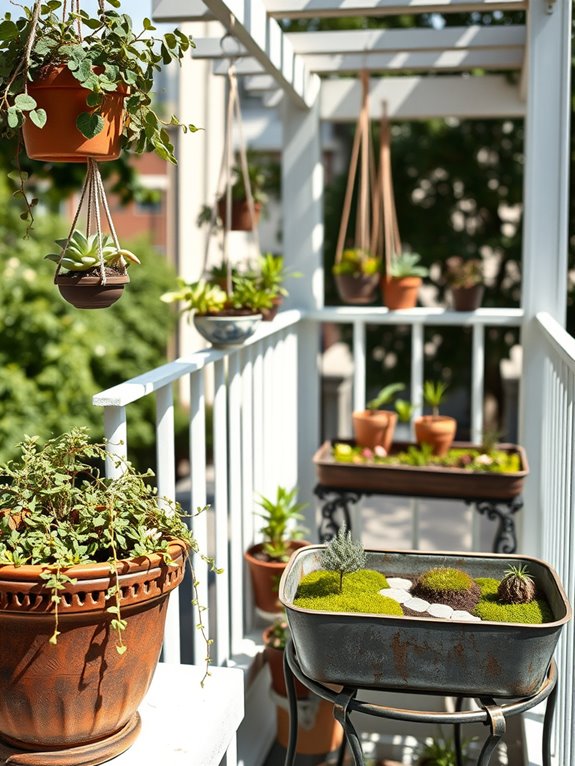
The location of your miniature garden sets the stage for its success and enjoyment. Whether nestled in a sunny kitchen windowsill, gracing an outdoor coffee table, or suspended from a pergola in hanging vessels, these pocket-sized gardens bring life to otherwise unused spaces. The container and placement work together to create an intimate vignette that invites closer inspection and provides a peaceful focal point in any setting.
Essential Elements:
- Container with drainage holes
- High-quality potting soil
- Small-scale plants
- Miniature decorative elements
- Pebbles or gravel for drainage
- Tiny garden tools
- Water-resistant sealant
- Location markers
- Plant markers
- Moss or ground cover
Selecting your container requires careful consideration of both practical and aesthetic factors. Choose a vessel at least 4-6 inches deep to accommodate root growth, ensuring proper drainage holes exist or can be added.
Apply waterproof sealant to wooden containers, and place a layer of pebbles at the bottom for drainage. Position the container where it will receive appropriate light for your chosen plants while remaining easily accessible for maintenance.
The location should match your plants’ light requirements – bright indirect light for most indoor miniature gardens, or filtered sun for outdoor displays. Consider protection from strong winds if placing outdoors, and ensure the supporting surface can bear the weight of the container when fully planted and watered.
Monitor the spot throughout different times of day to understand its microclimate before making your final decision.
For different spaces, adapt your container choice accordingly. Balconies can accommodate multiple small containers grouped together or one larger statement piece. Wall-mounted containers work well for narrow spaces, while deeper containers allow for more elaborate layered landscapes.
Consider using lightweight materials for upper-story locations, and remember that darker containers retain more heat, which can affect plant health in sunny spots.
Essential Plants for Miniature Gardens
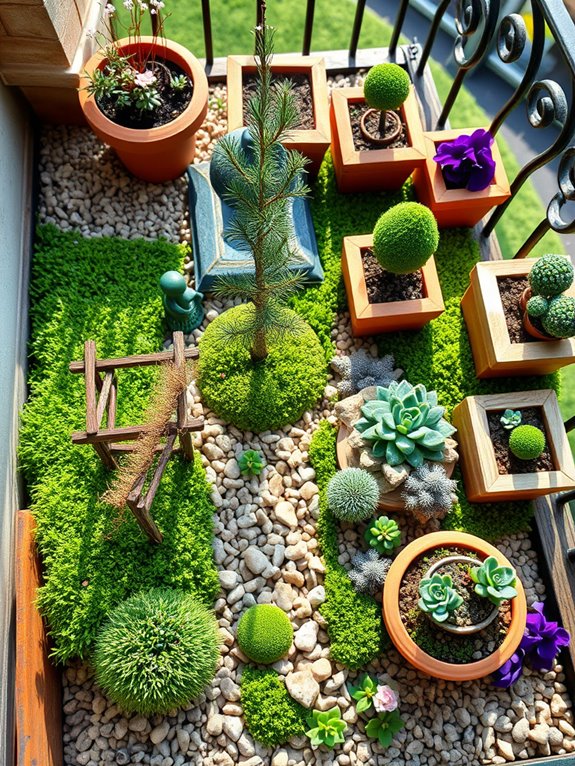
Miniature gardens come alive with carefully selected diminutive plants that create enchanting living landscapes in minimal space. Dwarf varieties of traditional favorites, like tiny creeping thyme, miniature fairy roses, and baby’s tears, form the foundation of these magical gardens. Each plant plays a vital role in establishing scale and proportion, working together to create an immersive world where moss becomes rolling hills and small-leaved varieties of ivy transform into climbing vines on miniature trellises.
The secret to a captivating miniature garden lies in selecting plants that naturally remain small or grow slowly, maintaining the garden’s delicate proportions over time. Ground-hugging sedums provide carpets of varying colors and textures, while miniature varieties of boxwood and cypress create perfect tiny topiaries and hedges. African violets and small ferns add depth and dimension, creating layers of interest that draw the eye through the diminutive landscape.
Essential Elements:
- Dwarf conifers (mugo pine, miniature cypress)
- Ground covers (Irish moss, baby’s tears)
- Miniature flowering plants (fairy roses, violets)
- Tiny succulents (sedums, echeverias)
- Small-leaved trailing plants (creeping thyme, wire vine)
- Dwarf shrubs (boxwood, holly)
- Miniature grasses
- Moss varieties
When implementing your miniature garden, begin by establishing different zones using varying heights of plants. Position the tallest specimens, like dwarf conifers, toward the back or center as focal points. Layer shorter plants in front, using ground covers to create the illusion of lawns or meadows. Maintain proper spacing between plants, accounting for minimal growth, and ensure all selections share similar water and light requirements for easier maintenance.
Design Tips: Consider the mature size of each plant when planning your layout, as even slow-growing varieties will eventually need pruning or replacement. For balcony gardens, use shallow containers with proper drainage and group plants with similar needs.
Small spaces benefit from vertical elements like miniature climbing plants on tiny trellises, while larger areas can incorporate multiple planting zones or themed garden rooms. Always select plants appropriate for your specific light conditions and climate zone, and remember that smaller containers will require more frequent watering to maintain optimal growing conditions.
Creating Tiny Pathways and Hardscaping
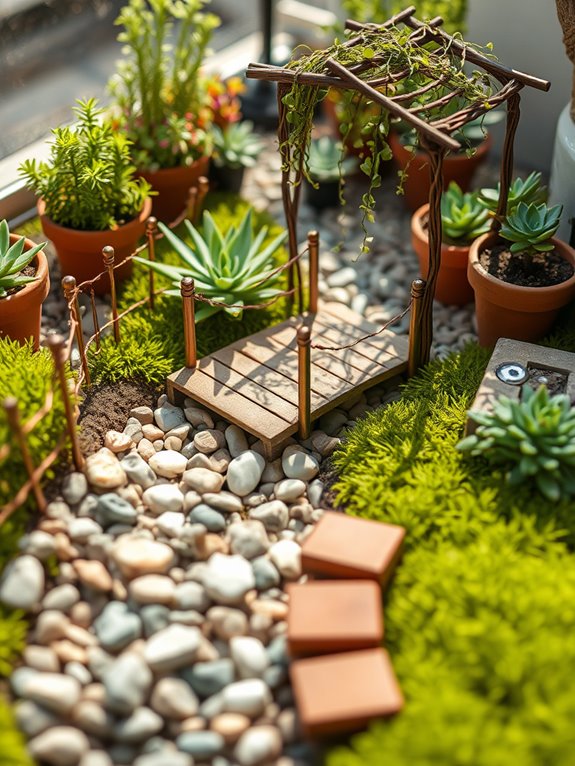
Winding through the miniature landscape, tiny pebble paths and diminutive stepping stones create an enchanting journey through your pocket-sized paradise. These meticulously crafted walkways, no wider than a finger’s width, lead visitors’ eyes past fairy-sized benches and around thumb-high topiaries, offering a sense of adventure and exploration within the confined space.
Miniature brick borders and delicate fencing made from twigs or decorative wire add structure and definition to the paths, making the garden feel like a masterfully planned tiny estate. The hardscaping elements transform simple plant arrangements into an organized miniature world, complete with scaled-down patios, bridges, and retaining walls.
Small stones carefully arranged into dry creek beds create the illusion of water features, while tiny arbors covered in creeping thyme or baby’s tears form magical entryways between different garden rooms. These architectural elements provide year-round interest and maintain the garden’s structure even when plants are dormant.
Key Elements:
- Fine gravel or crushed shells for paths
- Miniature stepping stones
- Tiny bricks or tiles
- Small wooden bridges
- Decorative pebbles
- Wire or twig fencing
- Miniature arbors
- Scale-appropriate edging materials
- Moss for groundcover
- Tiny furniture pieces
Begin your hardscaping by sketching a basic layout that includes main pathways and focal points. Layer the foundation with well-draining soil, then establish primary paths using fine gravel or crushed shells pressed firmly into place.
Create borders using small stones or miniature bricks, ensuring they’re proportional to the overall garden size. Position larger hardscaping elements like bridges or arbors first, then work outward with smaller details, maintaining consistent scale throughout.
For maintenance, regularly sweep paths clear of debris and adjust any shifted stones or elements after watering or weather events. Consider using landscape fabric beneath pathways to prevent weed growth and maintain clean lines.
Replace or refresh gravel annually to maintain crisp definition between planted areas and walking spaces. When adapting this style to different spaces, remember that scale is paramount – paths should typically be 1-2 inches wide for most miniature gardens, but can be adjusted proportionally for larger or smaller displays.
For balcony gardens, create raised pathways using different materials or colors to define spaces without adding height, and incorporate vertical hardscaping elements like tiny trellises to maximize limited space. Consider using lightweight materials like polymer clay or resin elements instead of stone when weight restrictions apply.
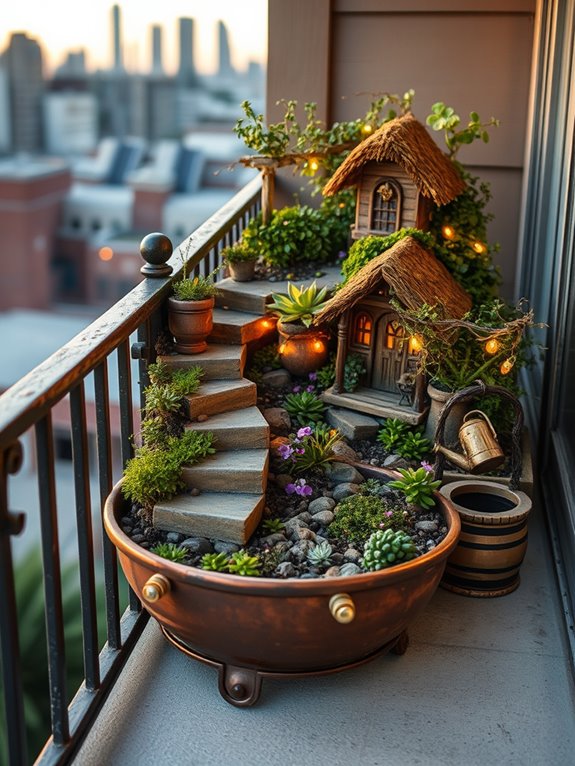
Adding Miniature Garden Accessories and Decor
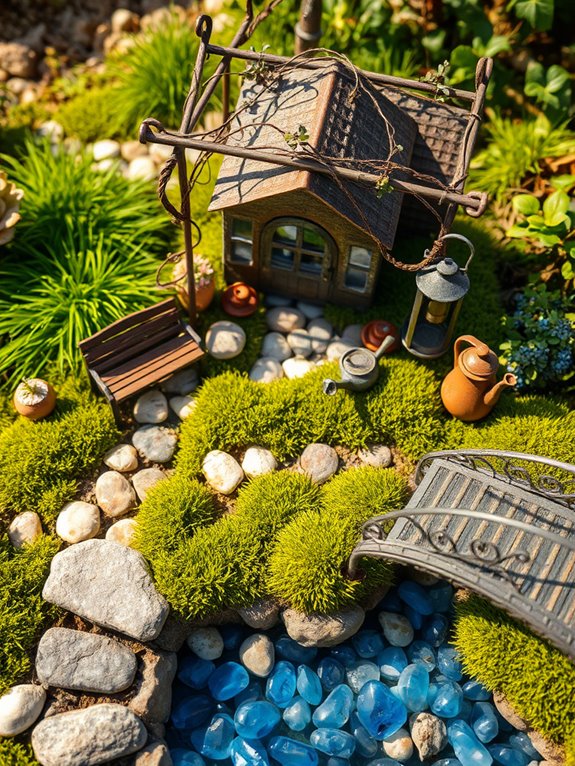
Miniature garden accessories and decor transform tiny landscapes into enchanting worlds filled with whimsy and wonder. Delicate fairy houses nestled among moss-covered stones, tiny wooden bridges spanning shallow pebble streams, and diminutive garden furniture crafted from natural materials create magical vignettes that capture the imagination. These carefully chosen elements work together to tell a story, whether it’s a quaint woodland cottage scene or a mystical fairy garden retreat.
The key to successful miniature garden decorating lies in maintaining proper scale and creating cohesive themed areas. Miniature arbors draped with tiny climbing vines, weathered metal lanterns casting soft shadows, and scaled-down garden tools leaning against miniature fences all contribute to the illusion of a complete tiny world. Each accessory should complement surrounding plants while maintaining proportional relationships that make the scene believable.
Essential Elements:
- Miniature houses or cottages
- Tiny furniture (benches, tables, chairs)
- Scaled pathways and stepping stones
- Small decorative fencing
- Miniature garden tools
- Tiny bridges and arbors
- Accent lighting (small lanterns)
- Decorative moss and pebbles
- Miniature figurines
- Small water features or mirrors
Begin arranging your miniature garden accessories by establishing a focal point, typically a structure like a fairy house or cottage. Create natural-looking paths leading to and from this central element using small stones or gravel. Position larger accessories first, then add smaller decorative elements to fill in spaces naturally. Leave room between items for plants to grow and ensure all pieces are securely anchored in the soil to prevent tipping or shifting.
When selecting and placing accessories, consider materials that can withstand outdoor conditions if the garden will be exposed to weather. Choose rust-resistant metals, weather-treated woods, and UV-resistant resins. Position delicate items where they won’t be damaged by watering or strong winds, and consider creating removable elements that can be brought inside during harsh weather.
Adaptation Tips: For smaller spaces, focus on vertical elements like tiny trellises or wall-mounted miniature planters to maximize space. Use mirrors strategically to create the illusion of depth and consider modular designs that can be rearranged seasonally. Choose lightweight materials for balcony gardens and ensure proper drainage to protect underlying structures. Remember to rotate accessories periodically to create fresh scenes and maintain interest throughout the year.
Designing Theme-Based Fairy Gardens
Theme-based fairy gardens transport viewers into enchanting miniature worlds where imagination knows no bounds. Delicate moss pathways wind between tiny cottages adorned with climbing vines, while diminutive furniture pieces nestled among dwarf plants create secret gathering spots for magical creatures. The careful selection of miniature flowers like thyme, baby’s tears, and alpine plants provides a lush backdrop that maintains the perfect scale for these whimsical landscapes.
The magic truly comes alive through thoughtful layering of elements, from the tiniest pebble streams to delicately crafted fairy doors positioned at the base of small woody plants. Strategic placement of miniature garden accessories like teeny lanterns, microscopic garden tools, and scaled-down birdbaths creates storytelling opportunities within the space. The addition of small-leaved groundcovers and compact flowering plants ensures year-round interest while maintaining the fairytale aesthetic.
Essential Elements:
- Miniature houses or cottages
- Tiny furniture pieces (chairs, tables, benches)
- Fairy figurines
- Diminutive garden accessories
- Dwarf or compact plants
- Moss varieties
- Miniature pathways
- Small-scale decorative stones
- Tiny water features
- Microscopic garden tools
- LED fairy lights
- Miniature fencing
Begin implementation by selecting a suitable container with adequate drainage and filling it with well-draining potting soil. Create different levels using small rocks and soil mounds to add visual interest and depth.
Position the largest elements first, such as fairy houses and any prominent plant specimens, then work outward with pathways and smaller decorative pieces. Establish clear focal points and ensure all elements maintain proper scale relationships with each other.
When designing a fairy garden for different spaces, consider vertical elements for smaller areas by incorporating tiered plantings or adding height with miniature trellises and climbing plants. For balcony gardens, use lightweight materials and ensure proper drainage solutions.
Consider creating themed sections within larger spaces, such as separate fairy neighborhoods or distinct garden rooms, each with its own character and story. Weather-resistant materials and proper plant selection for your specific climate will ensure longevity and minimize maintenance requirements.
Maintaining Your Mini Garden Ecosystem
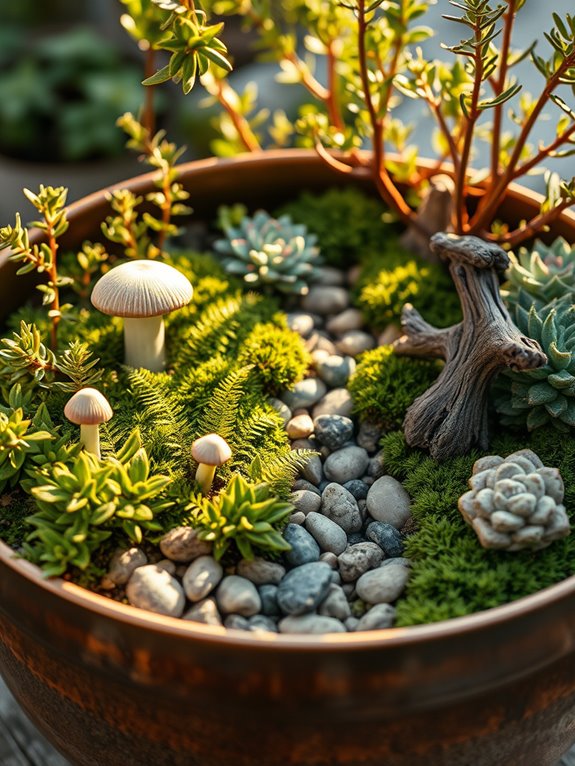
A miniature garden ecosystem is a delicate ballet of nature contained within a small, enchanting space. Tiny ground covers like Irish moss and baby tears create a lush carpet beneath diminutive trees like dwarf jade or miniature boxwood. Delicate ferns unfurl their fronds in shaded corners while miniature succulents add structural elements that mirror their full-sized counterparts in perfect proportion, creating a magical world in microcosm.
This living diorama comes alive with carefully chosen accessories that enhance the natural elements. Small pebble pathways wind through microscopic meadows, while tiny ceramic toadstools and weathered driftwood pieces add whimsical charm. The entire scene creates a self-sustaining environment where beneficial insects, moisture levels, and organic matter work in harmony to support this perfectly scaled ecosystem.
Key Elements:
- Miniature slow-growing plants
- Layer-appropriate soil mix
- Pebbles and sand for drainage
- Tiny decorative elements
- Micro-irrigation system
- Container with drainage holes
- Natural moss varieties
- Miniature garden tools
- pH testing kit
- Organic fertilizer
Creating a thriving mini ecosystem requires careful planning and precise execution. Begin by selecting a container with adequate drainage and filling it with a well-draining soil mix specifically formulated for miniature gardens.
Layer plants according to their growth habits, placing slower-growing specimens in prominent positions and faster-growing varieties where they can be easily trimmed. Establish a watering routine that maintains consistent moisture without oversaturation, and implement a quarterly fertilization schedule using diluted organic nutrients.
The key to long-term success lies in regular maintenance routines. Prune plants to maintain scale, remove spent blooms, and monitor for signs of pest problems. Create natural barriers between different plant types to prevent aggressive species from overwhelming their neighbors.
Install a simple irrigation system using medical tubing or specialized micro-drip components to ensure even water distribution.
When designing your mini ecosystem, consider the specific microclimate of your space. For sunny balconies, incorporate heat-tolerant plants and provide partial shade using miniature structures or larger companion plants.
In shadier locations, focus on woodland species and moisture-loving varieties. Scale your garden to your available space by selecting appropriate container sizes – even a teacup can become a complete ecosystem when properly planned.
Remember to include vertical elements for visual interest and to maximize growing space in any setting.
Seasonal Updates for Your Small-Scale Paradise
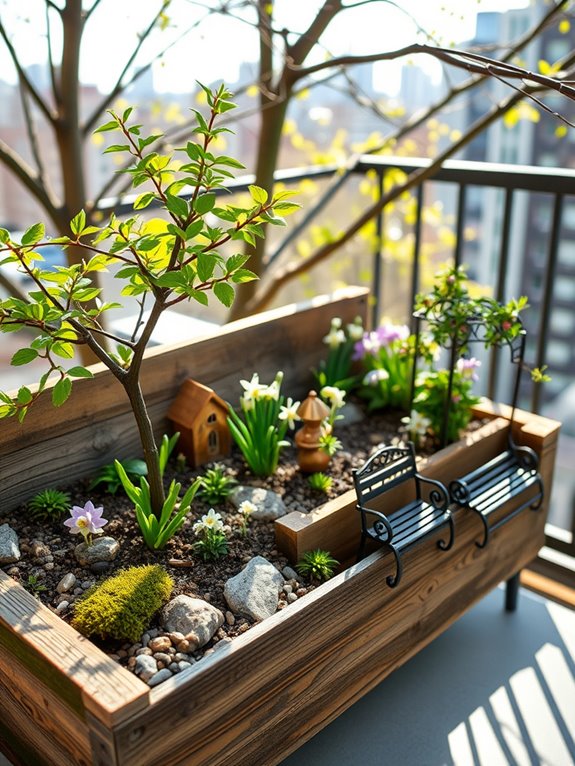
Transforming a miniature garden through the seasons creates an ever-changing display of natural beauty and wonder. As winter gives way to spring, tiny narcissus and crocus bulbs emerge, dotting the diminutive landscape with bursts of color.
Summer brings forth miniature roses and scaled-down versions of classic garden flowers, while autumn introduces small ornamental grasses and dwarf chrysanthemums that sway in the breeze. Each season offers unique opportunities to refresh and reimagine your pocket-sized paradise.
The magic of seasonal updates lies in creating distinct vignettes that capture the essence of each time of year. Spring might feature a tiny bird bath surrounded by miniature bleeding hearts, while summer showcases a fairy-sized gazebo draped in climbing miniature clematis.
Fall brings opportunities for tiny pumpkins and gourds nestled among scaled-down ornamental cabbages, and winter transforms the space with miniature evergreens dusted with artificial snow and diminutive holiday decorations.
Key Elements:
- Four sets of season-appropriate miniature plants
- Interchangeable decorative elements for each season
- Small-scale hardscaping materials (paths, walls)
- Miniature garden furniture and accessories
- Container with adequate drainage
- Quality potting soil
- Seasonal mulch options
- Compact pruning tools
- Storage solution for off-season items
To implement seasonal updates, start with a permanent foundation of hardy miniature plants that provide year-round structure, such as dwarf boxwood or tiny conifers.
Create designated areas within your miniature garden that can be easily modified, like small flower beds or container inserts that can be swapped out seasonally. Plan your transitions by preparing each season’s elements in advance, storing them carefully in labeled containers.
When designing for different spaces, consider vertical elements for smaller balconies by incorporating wall-mounted miniature gardens that can be seasonally updated.
Layer your plantings with taller specimens at the back and seasonal choices in the foreground. Remember to protect delicate decorative elements from harsh weather conditions and choose weather-resistant materials for permanent features.
Scale your seasonal updates to match your available space, focusing on quality over quantity in smaller areas.