
10 Garden Ideas for a Family-Friendly Yard
While you might think creating a family-friendly garden requires sacrificing style for safety, you’ll find that thoughtful design can deliver both. Your outdoor space can transform into an enchanting sanctuary where kids explore natural play zones, parents relax in cozy seating areas, and everyone enjoys edible gardens bursting with fresh herbs and berries. From soft boulders perfect for climbing to shallow water features that spark curiosity, these ten ideas will help you craft an outdoor paradise that grows with your family.
Contents
- 1 Create Natural Play Zones With Safe Materials
- 2 Design Wide, Easy-to-Navigate Pathways
- 3 Plant an Interactive Edible Garden
- 4 Install Child-Safe Water Features
- 5 Build Multi-Purpose Seating Areas
- 6 Establish Designated Sports and Activity Spaces
- 7 Incorporate Weather-Protected Gathering Spots
- 8 Add Sensory Garden Elements
- 9 Set Up Wildlife-Friendly Observation Areas
- 10 Organize Storage Solutions for Outdoor Toys
Create Natural Play Zones With Safe Materials
Natural play zones transform your garden into an enchanting wonderland where children can safely explore and imagine. Soft, rounded boulders nestle among cushioning ground covers like creeping thyme and Irish moss, creating stepping stone adventures without sharp edges. Gentle hills formed with soil and covered in sturdy grass provide natural climbing features, while clusters of sturdy ornamental grasses like fountain grass and feather reed grass create secret hideaways and whimsical tunnels.
A mixture of native plants and child-safe varieties adds both beauty and educational value to the space. Purple coneflowers, black-eyed susans, and butterfly bushes attract fascinating wildlife, while sturdy shrubs like boxwood and barberry can withstand enthusiastic play. Natural wood elements, such as smooth log segments and branch tepees, offer climbing opportunities while blending seamlessly with the garden’s organic feel.
Key Elements:
- Round stones and boulders
- Child-safe ground covers
- Grass-covered mounds
- Ornamental grasses
- Native flowering plants
- Sturdy shrubs
- Natural wood elements
- Soft mulch or rubber mulch
- Wide, clear pathways
- Edible plants (optional)
Creating safe play zones begins with proper spacing and clear sight lines. Position larger elements like boulders and climbing features at least 6 feet apart, with clear pathways between them. Install rubber mulch or wood chips at a depth of 6 inches beneath any climbing areas. When incorporating plants, choose specimens without thorns or toxic parts, and position them around the play features to create natural boundaries and exploration opportunities.
Maintenance involves regular safety checks of all climbing elements, keeping pathways clear, and trimming plants to maintain appropriate heights and shapes. Replace mulch annually and ensure proper drainage around play areas to prevent slippery conditions. Consider installing simple irrigation systems to maintain healthy plant growth while minimizing maintenance time.
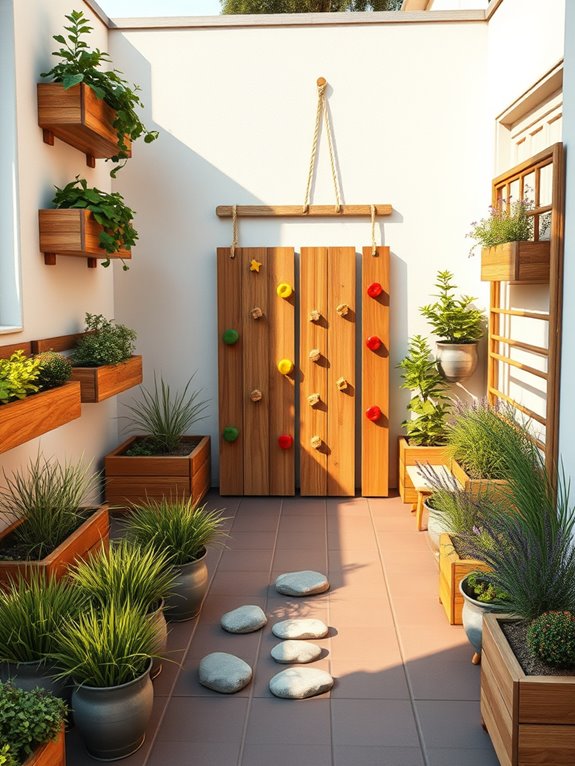
For smaller spaces or balconies, focus on vertical elements and container gardens. Use wall-mounted planters for trailing plants, create mini sensory gardens in containers, and incorporate child-sized furniture pieces. Safety surfaces can be created with interlocking rubber tiles, and climbing elements can be scaled down to hanging rope features or small stepping stones.
Always anchor any climbing elements securely and ensure weight limits are appropriate for your space’s structural capacity.
Wide, easy-to-navigate pathways transform a garden into an inviting wonderland that beckons family members of all ages to explore. Smooth flagstones laid in graceful curves create natural flowing lines through beds of colorful perennials, while crushed gravel paths bordered by lavender and thyme release gentle fragrances with each step. Solar-powered path lights nestled among ornamental grasses cast a warm glow at dusk, making evening strolls both magical and safe.
The pathways serve as more than just functional routes – they’re an integral part of the garden’s design aesthetic. Wider paths, at least 4-5 feet across, allow for side-by-side walking and easy wheelchair or stroller access. Natural materials like slate, brick, or permeable pavers add texture and character while complementing surrounding plantings of hardy shrubs and ground covers that spill slightly onto the path edges, softening the transitions.
Key Elements:
- Flagstones, pavers, or gravel for path surface
- Path edging materials (metal, stone, or plastic)
- Solar path lights
- Low-growing border plants
- Base materials (crushed stone, sand)
- Landscape fabric for weed prevention
- Drainage materials
- Stepping stones for secondary paths
- Path markers or focal points
Creating successful garden pathways starts with proper planning and preparation. Map out your paths using garden hoses to visualize flow and ensure gentle curves that feel natural. Excavate the path area to a depth of 4-6 inches, install landscape fabric to prevent weed growth, and add a solid base of crushed stone. Layer your chosen surface material, ensuring it’s level and properly compacted.
For gravel paths, use angular stones that lock together rather than round pebbles that shift underfoot. Install edging to keep materials contained and maintain clean lines between paths and planting areas. Consider incorporating resting spots along longer pathways by widening sections to accommodate benches or creating small pocket gardens.
Ensure proper drainage by grading paths slightly above the surrounding soil level and incorporating a slight crown or slope to direct water runoff. When designing your pathways, consider future maintenance needs and local climate conditions. In snowy regions, plan paths wide enough for snow removal equipment.
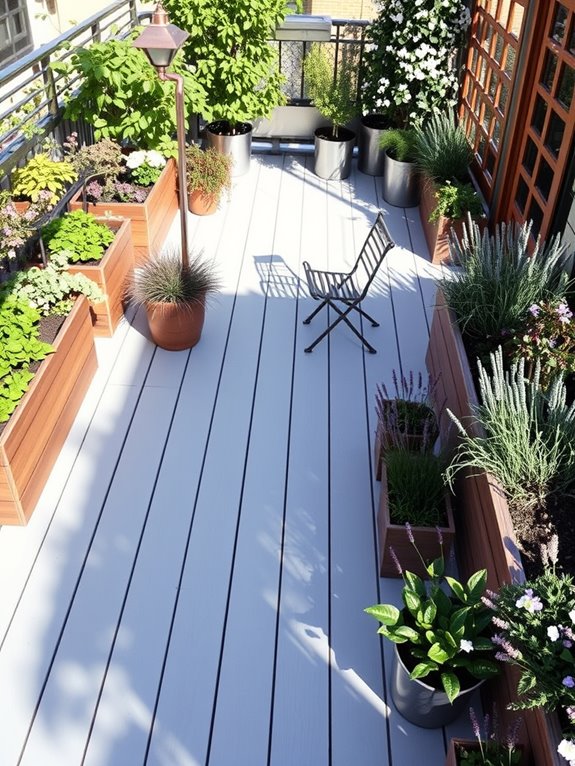
For smaller spaces, create the illusion of wider paths by using lighter-colored materials and keeping adjacent plantings low and well-trimmed. In tight spaces like urban gardens or balconies, use contrasting materials to define walking areas, and incorporate container gardens that can be easily moved to maintain clear passage.
Plant an Interactive Edible Garden
Transform your backyard into a living classroom and snack bar with an interactive edible garden that delights all the senses. Imagine meandering paths lined with strawberry patches where children can hunt for ruby-red treasures, or tall sunflowers creating natural archways that lead to secret vegetable plots.
Cherry tomato vines climb colorful trellises, while fragrant herbs like mint, basil, and lavender release their enchanting scents with every gentle touch.
The garden comes alive with purpose-built elements that invite exploration and learning. Raised beds at different heights accommodate gardeners of all ages, while child-sized tools hang from a painted tool station.
Weather-resistant plant markers feature both pictures and names, making it easy for young gardeners to identify their growing treasures. A small potting station with various containers allows for hands-on planting activities, while dedicated picking baskets encourage harvesting adventures.
Key Elements:
- Raised garden beds of varying heights
- Child-safe garden tools and storage
- Plant identification markers
- Colorful trellises and supports
- Wide, accessible paths
- Harvesting baskets
- Potting station
- Mix of fruits, vegetables, and herbs
- Vertical growing systems
- Water source or irrigation system
- Seating areas
- Storage for gardening supplies
Creating an interactive edible garden starts with thoughtful layout planning. Position taller plants like corn and sunflowers on the north side to prevent shading shorter plants.
Install raised beds with paths wide enough for wheelbarrows and multiple gardeners. Group plants by watering needs and growing seasons, keeping frequently harvested items like herbs and cherry tomatoes easily accessible near the main paths.
Incorporate vertical growing elements for vining plants to maximize space and create visual interest.
The garden should be maintained with family participation in mind. Establish a regular schedule for basic tasks like watering, weeding, and harvesting.
Create designated areas for composting and tool storage that are easily accessible but safe for children. Consider installing an automatic irrigation system to ensure consistent watering, especially during busy periods.
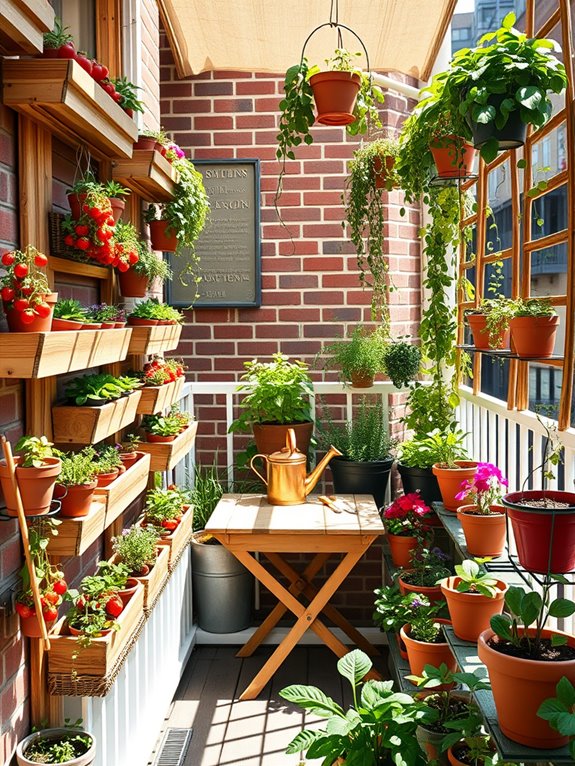
For smaller spaces or balcony gardens, focus on container gardening with dwarf varieties and vertical growing systems.
Use wall-mounted planters, hanging baskets, and stackable containers to maximize growing space. Choose compact varieties of favorite vegetables and fruits, and incorporate mobile elements that can be rearranged as needed.
Ensure all containers have proper drainage and are secured safely, particularly in windy locations. Consider self-watering containers for easier maintenance and create a rotation plan to maximize harvests in limited space.
Install Child-Safe Water Features
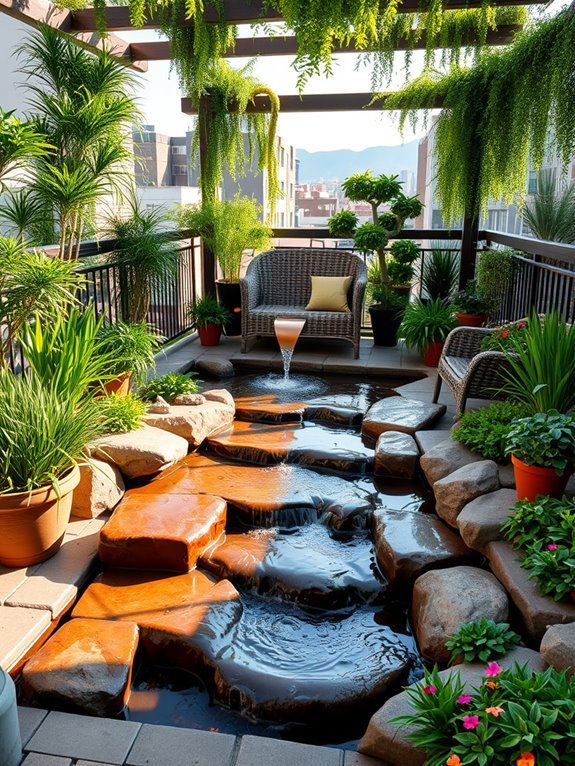
Imagine stepping into a whimsical garden space where gentle water sounds create a soothing atmosphere, yet every feature has been thoughtfully designed with child safety in mind. Shallow rock pools bordered by smooth river stones cascade into each other, creating musical ripples while maintaining a depth of just a few inches. Colorful water-loving plants like dwarf cattails, Japanese iris, and water mint surround these features, their leaves dancing in the breeze while providing natural barriers around water areas.
The water features are seamlessly integrated into the landscape using gently sloping edges and non-slip surfaces, eliminating sudden drops or hidden depths. Solar-powered pumps create engaging bubble fountains that rise just inches above the water’s surface, delighting young eyes while keeping splash zones contained. Natural filtration systems using aquatic plants not only maintain water clarity but also create educational opportunities about ecosystem balance.
Key Elements:
- Shallow, terraced water basins
- Smooth, rounded river rocks
- Non-slip surface materials
- Child-safe water pumps
- Aquatic plants for natural filtration
- Motion-activated lighting
- Protective border plants
- Seating areas with clear sight lines
- Weather-resistant safety covers
- Drainage system
Implementation begins with proper excavation and installation of a reliable liner system, ensuring all water containment areas maintain a maximum depth of 4-6 inches. Create graduated levels using preformed plastic basins or carefully shaped concrete forms, incorporating plenty of shallow areas where children can safely interact with the water.
Install recirculating pumps in easily accessible locations, concealed within decorative rock formations, and ensure all electrical components are properly grounded and protected. Position seating areas strategically to allow constant supervision while maintaining the garden’s aesthetic appeal.
Layer plants around the water features in height-graduated arrangements, with taller species like ornamental grasses at the back and low-growing water-loving plants near the edges. Regular maintenance should include checking water quality, cleaning filters, and ensuring all safety features remain secure.
When adapting this design for different spaces, consider vertical water walls for smaller yards or self-contained tabletop fountains for balconies. In cold climates, incorporate heating elements or plan for seasonal drainage. Always check local regulations regarding water features, and consider installing motion sensors or alarms for added security.
Position water features away from play equipment to prevent slippery conditions, and use child-proof covers during non-supervised times.
Build Multi-Purpose Seating Areas

Multi-purpose seating areas transform an ordinary garden into a vibrant outdoor living space where families can gather, relax, and create lasting memories.
Picture a cozy corner featuring a mix of built-in wooden benches adorned with weather-resistant cushions in cheerful patterns, surrounded by fragrant lavender and ornamental grasses that sway gently in the breeze. Stone pathways wind through clusters of colorful perennials, leading to various seating zones that blend seamlessly with the natural landscape.
Each seating area serves as its own mini-retreat, with pergolas draped in climbing roses providing shade and privacy. Oversized floor cushions and ottoman-style garden stools offer flexible seating options, while raised planters double as casual seating walls, their edges lined with cascading plants like creeping thyme and trailing verbena.
Strategic lighting from solar-powered lanterns and string lights creates an enchanting atmosphere as day turns to dusk.
Key Elements:
- Built-in wooden benches
- Weather-resistant cushions
- Modular outdoor furniture
- Pergola or shade structure
- Stone or brick pathways
- Raised planter boxes
- Solar lighting fixtures
- String lights
- Floor cushions and ottomans
- Low-maintenance perennials
- Climbing vines
- Container plants
Start by identifying natural gathering points in your garden, considering sun exposure and traffic flow.
Install the largest seating structure first, such as a pergola with built-in benches, which will serve as the anchor point. Create secondary seating areas using a mix of permanent and movable elements, ensuring each zone has its own character while maintaining visual cohesion through consistent materials or color schemes.
Layer in plants around the seating areas, selecting species that provide privacy, shade, and seasonal interest without requiring extensive maintenance.
Design Tips:
Consider incorporating storage solutions within built-in seating to keep cushions and garden tools protected from weather.
For smaller spaces or balconies, use fold-down benches and stackable furniture that can be tucked away when not in use. Choose multi-functional pieces like storage ottomans or planter-bench combinations to maximize space efficiency.
Install adequate drainage beneath permanent seating structures and use rot-resistant materials to ensure longevity in outdoor conditions.
Establish Designated Sports and Activity Spaces
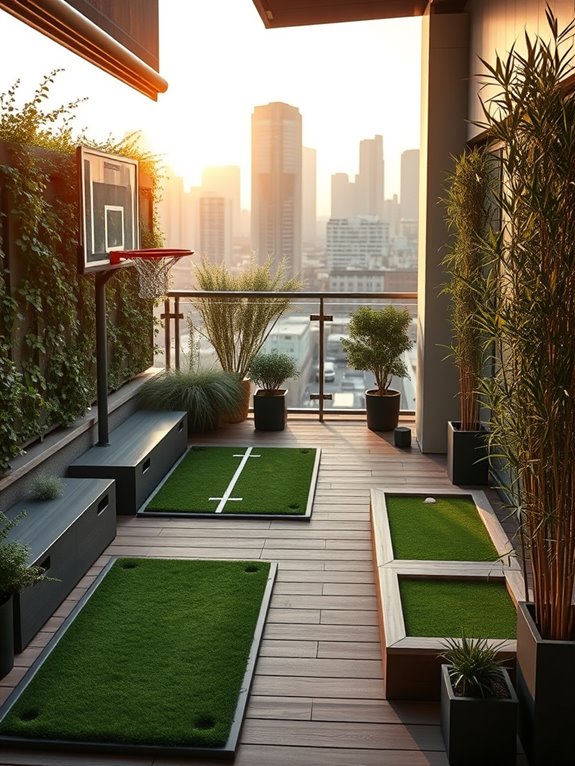
Transform your backyard into an energetic haven where sports and play take center stage while maintaining aesthetic appeal. A dedicated activity space features a lush, durable grass playing field bordered by low-maintenance perennials like ornamental grasses and Russian sage, creating natural boundaries without compromising safety.
Strategic placement of weather-resistant benches and storage solutions blend seamlessly with the landscape, while climbing vines on sturdy trellises add vertical interest and create natural dividers between different activity zones.
The space comes alive with thoughtful touches like painted court lines subtly integrated into a paved area, surrounded by cushioning groundcover plants such as creeping thyme or sedum. Decorative elements include solar-powered ground lighting for evening play, colorful wind spinners that mark boundary lines, and artistic ball storage solutions that double as garden sculptures.
The overall design maintains a balance between functionality and natural beauty, ensuring the space remains inviting for both active play and relaxation.
Key Elements:
- Durable grass varieties (Kentucky Bluegrass or Bermuda)
- Impact-resistant ground surfaces
- Sports equipment storage solutions
- Boundary markers and court lines
- Safety padding or soft landscaping
- Adequate lighting
- Seating areas
- Weather-resistant play equipment
- Shade structures
- Drainage systems
Creating an effective sports and activity space requires careful planning of zones and surfaces. Start by mapping out distinct areas for different activities, ensuring proper spacing and safety buffers between zones.
Install appropriate surfaces for each activity: synthetic turf or hardy grass for general play, rubber mulch under equipment, and permeable pavers for court games. Incorporate proper drainage systems beneath all surfaces to prevent water accumulation and maintain usability year-round.
Position shade structures strategically to protect players during peak sun hours while ensuring they don’t interfere with gameplay.
Design your space with flexible elements that can adapt to changing family needs over time. Consider removable court markings, portable equipment, and modular play structures that can be reconfigured.
For smaller yards, focus on multi-purpose areas that can accommodate various activities through clever storage solutions and convertible features. Balcony spaces can incorporate mini putting greens, wall-mounted basketball hoops, or compact climbing walls, while ensuring all elements are securely anchored and meet safety requirements for elevated spaces.
Incorporate Weather-Protected Gathering Spots
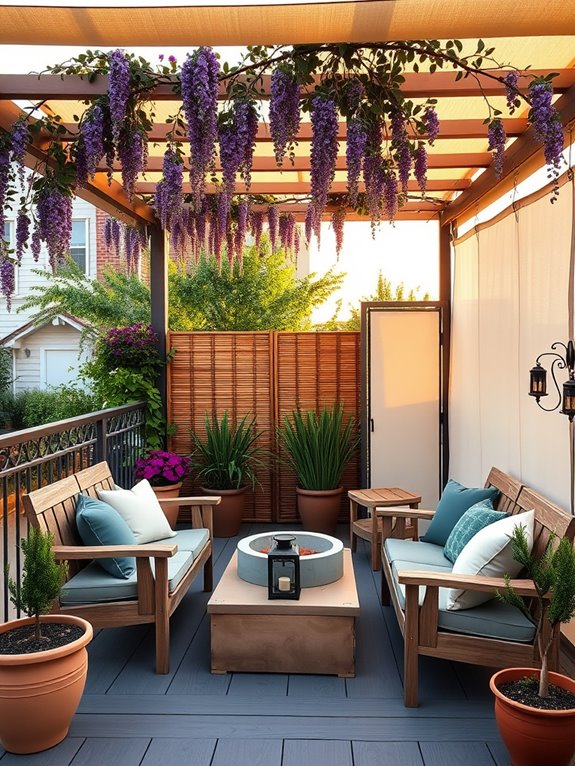
Transform your outdoor space into a cozy retreat with weather-protected gathering spots that invite year-round enjoyment. Picture a charming pergola draped with weather-resistant fabric and climbing vines like wisteria or hardy jasmine, creating a natural canopy that filters sunlight and shields from light rain. Comfortable all-weather seating arranged beneath the structure invites family gatherings, while potted plants like decorative grasses and evergreen shrubs frame the space with living beauty.
Strategic placement of retractable awnings or sail shades extends over a paved patio area, complemented by weather-resistant outdoor curtains that can be drawn for additional protection from sun or wind. String lights weave through the overhead structure, while container gardens filled with seasonal blooms like petunias and geraniums add splashes of color. A small outdoor fireplace or heating element extends the usability of this space well into cooler seasons.
Essential Elements:
- Pergola or gazebo structure
- Weather-resistant fabric covers
- Retractable awnings or sail shades
- All-weather furniture
- Outdoor curtains
- Climbing vines
- Container plants
- Lighting elements
- Heating source
- Weather-resistant flooring
- Drainage system
Begin implementation by selecting a level area that receives partial sun and offers convenient access from the house. Install a solid foundation using weather-resistant decking or pavers, ensuring proper drainage to prevent water accumulation.
Construct the overhead structure using treated lumber or weather-resistant materials, incorporating proper support for climbing plants and shade elements. Position seating areas to maximize views of the garden while maintaining protection from prevailing winds.
Layer the weather protection elements strategically, starting with permanent overhead structures and adding adjustable elements like curtains and awnings. Create zones within the space for different activities – perhaps a dining area and a separate conversation nook.
Install proper lighting at various heights for ambiance and functionality, and establish irrigation systems for container plants that may be difficult to reach.
Design Adaptation Tips: For smaller spaces, consider wall-mounted retractable awnings or umbrella alternatives that don’t require permanent structures. Vertical gardening elements can maximize limited space while providing additional privacy and protection.
Choose multi-functional furniture pieces with built-in storage, and opt for containerized plants that can be easily moved to follow sun patterns or make room for gatherings. In windy locations, ensure all elements are properly secured and consider wind-breaking features like decorative screens or strategic plantings.
Add Sensory Garden Elements
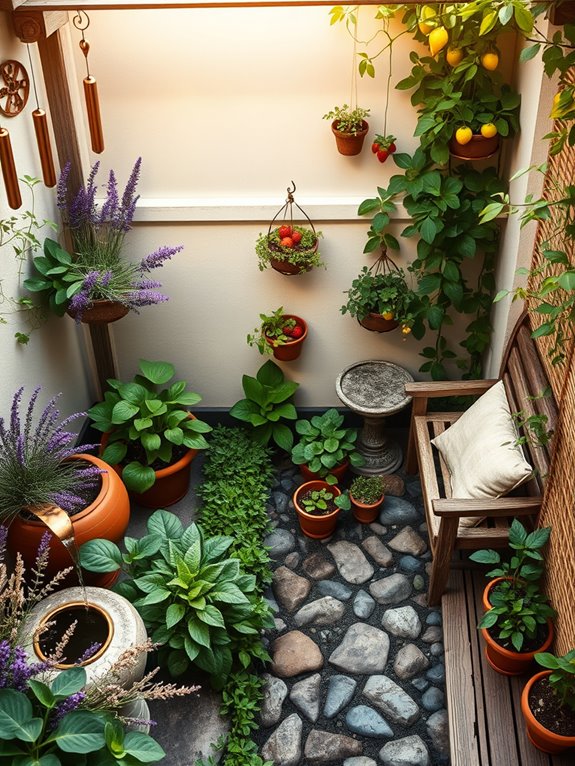
A sensory garden bursts with life and engagement, inviting both children and adults to explore nature through all five senses. Fragrant lavender and mint mingle with the soft, fuzzy leaves of lamb’s ear, while ornamental grasses create gentle rustling sounds in the breeze. Wind chimes tinkle melodically overhead, and colorful flowers like echinacea and black-eyed susans attract butterflies and hummingbirds, creating a vibrant, dynamic space that changes throughout the seasons.
Textural pathways alternate between smooth stones, rough mulch, and springy moss, offering different tactile experiences underfoot. Edible elements like strawberry patches and cherry tomatoes provide tasty discoveries, while aromatic herbs like rosemary and thyme release their scents when touched. A small water feature adds both sound and reflective qualities, creating a peaceful atmosphere that engages multiple senses simultaneously.
Key Elements:
- Fragrant plants (lavender, herbs, jasmine)
- Textural plants (lamb’s ear, ornamental grasses)
- Edible plants (strawberries, herbs, cherry tomatoes)
- Wind chimes or bells
- Water feature
- Various pathway materials
- Comfortable seating
- Bird feeders
- Butterfly-attracting flowers
- Tactile decorative elements (smooth stones, rough bark)
Implementation begins with creating distinct zones for different sensory experiences, connected by winding paths that encourage exploration. Place taller aromatic plants like lavender and rosemary along borders, with lower-growing textural plants in the foreground. Install the water feature where it’s visible from seating areas but safely away from small children. Group plants with similar water needs together, and position edible elements within easy reach of both adults and children.
Position wind chimes where they’ll catch the prevailing breeze, and integrate various pathway materials in a logical flow that doesn’t create tripping hazards. Include resting spots where visitors can pause to fully experience the garden’s sensory elements. Maintain clear boundaries between different areas using natural divisions like changes in ground material or height variations.
When adapting a sensory garden for different spaces, consider vertical elements for smaller areas: wall-mounted herbs, hanging chimes, and climbing vines maximize limited square footage. For balconies, use containers of varying heights and materials to create texture and interest, and choose compact varieties of sensory plants. Focus on creating multi-functional elements – for instance, a small water feature that also serves as a bird bath, or seating with built-in planters for aromatic herbs.
Set Up Wildlife-Friendly Observation Areas
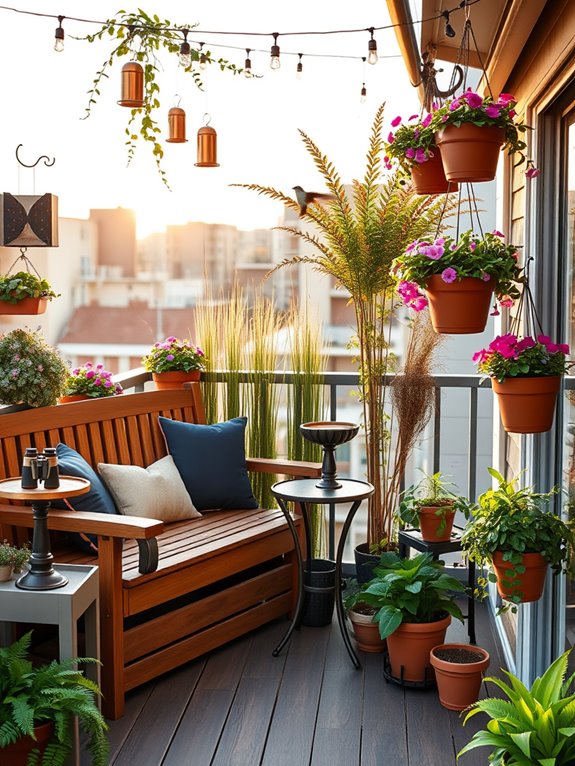
Transform your yard into a thriving wildlife sanctuary where children and adults can observe nature’s fascinating creatures up close. Native flowering plants like coneflowers, black-eyed susans, and butterfly bush create splashes of color while attracting butterflies and hummingbirds.
Strategic placement of bird feeders, birdbaths, and natural perches made from fallen branches adds visual interest while providing essential resources for local wildlife.
A meandering path leads to a cozy observation nook featuring comfortable seating nestled among tall ornamental grasses and flowering shrubs.
This hidden retreat offers the perfect vantage point for wildlife watching while maintaining enough distance to avoid disturbing animal visitors. Natural materials like stone pavers and wooden benches blend seamlessly with the landscape, while weatherproof storage keeps binoculars and field guides close at hand.
Key Elements:
- Native flowering plants
- Bird feeders and houses
- Water features or birdbaths
- Comfortable seating area
- Natural screening plants
- Storage for observation equipment
- Identification guides and markers
- Camera-friendly viewing angles
- Natural perches and landing spots
- Wildlife-safe food sources
Begin by selecting a quiet corner of your yard that receives moderate sun and offers clear sightlines to wildlife activity areas.
Install taller plants and structures at the back of the space, creating a protective backdrop while maintaining visibility. Position water features within view but away from seating to prevent splashing.
Layer plants of varying heights to provide multiple feeding and resting zones for different species.
Maintain discrete pathways that allow quiet approach to viewing areas, using soft materials like mulch or stepping stones to minimize noise.
Consider installing a small covered structure or pergola to provide shelter during observation sessions while supporting climbing plants that offer additional wildlife habitat.
For smaller spaces or balconies, focus on container gardens with native plants and compact water features.
Use vertical space with wall-mounted bird feeders and climbing vines. Position observation seating against walls or railings to maximize available space while maintaining clear viewing angles.
Consider using removable or folding furniture to create flexibility in tight areas, and select plants that provide maximum wildlife benefit in minimal space.
Organize Storage Solutions for Outdoor Toys

A well-organized outdoor toy storage area can transform a chaotic family yard into an inviting play paradise. Natural wood storage benches nestle against garden walls, their weathered finish complementing climbing jasmine and cheerful marigolds that add pops of color around the storage zone.
Woven willow baskets peek out from under pergola-covered shelving units, creating an organic feel while keeping sports equipment, garden toys, and outdoor games readily accessible yet aesthetically pleasing.
The storage solutions blend seamlessly with the garden landscape through strategic placement of ornamental grasses like fountain grass and Japanese forest grass, which partially screen the storage areas while adding movement and texture. Large decorative containers double as both planters and toy storage, featuring bright zinnias and petunias on top while housing beach toys and garden tools below.
Metal hooks disguised by climbing morning glories provide hanging storage for bikes and other equipment.
Key Elements:
- Weather-resistant storage benches
- Built-in shelving units
- Decorative storage containers
- Wall-mounted hooks and racks
- Woven baskets and bins
- Screening plants and ornamental grasses
- Pergola or covered storage area
- Child-safe latches and closures
- Non-slip storage surfaces
- Drainage solutions
Implementation begins with mapping out designated zones for different types of toys and equipment, ensuring each area is easily accessible to children while maintaining garden aesthetics.
Install weather-resistant storage solutions against existing walls or fences, incorporating built-in benches and shelving units at appropriate heights for children. Create clear pathways between storage areas and play spaces, using permeable materials like gravel or stepping stones to prevent mud during wet weather.
Essential Extras:
Consider incorporating chalkboard-painted surfaces on storage units for labeling and creative play. For smaller spaces, utilize vertical storage solutions with tiered shelving and wall-mounted organizers.
Ensure all storage solutions have proper drainage and ventilation to prevent mold and rust. In balcony gardens, opt for collapsible storage solutions and multi-functional furniture pieces that can be easily stored during inclement weather.
Remember to include a maintenance schedule for regular cleaning and organization of storage areas to keep the space functional and appealing throughout the seasons.