
7 Garden Ideas for Busy Families
You don’t need endless hours to create a beautiful, family-friendly garden that brings joy to your busy life. Whether you’re juggling soccer practice, meal prep, or demanding work schedules, there’s a way to design an outdoor space that practically takes care of itself. From low-maintenance native plants to automated watering systems, these seven garden ideas will transform your yard into a vibrant retreat without monopolizing your precious family time. Let’s explore how you can make your garden work smarter, not harder.
Contents
Choose Low-Maintenance Native Plants
A low-maintenance native garden bursts with natural beauty while celebrating your local ecosystem. Vibrant butterflies dance between clusters of purple coneflowers and black-eyed susans, while native grasses sway gracefully in the breeze. The informal arrangement of drought-resistant plants creates a relaxed, prairie-inspired aesthetic that seamlessly connects your outdoor space to the surrounding landscape.
Stepping stones wind through masses of compact shrubs and groundcover, revealing new views at every turn. Hardy natives like butterfly weed, yarrow, and little bluestem provide year-round interest with minimal care, transforming from spring blooms to striking seed heads and winter textures. The garden comes alive with visiting birds and beneficial insects, turning your yard into a thriving habitat that practically maintains itself.
Key Elements:
- Native perennial flowers suited to your region
- Indigenous ornamental grasses
- Local shrubs and groundcovers
- Natural stone paths or stepping stones
- Mulch for moisture retention
- Rain barrel or efficient irrigation system
- Garden edging or borders
- Native trees for shade (optional)
- Bird bath or shallow water feature
- Bench or seating area
Begin by researching plants native to your specific region and climate zone. Group plants with similar water and sunlight needs together, placing taller species toward the back and shorter ones in front.
Create defined planting beds with clean edges, and apply a thick layer of mulch to suppress weeds and retain moisture. Install a simple irrigation system or arrange plants so that those with higher water needs are closest to your water source.
Once established, native plants require minimal maintenance beyond occasional pruning and dividing every few years. Remove spent blooms if desired, but consider leaving seed heads for winter interest and bird food.
Annual mulching and monthly weeding sessions should be sufficient to keep the garden looking tidy.
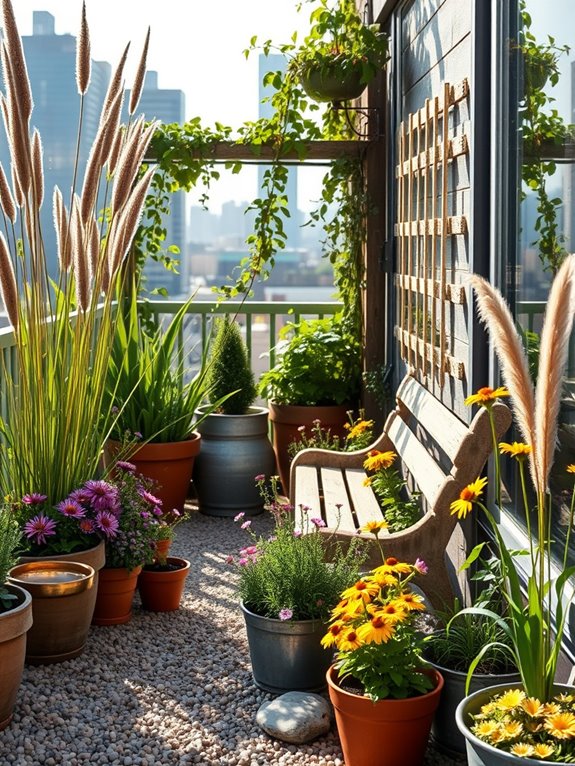
For smaller spaces or balconies, focus on compact native species in containers. Use vertical elements like native vines on trellises, and select dwarf varieties of traditional native plants.
Consider creating themed mini-gardens, such as a butterfly container garden or a native grass collection. Ensure proper drainage and use high-quality potting soil mixed with native soil to maintain the proper growing environment for indigenous plants.
Create a Mulched Play Area
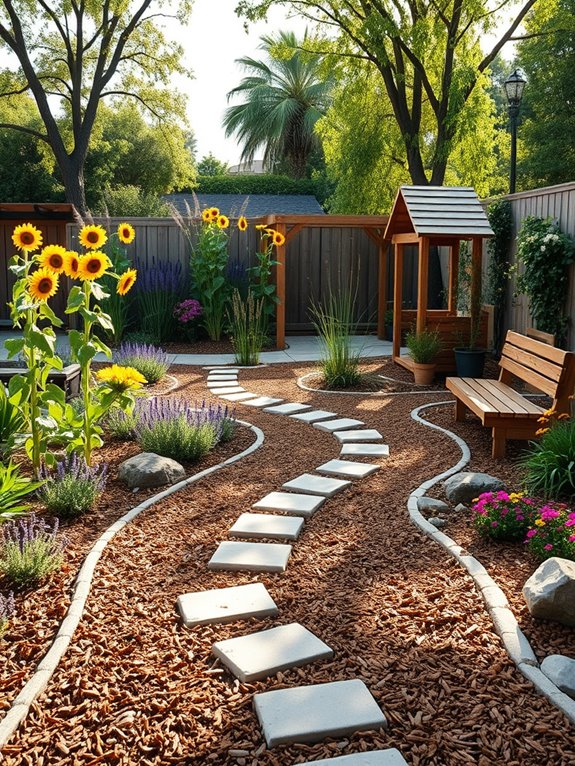
Transform your backyard into a whimsical play paradise with a mulched area that combines safety, beauty, and adventure. Natural wood mulch creates a soft, springy surface beneath towering sunflowers, climbing vines, and robust butterfly bushes that form living walls around the play space.
Ornamental grasses sway gently in the breeze, creating secret hideaways where children can let their imaginations soar while staying within sight of watchful parents. Stone pathways wind through the mulched terrain, connecting different play zones while drought-resistant plants like lavender and sage release calming scents with every step.
Curved garden borders featuring rainbow-colored zinnias and black-eyed susans add visual interest while defining the space. Strategic placement of evergreen shrubs provides year-round structure and creates natural boundaries that make the area feel like a special sanctuary.
Key Elements:
- Premium wood mulch (6-inch depth)
- Weather-resistant border materials
- Child-safe plants and flowers
- Stepping stones or pavers
- Climbing structures
- Storage solutions for toys
- Shade elements
- Seating areas
- Drainage system
Implementation starts with proper ground preparation, removing existing grass and weeds, then installing landscape fabric to prevent unwanted growth. Create defined borders using pressure-treated lumber or natural stone, ensuring adequate depth for mulch containment.
Layer premium playground-grade mulch at least 6 inches deep, focusing on high-impact areas beneath play equipment. Install stepping stones in meandering patterns to create paths that encourage exploration while preventing mulch displacement.
Position larger plants and structures along the perimeter, working inward with progressively shorter plants. Consider sight lines to maintain proper supervision while creating engaging spaces for discovery. Incorporate storage solutions like weather-resistant bins or benches that double as seating and toy storage.
Design Tips: For smaller spaces, utilize vertical gardening techniques with climbing plants and wall-mounted play elements. Select compact varieties of ornamental grasses and dwarf shrubs for space efficiency.
Install proper drainage to prevent mulch washout during heavy rains, and plan for annual mulch replenishment to maintain proper depth. Consider incorporating permeable surfaces in high-traffic areas to minimize maintenance and extend the life of the play space.
Install an Automatic Irrigation System
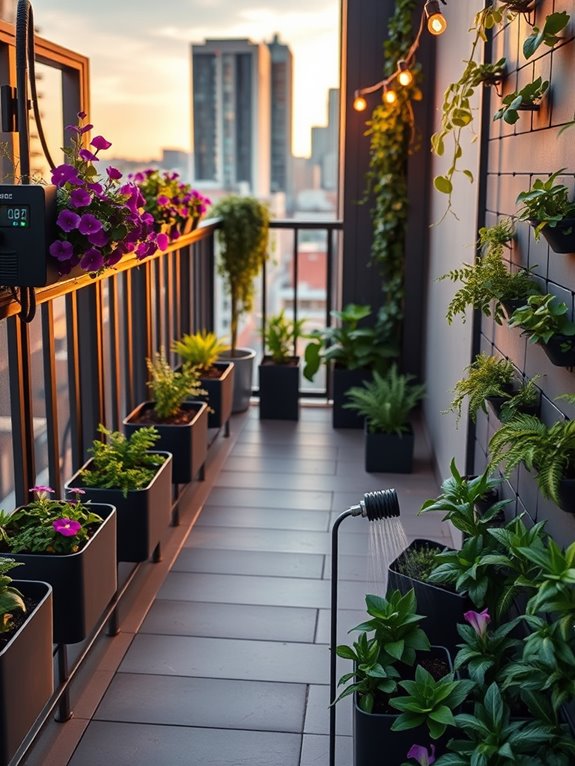
Transform your garden into a self-sustaining oasis with an automatic irrigation system that brings life-giving water to your plants with perfect timing and precision. Lush flower beds burst with vibrant blooms, while perfectly hydrated vegetable gardens produce abundant harvests – all without the daily commitment of hand watering. The systematic arrangement of drip lines and sprinkler heads creates an invisible network of care beneath your garden’s surface, allowing plants to thrive even during your busiest seasons.
Your garden maintains its vitality through carefully timed watering cycles, creating a consistently healthy environment where deep-rooted perennials and delicate annuals flourish side by side. The gentle mist of adjustable sprayers nurtures hanging baskets and container gardens, while efficient drip lines deliver water directly to the roots of larger shrubs and trees, eliminating waste and preventing water spots on foliage.
Key Elements:
- Smart controller with weather sensors
- Main water supply connection
- Backflow preventer
- Filter system
- Pressure regulator
- Zone valves
- PVC main lines
- Flexible distribution tubing
- Drip emitters
- Spray heads
- Rain sensors
- Timer system
- Moisture sensors
Start by mapping your garden’s layout, dividing it into hydrozones based on plant water needs and sun exposure. Install the main controller near a power source, connecting it to your water supply with appropriate backflow prevention. Run main lines underground, branching into smaller distribution tubes that connect to various watering devices – drip emitters for ground-level plants, micro-sprayers for delicate flowers, and adjustable sprinkler heads for lawn areas.
Program different zones to water at optimal times, typically early morning or evening, adjusting duration and frequency based on seasonal needs. Design considerations should include future garden growth, incorporating extra capacity in your system for additional planting areas.
For balcony gardens, consider installing a compact controller with multiple ports for container plants, using specialized micro-tubing systems that can be discretely mounted along railings or walls. Include a rain sensor to prevent overwatering during wet weather, and consider adding soil moisture sensors for ultra-precise water management.
Remember to install shut-off valves at key points for easy maintenance and system modifications.
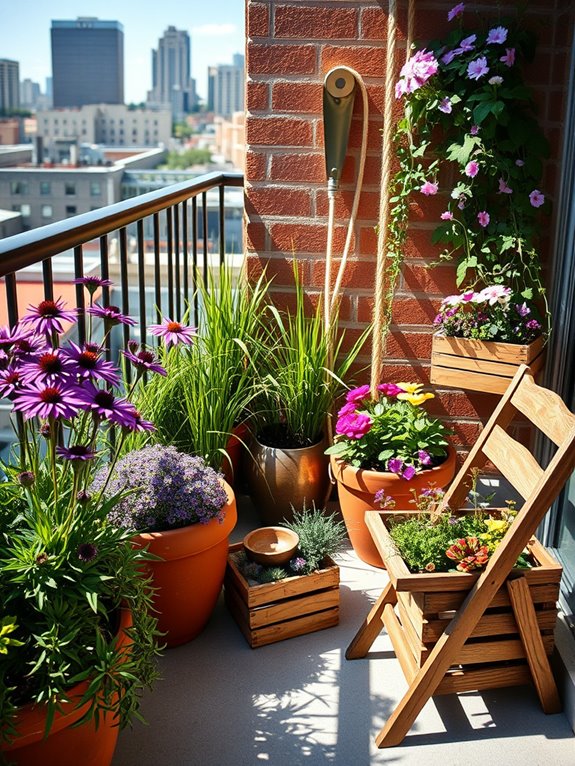
Design Container Garden Zones
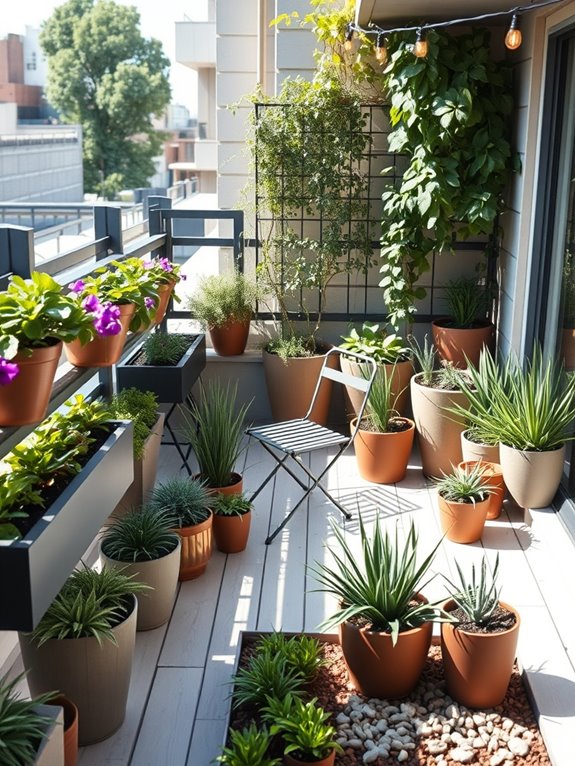
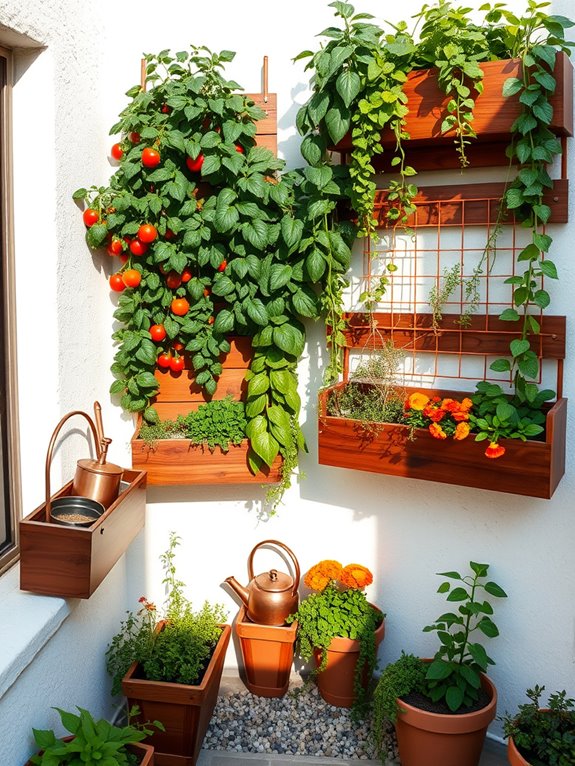
Transform your outdoor living space into an organized oasis with thoughtfully designed container garden zones that bring structure and beauty to busy family life. Imagine stepping onto your patio to find a harmonious arrangement of colorful pottery filled with herbs, vegetables, and flowers, each grouped into distinct areas that serve different purposes. Tall ceramic containers housing tomatoes and pole beans create natural dividers, while lower planters burst with compact herbs and salad greens, all within easy reach for quick harvest during meal preparation.
Terra cotta pots filled with cascading petunias and geraniums add vibrant splashes of color, while sleek modern containers showcase ornamental grasses and drought-resistant succulents. These carefully planned zones transition smoothly from one to another, creating mini garden rooms that invite exploration and provide functional spaces for both cultivation and relaxation. Children can have their own designated growing area with sturdy plastic containers perfect for hands-on learning about plants.
Essential Elements:
- Containers of varying heights and materials
- Plant supports and trellises
- Irrigation system or self-watering containers
- Weather-resistant furniture for seating zones
- Child-safe planters and tools
- Storage solutions for gardening supplies
- Lighting for evening enjoyment
- Plant markers and zone labels
- Decorative stones or mulch
- Mobile container platforms or dollies
Start by mapping your available space and identifying zones based on sunlight, accessibility, and purpose. Position larger containers along the perimeter to create natural boundaries, then arrange medium-sized planters in clusters according to plant needs and maintenance requirements.
Install an automatic drip irrigation system connecting all containers, ensuring consistent watering despite busy schedules. Create clear pathways between zones using weather-resistant pavers or gravel, making each area easily accessible for maintenance and enjoyment.
Consider incorporating these practical adaptations: For smaller balconies, utilize vertical space with wall-mounted planters and stackable containers. Maximize corner spaces with triangular planters, and choose multi-functional furniture with built-in planting areas.
For wind protection, install removable screens or use heavier containers on exposed balconies. Remember to position frequently harvested plants closer to entry points and reserve harder-to-reach spots for low-maintenance perennials.
Plant a No-Mow Meadow Garden
Transform your outdoor space into a dreamy meadow garden where wildflowers dance in the breeze and butterflies drift lazily from bloom to bloom. Native grasses like feather reed and blue fescue create a soft, undulating base, while colorful perennials including coneflowers, black-eyed susans, and yarrow add splashes of purple, yellow, and pink throughout the natural-style landscape.
Stone pathways wind through the gentle wilderness, offering peaceful moments of discovery and connection with nature. This low-maintenance approach captures the untamed beauty of natural meadows while eliminating the need for regular mowing. The mix of flowering plants provides year-round interest, from spring bulbs to summer blooms and autumn seed heads that glisten with morning frost.
Rustic elements like weathered wood benches, bird baths, and locally-sourced boulders complete the organic feel, creating an enchanting retreat that practically maintains itself.
Key Elements:
- Native grasses (feather reed, blue fescue, switchgrass)
- Wildflowers (coneflower, black-eyed susan, yarrow, butterfly weed)
- Spring bulbs (daffodils, crocus)
- Natural stone pathways
- Weathered wood seating
- Bird bath or water feature
- Large rocks or boulders
- Butterfly-attracting plants
- Native perennials
Start by removing existing turf grass and preparing the soil with organic matter. Plant taller grasses and perennials toward the back of the space, with medium-height plants in the middle and shorter species in front. Create meandering pathways using stepping stones or gravel to define different areas and provide access for maintenance.
Allow plants to self-seed and spread naturally, only removing aggressive species that might take over. Maintain the meadow garden by cutting back dead growth in early spring and removing invasive weeds as needed. Annual mowing in late winter helps manage growth and prevent woody plants from taking hold. Water deeply but infrequently to encourage deep root growth, and avoid fertilizing, as native plants thrive in lean soil conditions.
For smaller spaces or balconies, create a mini-meadow using containers of different heights. Choose dwarf varieties of native grasses and compact perennials, and incorporate vertical elements like climbing vines on trellises. Focus on a few key species rather than trying to include everything, and use lightweight containers that can be easily moved.
Consider incorporating herbs like thyme and oregano, which provide both visual interest and practical value while maintaining the meadow garden aesthetic.
Build Raised Garden Beds
A collection of beautifully crafted raised garden beds transforms an ordinary backyard into an organized and productive growing space. Rich cedar planks form elegant rectangular borders filled with dark, fertile soil that rises above the surrounding ground, creating natural pathways between abundant vegetable plots and herb gardens. Tomato vines climb upward on sturdy trellises, while leafy lettuce, compact bush beans, and fragrant basil create a tapestry of textures and colors within each bed’s borders.
The elevated design brings gardening to a comfortable working height, eliminating the need to bend and stoop while tending to plants. These structured growing spaces offer clean lines that complement both modern and traditional home designs, while the organized layout makes it simple to rotate crops and maintain separate growing zones. Flowers like marigolds and nasturtiums add bright splashes of color along the edges, attracting beneficial insects and creating a welcoming environment for both gardeners and visitors.
Key Elements:
- Weather-resistant lumber (cedar or pressure-treated)
- Galvanized screws and corner brackets
- Quality topsoil and compost mix
- Landscape fabric
- Irrigation system or soaker hoses
- Plant supports and trellises
- Garden tools
- Mulch materials
- Plant markers
- Pathway materials
Building raised beds starts with selecting a sunny location and laying out the bed dimensions using stakes and string. Standard beds should be 4 feet wide to allow easy reach from both sides, with lengths varying based on available space.
Install landscape fabric beneath the beds to prevent weed growth, then construct frames using weather-resistant lumber and secure corners with brackets. Fill beds with a mixture of quality topsoil, compost, and organic matter, creating a rich growing medium that drains well while retaining moisture.
Position taller plants along the northern side of beds to prevent shading shorter plants, and install irrigation systems before planting. Create paths between beds wide enough for wheelbarrow access, using materials like wood chips, gravel, or stepping stones to prevent mud and provide stable footing. Regular maintenance includes adding compost annually, checking irrigation systems, and repairing any damaged boards or hardware as needed.
For smaller spaces or balcony gardens, consider constructing narrower beds (2-3 feet wide) or using modular designs that can be reconfigured as needed. Vertical growing elements like trellises and stackable planters maximize growing space in compact areas.
Choose dwarf varieties of vegetables and fruits specifically bred for container growing, and incorporate self-watering systems to reduce maintenance needs. Building beds with wheels or temporary foundations allows for mobility when needed, while ensuring stability during the growing season.
Add Weather-Resistant Outdoor Seating
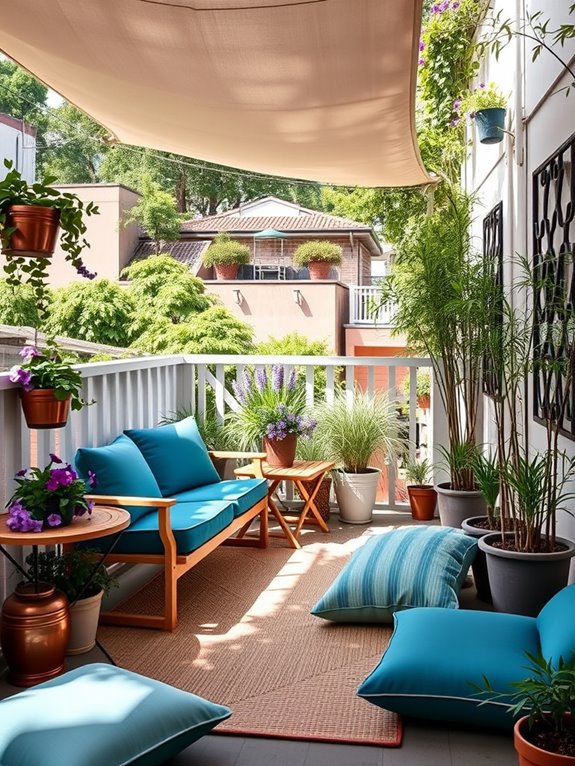
Transform your garden into a cozy outdoor living room with strategically placed weather-resistant seating that invites family gatherings and peaceful moments amid nature.
Picture deep-cushioned wicker sofas and sturdy teak benches nestled between flowering shrubs and ornamental grasses, creating intimate conversation areas sheltered by the gentle sway of Japanese Maples and climbing jasmine.
Solar-powered string lights draped overhead add a magical touch as dusk settles, while potted lavender and rosemary release their soothing fragrances.
The seating arrangement flows naturally with your garden’s landscape, incorporating built-in bench seating along retaining walls and clustering weather-resistant armchairs around a rustic coffee table.
Colorful throw pillows in water-resistant fabrics add splashes of personality, while nearby container gardens overflow with seasonal blooms, creating a living backdrop that changes throughout the year.
A pergola overhead provides partial shade and support for climbing roses or wisteria, completing this outdoor sanctuary.
Essential Elements:
- Weather-resistant furniture (teak, powder-coated aluminum, or all-weather wicker)
- Waterproof cushions and pillows
- Built-in seating options
- Outdoor coffee tables or side tables
- Solar lighting
- Container plants
- Shade structure (pergola, umbrella, or shade sail)
- Weather-resistant storage solutions
- All-weather floor cushions or poufs
- Outdoor rugs made from synthetic materials
Begin implementation by identifying natural gathering spots in your garden, considering sun exposure and traffic flow.
Create a primary seating area on a level surface, ideally on a patio or deck, and anchor it with an outdoor rug.
Position larger furniture pieces first, ensuring adequate space for movement, then layer in smaller seating options and accent tables.
Install your shade structure before adding lighting elements and container plants.
The key to maintaining your outdoor seating area lies in selecting truly weather-resistant materials and implementing proper storage solutions.
Clean furniture regularly with appropriate cleaners, store cushions in weather-proof containers during severe weather, and ensure proper drainage beneath furniture to prevent water damage.
Consider installing a French drain system if the area tends to collect water.
Design Tips: For smaller spaces, opt for stackable or folding furniture that can be easily stored.
Wall-mounted fold-down tables and benches work well for balconies, while modular furniture pieces allow flexibility in arrangement.
Consider vertical gardening elements to maximize green space without sacrificing seating area, and use multi-functional pieces like storage benches or planters with built-in seating.
For wind-prone areas, select heavier furniture pieces or secure lighter ones with discrete anchors.