
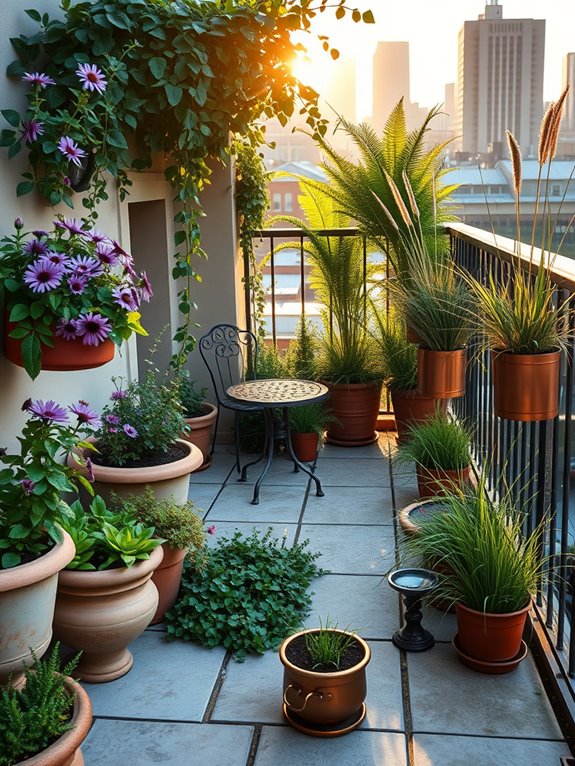
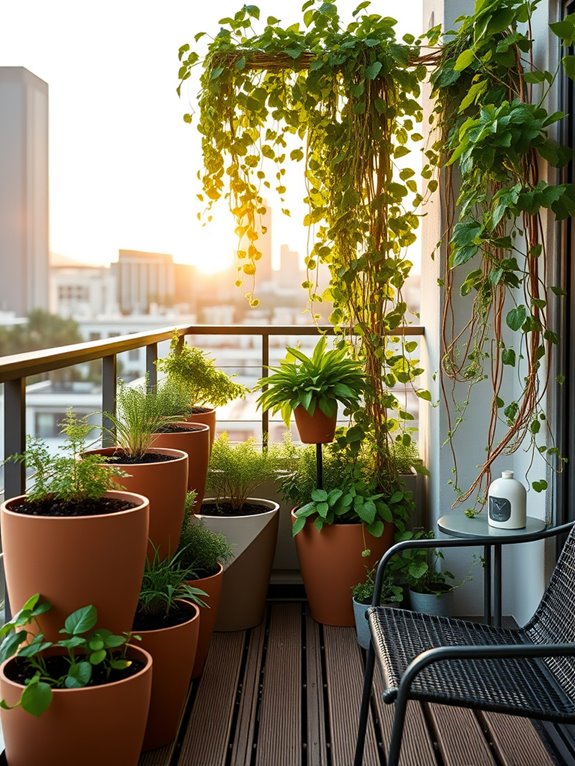
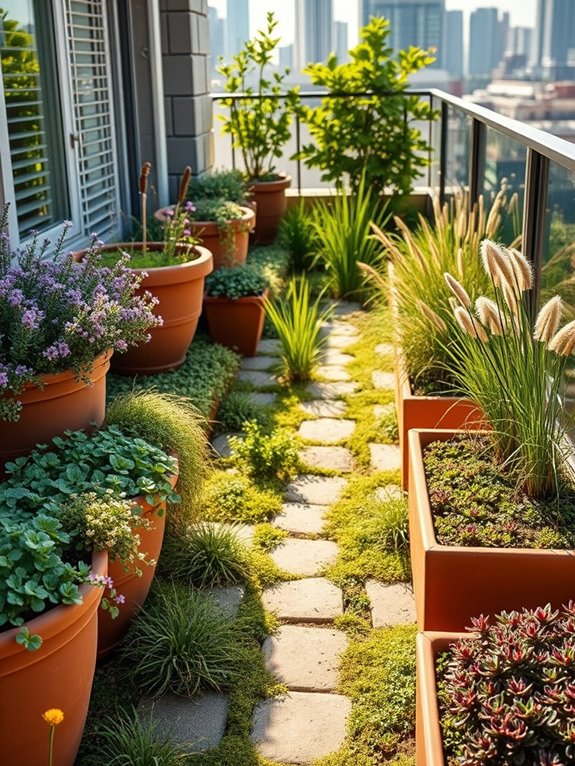
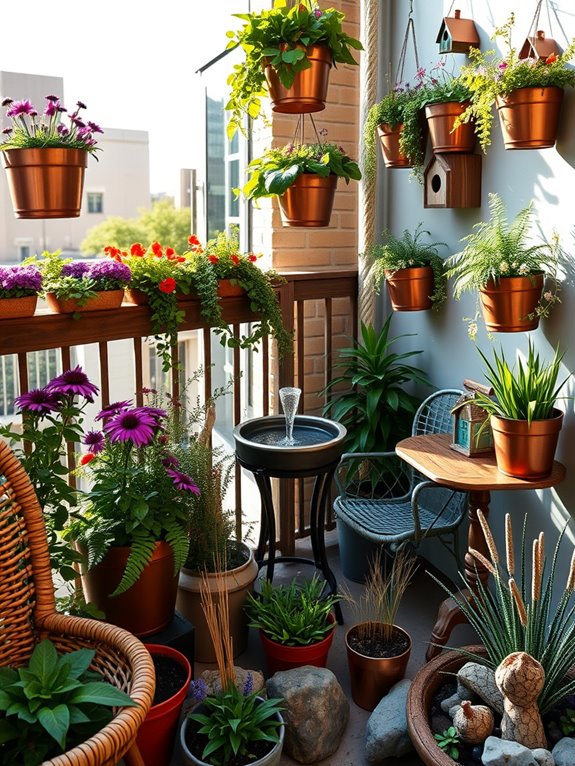
8 Garden Ideas for a Sustainable Lawn
Studies show that traditional lawns consume up to 60% of residential water usage, making them one of the least sustainable features of modern homes. You’ll find that transforming your yard into an eco-friendly oasis isn’t just good for the environment—it’s also easier on your wallet and schedule. From drought-resistant ground covers to smart irrigation systems, there’s a world of creative solutions waiting to help you build a lawn that thrives with minimal resources and maximum impact.
Contents
- 1 Choose Native Plants for Your Region
- 2 Install a Smart Irrigation System
- 3 Replace Traditional Grass With Eco-Friendly Alternatives
- 4 Create Wildlife-Friendly Zones
- 5 Design a Rain Garden
- 6 Incorporate Natural Fertilizers and Composting
- 7 Add Ground Cover Plants to Reduce Water Needs
- 8 Establish Low-Maintenance Garden Borders
Choose Native Plants for Your Region
Transform your yard into a thriving celebration of local flora by embracing the natural beauty of native plants that have evolved perfectly for your region. Picture a dynamic landscape where tall prairie grasses sway in the breeze alongside clusters of vibrant wildflowers, creating a tapestry of colors that shift with the seasons.
Regional varieties like purple coneflowers, black-eyed susans, and native ferns create layers of texture while providing essential habitat for local butterflies, birds, and beneficial insects. The garden becomes a living portrait of your region’s natural heritage, with each plant telling a story of adaptation and resilience.
Low-growing native groundcovers spread naturally between stepping stones, while indigenous shrubs offer structure and year-round interest. The space feels both wild and intentional, with informal pathways weaving through drifts of native perennials that bloom in succession, ensuring continuous color and life throughout the growing season.
Key Elements:
- Native grasses of varying heights
- Regional wildflowers
- Indigenous shrubs and trees
- Natural stone pathways
- Local groundcover species
- Water feature using local rock
- Native vine species
- Regional mulch materials
- Local pollinator plants
- Bird-attracting berry producers
Begin implementation by researching plants native to your specific region through local extension offices or native plant societies. Create a base map of your space, noting sun exposure and drainage patterns.
Plant in layers, starting with larger native shrubs and trees as anchors, then add medium-height perennials in groups of odd numbers for natural-looking drifts. Fill in with lower-growing species and groundcovers, allowing space between plants for natural spread. Incorporate curved pathways to create a sense of discovery and divide the space into manageable planting zones.
Design Tips: Consider mature plant sizes and seasonal changes when planning your layout. For small spaces or balconies, focus on compact native species and utilize vertical space with indigenous vines and cascading plants.
Container gardens can successfully host native plant communities when proper soil depth and drainage are provided. Remember that native plants often require less maintenance once established, but initial watering and weeding are crucial for success.
Plan for at least three seasons of interest by selecting plants with varying bloom times and attractive seed heads or winter structure.
Install a Smart Irrigation System
A smart irrigation system transforms an ordinary lawn into a model of modern efficiency, where carefully placed sprinkler heads emerge like technological flowers, orchestrating a precise water ballet across your landscape. The sleek control panel, discreetly mounted near your home, works in harmony with moisture sensors scattered throughout the garden, creating an invisible network that responds to your plants’ exact needs while conserving precious water resources.
Beneath the surface, a web of water-efficient drip lines delivers hydration directly to plant roots, eliminating waste and preventing water spots on foliage. This sophisticated system creates a consistently lush, green space that maintains its vibrancy even during challenging weather conditions, all while reducing water consumption by up to 50% compared to traditional irrigation methods.
Key Elements:
- Smart controller with WiFi capability
- Rain sensors
- Soil moisture sensors
- Weather monitoring station
- Zone-specific sprinkler heads
- Drip irrigation lines
- Automatic shut-off valves
- Flow meters
- Pressure regulators
- Smart phone app interface
Installing a smart irrigation system begins with a thorough site analysis to determine different watering zones based on sun exposure, soil type, and plant requirements.
Map out your yard’s dimensions and create a detailed irrigation plan, identifying optimal locations for sprinkler heads, drip lines, and sensors. Install the main controller in a protected area with reliable WiFi access, then systematically lay out the irrigation infrastructure, connecting each component to create distinct watering zones.
The system should be programmed to account for seasonal changes, local water restrictions, and specific plant needs. Regular maintenance includes checking for leaks, cleaning filters, and adjusting sprinkler heads to ensure optimal coverage.
Calibrate sensors periodically and update the system’s software to maintain peak efficiency. For adaptation to different spaces, consider using container-specific drip systems for balconies or small yards.
Multiple micro-zones can be created for varied plant needs, and vertical gardens can be accommodated with specialized drip lines. In areas with water restrictions, incorporate grey water integration capabilities and rain barrels into the system design.
Remember to check local regulations regarding irrigation system installation and consider professional installation for complex setups requiring electrical connections.
Replace Traditional Grass With Eco-Friendly Alternatives
Transform your traditional grass lawn into a vibrant tapestry of eco-friendly alternatives that dance with life and color throughout the seasons. Low-growing thyme creates a fragrant carpet in purple and pink hues, while hardy sedums add clusters of star-shaped flowers in warm yellows and crisp whites. Native wildflowers sway gently in the breeze, attracting butterflies and bees, while ornamental grasses add texture and movement with their feathery plumes.
This sustainable landscape weaves together clover patches that remain lush and green with minimal water, moss gardens that thrive in shady spots, and drought-resistant groundcovers that spread their tendrils across the earth. Natural stepping stones and gravel pathways wind through the diverse plantings, creating an enchanting journey through your yard while reducing the total area requiring maintenance.
Key Elements:
- Low-growing thyme varieties (creeping, woolly, mother-of-thyme)
- White clover or microclover
- Native wildflowers suitable for your region
- Ornamental grasses (fescue, sedge)
- Moss varieties for shaded areas
- Stepping stones or pavers
- Gravel or crushed stone
- Drought-resistant groundcovers
- Sedum varieties
- Edge restraints or borders
Begin the transformation by removing existing grass in sections, ensuring proper soil preparation with organic matter and appropriate drainage. Layer cardboard over remaining grass areas, then add a mix of topsoil and compost.
Plant larger specimens first, such as ornamental grasses, followed by groundcovers and low-growing plants. Install pathways and stepping stones early in the process, using them as natural borders between different plant groupings. Water deeply but infrequently during the establishment period to encourage deep root growth.
When designing your eco-friendly lawn alternative, consider your local climate and soil conditions. For smaller spaces or balconies, focus on container plantings of native grasses and compact groundcovers.
Choose plants with similar water requirements and group them together. In areas with high foot traffic, incorporate more hardscaping elements and sturdy groundcovers. Remember to check local regulations regarding lawn alternatives and maintain clear boundaries with neighboring properties.
Create Wildlife-Friendly Zones
Transform your outdoor space into a vibrant sanctuary where butterflies dance among swaying native flowers and birds hop merrily between thoughtfully placed feeders and baths. Clusters of purple coneflowers, black-eyed susans, and wild bergamot create waves of color throughout the seasons, while berry-producing shrubs like elderberry and serviceberry provide both visual interest and natural food sources for local wildlife.
Stone pathways weave through the garden, leading to small meditation spots where one can observe nature’s daily theater. The atmosphere shifts with each passing breeze as tall ornamental grasses rustle and sway, creating natural movement and shelter for small creatures. Fallen logs and stacked stone walls serve double duty as artistic elements and crucial habitat for beneficial insects and small mammals.
The garden comes alive with the gentle sounds of trickling water from a solar-powered fountain, which attracts birds and provides drinking water for pollinators while creating a peaceful backdrop for human visitors.
Essential Elements:
- Native flowering plants (minimum 5 varieties)
- Berry-producing shrubs
- Water feature or bird bath
- Natural stone pathways
- Brush piles or log features
- Multiple bird feeders
- Ornamental grasses
- Dense shrub coverage
- Pollinator houses
- Rock gardens
Begin implementation by mapping your space into distinct zones: feeding areas, water features, and dense coverage areas. Install the water feature first, positioning it where it’s visible from indoor viewing areas but offers wildlife protection from predators.
Create clusters of native plants in groups of odd numbers, ensuring succession blooming throughout growing seasons. Position taller plants and shrubs along borders and corners, graduating down to shorter species toward pathways and seating areas. Maintain clear sight lines through strategic pruning while allowing sufficient density for wildlife shelter.
Leave dried flower heads and ornamental grasses standing through winter to provide food and shelter. Layer your plantings vertically, incorporating ground covers, mid-height perennials, and taller woody plants to create diverse habitat opportunities. Consider installing motion-activated lights that minimize disruption to nocturnal wildlife while maintaining evening garden enjoyment.
Design Adaptations: For smaller spaces or balconies, focus on container groupings with dwarf varieties of native plants and compact water features. Vertical gardening techniques using wall-mounted planters can maximize limited space while still providing wildlife benefits.
Create micro-habitats using tiered plant stands and hanging baskets, and choose multi-functional elements like hollow stem bundles that serve as both decoration and insect habitat. Even the smallest spaces can incorporate wildlife-friendly features through thoughtful plant selection and creative use of containers.
Design a Rain Garden
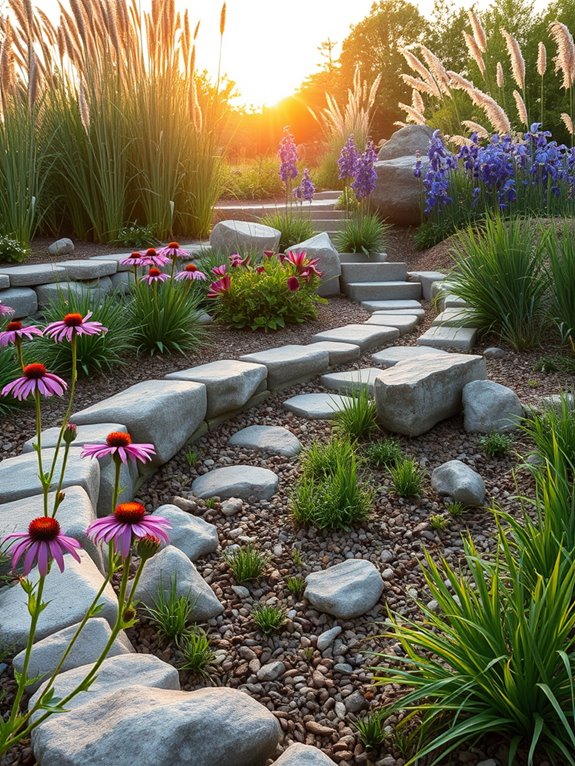
Transform an ordinary drainage area into a vibrant rain garden where colorful native plants create a natural oasis while managing stormwater runoff. Deep-rooted perennials like purple coneflowers, black-eyed susans, and swaying ornamental grasses dance in the breeze, while cardinal flowers and blue iris add stunning pops of color throughout the seasons.
Natural stone borders and weathered boulder accents create an organic flow, guiding rainwater into this thoughtfully designed depression. This eco-friendly garden space serves as both a practical solution and artistic focal point, featuring layers of vegetation that thrive in varying moisture levels.
Taller plants like Joe Pye weed and native shrubs anchor the back, while shorter sedges and rushes carpet the deepest part of the basin. During rain events, the garden comes alive, temporarily pooling water before it slowly filters into the ground, creating a dynamic landscape that changes with the weather.
Key Elements:
- Basin depression (4-8 inches deep)
- Amended soil mix with sand and organic matter
- Native moisture-loving perennials
- Deep-rooted plants
- River rock or gravel
- Border stones
- Downspout connection or natural slope
- Multiple plant layers
- Mulch layer
- Overflow route
Creating a rain garden starts with selecting a natural depression or digging a shallow basin at least 10 feet from your home’s foundation. Test soil drainage and amend with sand and compost to ensure proper filtration.
Install plants in zones, with water-tolerant species in the center and drought-resistant varieties around the edges. Create clear entry points for water flow and establish stable borders using stone or native grasses to prevent erosion.
Essential tips for success include choosing the right size (typically 20-30% of the drainage area), ensuring proper overflow paths for major storms, and maintaining regular mulching to prevent weed growth.
For smaller spaces, consider creating a series of connected mini rain gardens or incorporating rain garden principles into existing landscape features. Urban gardeners can adapt the concept using raised planters with reservoir bases or connecting downspouts to contained bog gardens, making sustainable drainage possible even in limited spaces.
Incorporate Natural Fertilizers and Composting
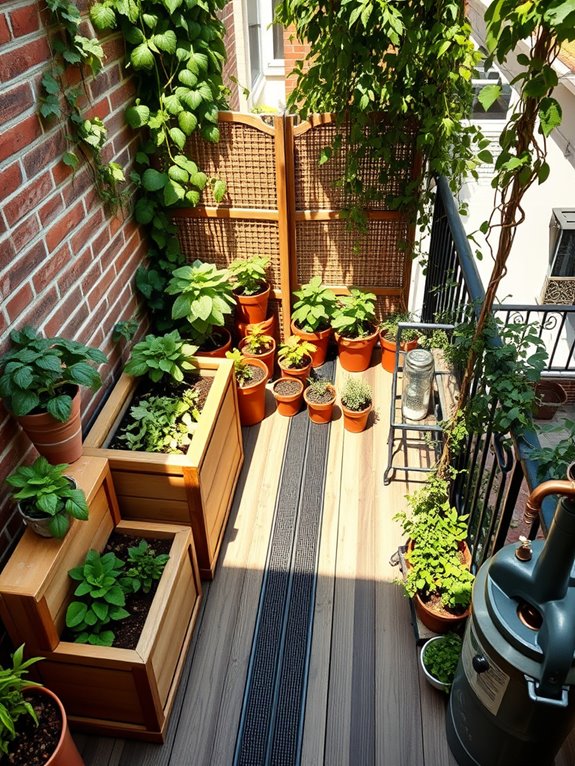
Transform your lawn into a thriving ecosystem by embracing natural fertilizers and composting practices. Picture a lush, emerald-green expanse dotted with native grasses and flowering plants, their roots nourished by rich, dark compost that emanates the earthy fragrance of healthy soil.
Strategically placed compost bins, cleverly disguised with climbing vines or decorative screens, become functional art pieces that contribute to the garden’s sustainable beauty. The garden pulses with life as beneficial insects and birds are drawn to this chemical-free haven.
Ornamental grasses sway gently in the breeze, while perennial flowers bloom in succession throughout the seasons, all supported by the nutrient-rich soil created through your composting efforts. Natural stone pathways wind through designated composting zones, creating an organized yet organic flow that makes maintenance both practical and pleasurable.
Key Elements:
- Compost bins (multiple sizes)
- Leaf mold collection area
- Worm composting system
- Green waste collection containers
- Natural mulch materials
- Soil testing kit
- Organic matter storage bins
- Garden fork and shovel
- Watering system
- Native plants adapted to local soil
- Coffee grounds collection
- Grass clipping repository
Implementation begins with positioning compost bins in partially shaded areas, ensuring easy access while maintaining aesthetic appeal.
Create a three-bin system: one for fresh materials, one for actively decomposing matter, and one for finished compost. Establish collection points throughout the garden for green waste, and layer materials with appropriate carbon-to-nitrogen ratios.
Install a simple irrigation system to maintain optimal moisture levels in both composting areas and plant beds. Natural fertilizer zones should be integrated thoughtfully into the landscape design, with dedicated areas for different types of organic matter processing.
Position tall plants or decorative screens to conceal working areas while maintaining functionality. Create clear pathways for wheelbarrow access and include convenient spots for storing tools and materials.
Design Adaptation Tips: For smaller spaces, consider vertical composting systems or compact tumbling bins that can be tucked into corners. Urban gardeners can utilize bokashi composting or vermicomposting systems that fit under sinks or on balconies.
Focus on creating multiple micro-composting stations rather than one large area, and use attractive containers that complement your outdoor décor while maintaining the practical aspects of natural fertilizer production.
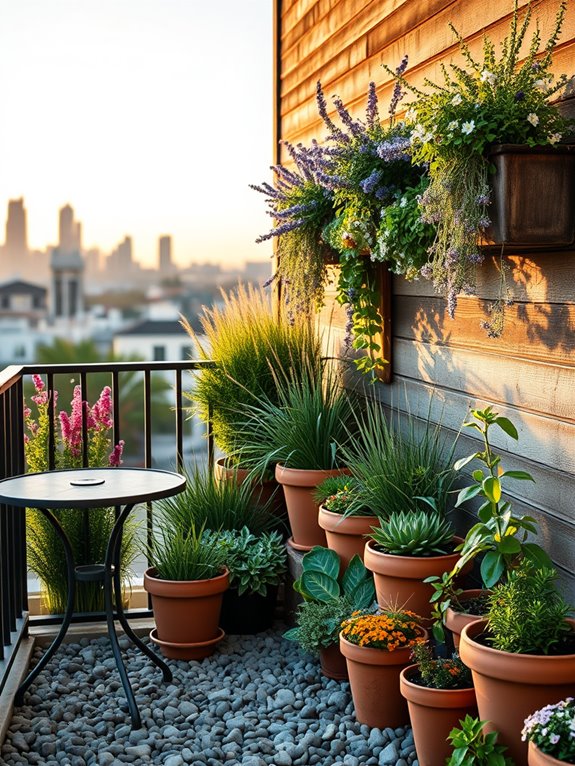
Add Ground Cover Plants to Reduce Water Needs
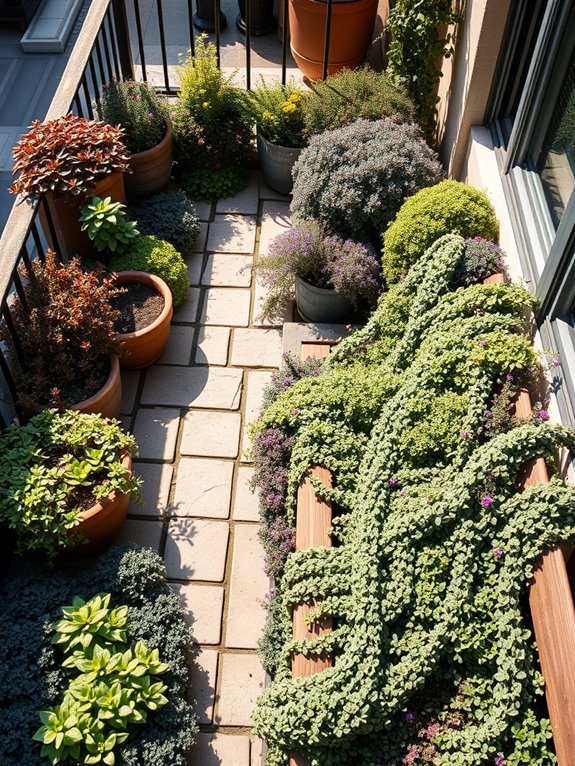
Transform your thirsty lawn into a lush tapestry of low-growing ground covers that create a mesmerizing carpet of colors and textures. Creeping thyme releases its sweet fragrance with every step, while patches of blue star creeper sparkle like tiny constellations against emerald sedum. The undulating waves of varying heights and hues create a natural, meadow-like appearance that draws the eye across the landscape, punctuated by stepping stones that seem to float atop the living green blanket.
This water-wise wonderland buzzes with beneficial insects and provides year-round interest through changing seasons. Bronze ajuga leaves catch morning light, while woolly thyme adds silvery touches to shaded corners. Hardy ice plants contribute bursts of vibrant flowers in spring and summer, creating a drought-resistant paradise that requires minimal maintenance while maximizing visual impact.
Key Elements:
- Drought-resistant ground covers (thyme, sedum, ajuga)
- Stepping stones or pavers
- Mulch for new plantings
- Landscape fabric for weed control
- Soil amendments for proper drainage
- Border materials (rocks, edging)
- Varied plant heights and textures
- Strategic irrigation system
Begin implementation by removing existing turf and improving soil drainage with organic matter. Map out walking paths first, installing stepping stones or pavers slightly above soil level. Plant ground covers in groups, spacing them according to mature spread, with faster-growing varieties toward the center and slower-growing types along edges. Create transition zones between different species using natural curves rather than straight lines.
Layer the ground covers by height, with taller varieties (4-6 inches) at the back or as focal points, and shortest types (1-2 inches) along walkways. Water deeply but infrequently during the establishment period, typically the first growing season, to encourage deep root growth.
Once established, most ground covers require minimal irrigation, making them perfect for water-conscious gardens. For smaller spaces or balcony adaptations, focus on container-friendly ground covers like sedums and creeping thyme in shallow, wide planters.
Consider vertical elements such as trailing varieties that can cascade over edges, and use varying container heights to create depth. In hot climates, provide afternoon shade and ensure excellent drainage through proper soil mix and container holes. Monitor moisture levels more frequently in containers, as they dry out faster than in-ground plantings.
Establish Low-Maintenance Garden Borders
Transform your lawn’s edges into enchanting, self-sustaining borders that frame your outdoor space with year-round beauty. Picture a flowing tapestry of hardy perennials, ornamental grasses, and compact evergreen shrubs creating natural boundaries that soften harsh lines and welcome beneficial wildlife. Native plants like coneflowers, black-eyed susans, and switchgrass dance in the breeze, while compact boxwoods and dwarf hydrangeas provide structure and permanence.
These living boundaries evolve through the seasons, offering waves of color from spring bulbs to autumn seed heads, all while requiring minimal intervention once established. Natural stone elements and weathered garden ornaments peek through the foliage, creating focal points that draw the eye along meandering paths. The border’s layered design provides depth and interest, with taller plants creating a backdrop for medium-height perennials and ground-covering specimens that spill onto pathways.
Key Elements:
- Drought-resistant perennials
- Ornamental grasses
- Evergreen shrubs
- Natural stone or rock features
- Garden ornaments
- Mulch or gravel pathways
- Native plants
- Ground covers
- All-season bloomers
- Edging materials
Begin implementation by outlining your border with a garden hose to visualize the flow and shape. Remove existing turf and prepare the soil by incorporating organic matter to improve drainage and fertility. Install taller plants at the back of the border, working forward with progressively shorter specimens. Group plants in odd-numbered clusters for natural-looking drifts, and position them according to their mature size to prevent overcrowding.
Ensure success by selecting plants suited to your climate zone and soil conditions. Consider light patterns throughout the day when placing sun-loving or shade-tolerant species. Install an efficient drip irrigation system during the initial planting phase to establish deep root systems and reduce long-term maintenance needs.
For adaptation to different spaces, scale the border’s depth proportionally to your available area – small spaces might use a 2-foot-deep border, while larger properties can accommodate 6-8 feet of depth. In restricted areas, focus on vertical elements and compact varieties, using container gardens to create portable border sections. Consider incorporating built-in seating or raised beds to maximize functionality in limited spaces while maintaining the low-maintenance aesthetic.