
8 Edible Garden Ideas Beyond the Vegetable Patch
While traditional vegetable patches offer familiar comforts, you’ll discover a world of creative possibilities when you think beyond neat rows of tomatoes and lettuce. You can transform your outdoor space into an edible oasis through spiral herb gardens that dance skyward, living walls draped with climbing peas, or serene water gardens dotted with aquatic delights. These innovative approaches don’t just maximize your growing potential—they’ll revolutionize how you view edible landscaping.
Contents
- 1 Spiral Herb Gardens: A Beautiful Space-Saving Solution
- 2 Edible Flower Borders and Beds
- 3 Fruit Tree Guilds and Food Forests
- 4 Living Wall Gardens With Climbing Edibles
- 5 Container Gardens for Small-Space Harvests
- 6 Mushroom Cultivation in Shady Spots
- 7 Edible Hedgerows and Borders
- 8 Water Gardens With Aquatic Edibles
Spiral Herb Gardens: A Beautiful Space-Saving Solution
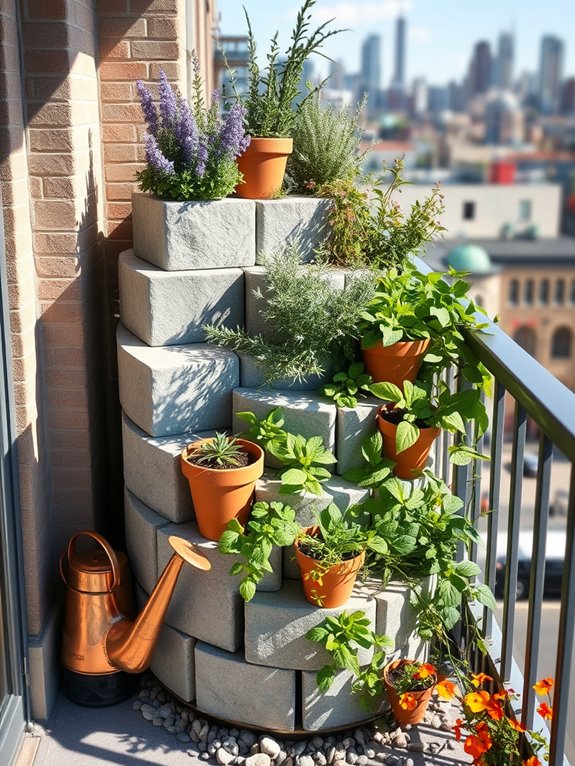
A spiral herb garden rises gracefully from the ground like a living sculpture, creating an enchanting focal point in any outdoor space. The ascending spiral pattern allows herbs to cascade down different levels, with Mediterranean herbs like thyme and rosemary adorning the sun-drenched upper tiers, while mint and parsley thrive in the shadier lower sections.
Natural stones or brick borders trace elegant curves through the design, creating a harmonious blend of function and artistic expression.
Walking around a spiral herb garden engages all the senses, as fragrant herbs release their essential oils into the air with every gentle breeze. The varying heights create visual interest, while the mix of textures – from the soft, silvery leaves of sage to the delicate purple blooms of chives – adds depth and character.
Small stepping stones between the spirals invite closer inspection, making harvesting and maintenance a delightful garden experience.
Key Elements:
- Construction materials (stones, bricks, or concrete blocks)
- Soil mix suitable for herbs
- Drainage materials
- Selection of herbs for different light conditions
- Decorative top stones or features
- Garden tools
- Irrigation system or watering can
- Ground cover or mulch
Building a spiral herb garden starts with marking a circular base approximately 6 feet in diameter. Create the spiral structure by laying stones or bricks in an ascending pattern, starting from the outer edge and working inward and upward. Each level should rise about 6-8 inches, reaching a height of about 3 feet at the center.
Fill each section with well-draining soil, incorporating organic matter and creating slight slopes for proper water flow.
Plant selection and placement are crucial for success. Position drought-tolerant Mediterranean herbs at the top where drainage is excellent and sunlight abundant. Work downward with progressively moisture-loving herbs, ending with plants that prefer partial shade and richer soil at the base.
Water newly planted herbs regularly until established, then adjust watering based on each section’s specific needs.
For smaller spaces or balcony gardens, consider creating a miniature version using a spiral that’s 3-4 feet in diameter and 2 feet high. Container adaptations can be achieved using large circular planters with dividers creating spiral segments, or by arranging graduated containers in a spiral pattern.
Ensure adequate drainage in any design variation, and consider incorporating vertical elements like small trellises for climbing herbs to maximize space usage while maintaining the spiral aesthetic.
Edible Flower Borders and Beds
Transform your garden borders into a stunning fusion of beauty and functionality with edible flower beds that delight both the eyes and the palate. Imagine vibrant calendula blooms casting golden rays alongside deep purple borage flowers, while delicate johnny-jump-ups peek through clusters of fragrant lavender. These colorful compositions create living tapestries that transition seamlessly through the seasons, offering fresh garnishes and edible delights mere steps from your kitchen.
The magical aspect of edible flower borders lies in their ability to blend traditional ornamental garden aesthetics with culinary practicality. Nasturtiums cascade over stone edges, their peppery blooms adding splashes of orange and yellow, while chive flowers stand in elegant purple clusters, attracting beneficial pollinators. Herb flowers like oregano and thyme create soft clouds of tiny blooms, filling the air with their aromatic presence and providing continuous harvests.
Key Elements:
- Flowering herbs (lavender, thyme, oregano, sage)
- Annual edible flowers (calendula, nasturtium, borage)
- Perennial edible flowers (day lilies, violets)
- Border stones or edging material
- Quality organic soil
- Mulch for moisture retention
- Plant markers or labels
- Irrigation system or watering equipment
- Garden tools for maintenance
Implementation begins with selecting a sunny location and preparing well-draining soil enriched with organic matter. Arrange plants in layers, with taller specimens like hollyhocks and flowering herbs toward the back, medium-height plants like calendula and borage in the middle, and low-growing flowers such as violets and creeping thyme in front.
Ensure adequate spacing between plants to allow for growth and air circulation, typically 12-18 inches apart depending on mature size. Maintain healthy growth by regularly deadheading spent blooms, which promotes continuous flowering. Water deeply but infrequently to encourage strong root development, and apply organic mulch to retain moisture and suppress weeds. Harvest flowers in the morning when their water content is highest, and only pick what you plan to use immediately.
For smaller spaces or balcony gardens, focus on compact varieties and utilize vertical growing techniques. Container combinations can include trailing nasturtiums paired with upright herbs, while wall-mounted planters can house cascading flowers and compact herbs. Choose dwarf varieties of larger plants, and consider succession planting to maintain continuous blooms throughout the growing season.
Remember that edible flowers require pesticide-free growing conditions, so implement natural pest control methods to ensure safe consumption.
Fruit Tree Guilds and Food Forests

Walking into a fruit tree guild feels like stepping into nature’s perfectly orchestrated symphony. Tall, graceful fruit trees create a protective canopy overhead, their branches laden with ripening apples, pears, or plums. Beneath them, layers of edible and beneficial plants work in harmony – medium-height shrubs like currants and gooseberries nestled alongside patches of comfrey, while strawberries and herbs carpet the ground in a living mulch.
The space transforms throughout the seasons, beginning with delicate spring blossoms that attract buzzing pollinators, followed by the lush abundance of summer growth, and culminating in a fall harvest of fruits and berries.
Stone pathways wind through the guilds, allowing access to each layer while native flowers add splashes of color and attract beneficial insects. The overall effect is one of organized wilderness, where every plant serves multiple purposes in supporting the ecosystem.
Key Elements:
- Central fruit tree (dwarf or semi-dwarf variety)
- Nitrogen-fixing plants (clover, beans)
- Dynamic accumulators (comfrey, yarrow)
- Pollinator-attracting plants (lavender, borage)
- Groundcover plants (strawberries, thyme)
- Support species (alliums, daffodils)
- Mulch materials (straw, wood chips)
- Support stakes or trellises
- Path materials (stepping stones, gravel)
Implementation begins with selecting and planting the central fruit tree, ensuring adequate spacing for mature growth. Create concentric circles around the tree, working outward with progressively shorter plants. The innermost circle should contain nitrogen-fixers and dynamic accumulators, followed by herbs and beneficial plants in the middle ring, and finally groundcovers at the outer edge.
Maintain clear access paths between guilds and ensure each plant has enough space to thrive without overwhelming its neighbors.
Adapting fruit tree guilds to smaller spaces requires creative solutions. Consider espaliered fruit trees against walls, columnar varieties for narrow spaces, or dwarf trees for containers.
Multiple guilds can be simplified into a single compact system, focusing on the most essential companion plants. Container gardens can incorporate vertical elements like climbing berries or vining plants to maximize space usage, while ensuring each plant group still serves its intended function in the guild system.
Living Wall Gardens With Climbing Edibles
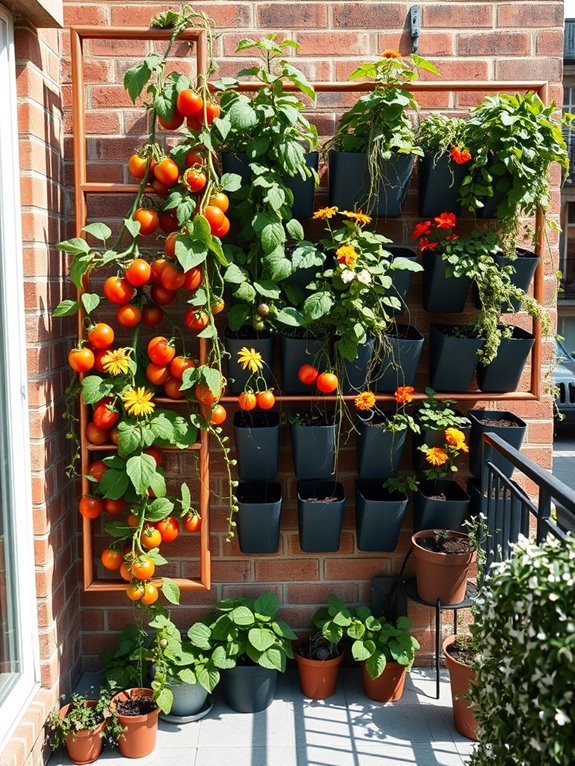
Transform your vertical space into a lush, edible oasis with a living wall garden that climbs skyward in a stunning display of abundance. Imagine emerald tendrils of pole beans spiraling up copper-toned trellises, while purple grape vines weave their way through geometric lattices, creating a tapestry of edible foliage. The natural cascade of cherry tomatoes dangles like jewels alongside the delicate white flowers of climbing peas, offering both visual drama and practical harvesting opportunities.
This dynamic garden style brings life to otherwise unused vertical spaces, turning blank walls into productive growing areas that double as living art. The vertical layers create depth and interest, while strategically placed climbing roses intermingle with edible nasturtiums to add splashes of color throughout the seasons. The overall effect is one of organized wilderness, where carefully planned support structures disappear beneath a verdant canopy of edible abundance.
Key Elements:
- Sturdy wall-mounted trellis system
- Deep planting pockets or containers
- Drip irrigation system
- Climbing plant varieties
- Support cables or mesh
- Rich, well-draining soil
- Plant anchoring materials
- Growth guides and ties
- Proper lighting setup
- Maintenance access points
Begin implementation by securing a strong trellis system to your wall, ensuring it can support the weight of mature plants and their growing medium. Install planting pockets or mounted containers at various heights, creating a staggered pattern that allows each plant adequate growing space.
Set up a reliable drip irrigation system with multiple watering points to ensure consistent moisture throughout the vertical space. The selection and positioning of plants should follow a thoughtful pattern: place heavy fruiting varieties like tomatoes and squash at lower levels for easy harvesting, while lighter plants such as peas and beans can climb higher.
Train young plants early by gently guiding them toward their support structures, using soft ties to secure them without causing damage. Regular maintenance includes pruning, training new growth, and monitoring the irrigation system.
When designing your living wall, consider the weight-bearing capacity of your structure and available sunlight patterns throughout the day. For smaller balconies, focus on compact varieties and use modular systems that can be expanded over time.
Urban gardeners should select plants that thrive in their specific microclimate and consider incorporating automatic watering systems for consistent care. Remember to leave adequate space between plants to prevent overcrowding and ensure proper air circulation, which helps prevent disease and promotes healthy growth.
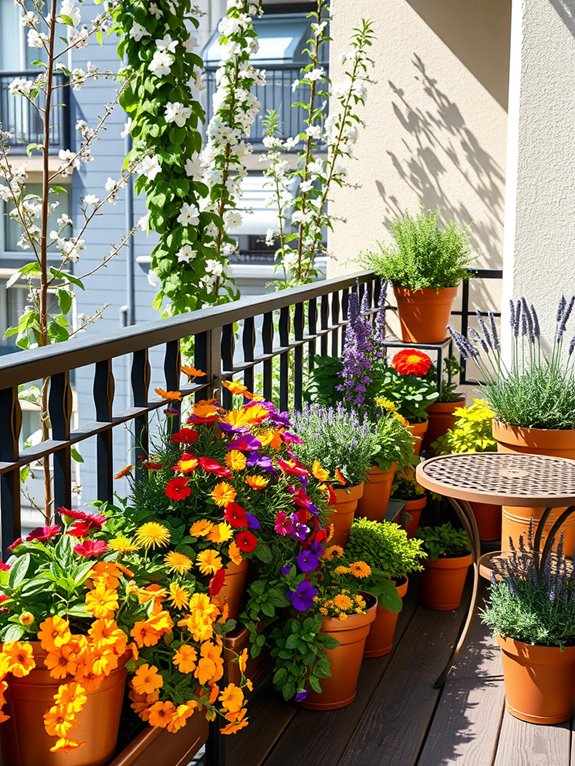
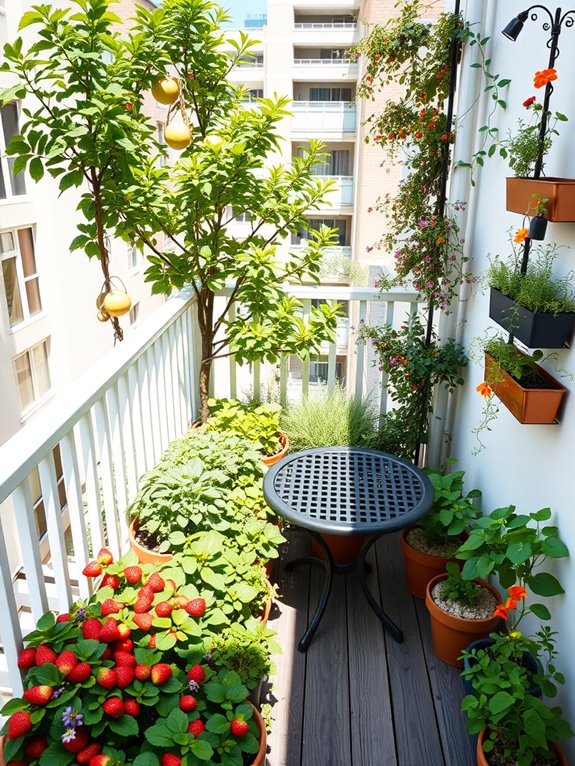
Container Gardens for Small-Space Harvests
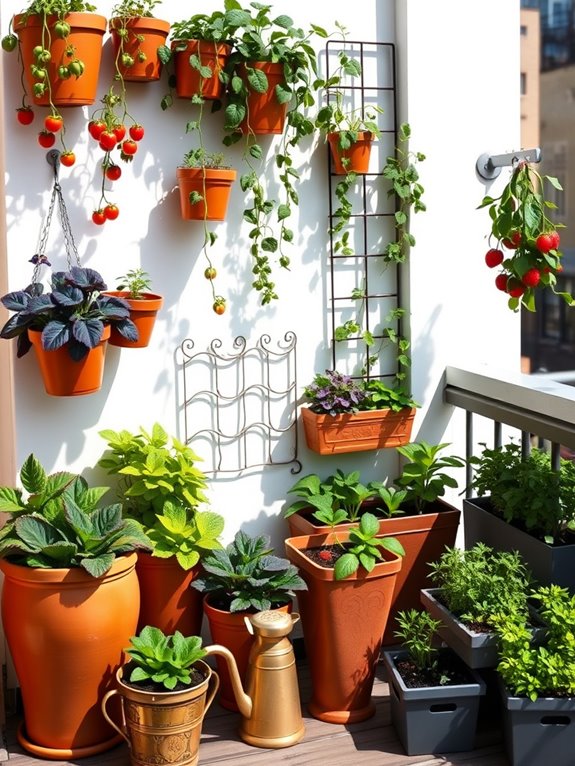
A vibrant container garden transforms even the tiniest balcony or patio into a lush, productive oasis where fresh herbs, compact vegetables, and dwarf fruit varieties thrive in an array of decorative pots. Terracotta containers spill over with cascading cherry tomatoes, while sleek modern planters showcase neat rows of kitchen herbs like basil, thyme, and chives. Vertical elements add drama through wall-mounted pocket planters filled with strawberries and trailing nasturtiums, creating a living tapestry of edible greenery.
The garden’s intimate scale invites interaction, with every plant within arm’s reach for easy maintenance and harvest. Compact bush beans nestle alongside petite pepper plants in deep containers, while lettuce varieties add textural interest with their ruffled leaves. Metal trellises support climbing peas and miniature cucumber varieties, maximizing vertical space while adding architectural interest. The arrangement creates a cozy outdoor room where functionality meets beauty in a carefully choreographed display.
Key Elements:
- Container assortment (varying sizes and materials)
- Vertical growing systems
- Compact vegetable varieties
- Culinary herbs
- Dwarf fruit plants
- Trellises and supports
- Self-watering containers
- Quality potting soil
- Container-specific fertilizer
- Drainage materials
- Plant markers
- Watering can or irrigation system
Position containers to maximize sunlight exposure, arranging larger pots at the back and shorter ones in front for easy access. Ensure each container has adequate drainage holes and fill with high-quality potting mix specifically formulated for containers.
Group plants with similar water needs together, and install a simple drip irrigation system to maintain consistent moisture levels. Create depth by varying container heights and incorporating hanging baskets or wall-mounted planters to utilize vertical space effectively.
Success in small-space container gardening relies heavily on proper spacing and plant selection. Monitor plants closely for signs of stress or nutrient deficiency, as container-grown plants require more frequent feeding than those grown in the ground. Consider installing a small compost bin nearby for convenient fertilizer production and wear and tear on containers that may need seasonal replacement.
For different balcony sizes, adapt the design by scaling the number and size of containers accordingly. Micro-balconies might focus on a few essential herbs and one or two vegetable varieties, while larger spaces can accommodate multiple growing zones and fruit trees in wheeled planters.
Consider wind exposure at different heights and install appropriate windbreaks or supports. Light-colored containers help reduce soil temperature in sunny locations, while self-watering varieties provide insurance against irregular watering schedules in busy urban lifestyles.
Mushroom Cultivation in Shady Spots
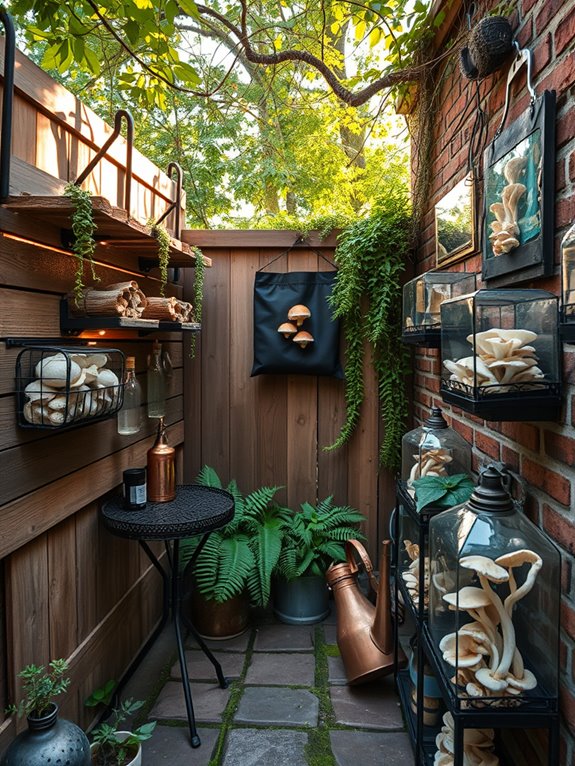
Transform a shaded corner of your garden into a mystical mushroom sanctuary where gourmet fungi thrive beneath the dappled light of overhead trees. Wooden logs arranged in artistic patterns host shiitake and oyster mushrooms, while strategically placed stone pathways wind between cultivation areas. The deep browns and grays of decomposing organic matter create a natural palette, punctuated by the occasional fruiting bodies that emerge like jewels from the substrate.
This enchanting space combines functionality with natural beauty, where moss-covered rocks and fallen leaves add texture and atmosphere to the growing area. Humidity-loving ferns and shade plants can be incorporated as companion plantings, creating multiple layers of visual interest while maintaining the optimal growing environment for mushrooms. The space takes on an almost prehistoric feeling, especially in the early morning when mist clings to the cultivation area.
Key Elements:
- Hardwood logs for mushroom cultivation
- Shade structure or natural tree canopy
- Moisture-retaining ground cover
- Growing racks or shelving systems
- Irrigation system or misting setup
- Temperature monitoring equipment
- Organic substrate materials
- Tool storage area
- Harvesting baskets
- Identification markers
Start by selecting a location that receives minimal direct sunlight and has good air circulation. Install a basic irrigation system with misting capabilities to maintain consistent moisture levels.
Arrange logs in vertical stacks or diagonal patterns that allow easy access for monitoring and harvesting, while maintaining aesthetic appeal. Create designated zones for different mushroom varieties, as each may require slightly different conditions. Incorporate a small workstation for preparation and maintenance tasks.
The key to success lies in creating multiple growing cycles throughout the season. Inoculate new logs every few months to ensure continuous production, and maintain detailed records of cultivation progress. Proper spacing between logs prevents contamination while creating natural pathways for maintenance access.
Consider installing subtle lighting for evening harvesting and visual appeal. For smaller spaces or balcony gardens, vertical growing systems can maximize production in minimal square footage. Use stackable containers or wall-mounted growing bags as alternatives to traditional log cultivation.
Maintain higher humidity levels by grouping plants together and using humidity trays. In urban settings, create micro-climates using portable greenhouse covers or humidity tents that can be easily adjusted or removed as needed.
Edible Hedgerows and Borders
Transform your garden boundaries into a lush, productive paradise with edible hedgerows and borders that blend beauty with functionality. Picture a vibrant tapestry of fruit-bearing shrubs like blueberries and raspberries, interwoven with aromatic herbs such as rosemary and sage, creating living walls that provide both privacy and sustenance.
The varying heights and textures of gooseberries, currants, and elderberries form a natural backdrop while their seasonal changes offer year-round visual interest. These edible boundaries come alive with pollinators drawn to the flowering herbs and fruit blossoms, creating a dynamic ecosystem that enhances your entire garden.
The layered approach combines tall fruit trees like columnar apples at the back, mid-height berry bushes in the middle, and low-growing herbs and strawberries at the front, forming a productive green screen that serves multiple purposes throughout the growing season.
Key Elements:
- Dwarf fruit trees (columnar apples, plums)
- Berry bushes (blueberries, raspberries, blackberries)
- Fruiting shrubs (gooseberries, currants, elderberries)
- Perennial herbs (rosemary, sage, thyme, lavender)
- Ground cover (strawberries, creeping thyme)
- Support structures (trellises, posts, wire systems)
- Mulch and compost
- Irrigation system
- Decorative edging or pathway materials
Begin implementation by preparing a well-draining soil strip at least 3 feet wide along your chosen boundary. Install support structures first, then plant your tallest specimens at the back, spacing them according to their mature sizes. Layer shorter plants in front, ensuring each has adequate space to grow.
Incorporate a drip irrigation system during planting to ensure consistent moisture, particularly crucial during the establishment phase. When selecting plants, consider their mature heights and spreads, sun exposure, and local climate compatibility. Mix deciduous and evergreen species for year-round interest, and group plants with similar water needs together.
Regular pruning maintains the desired shape and encourages productive growth, while annual mulching helps suppress weeds and retain moisture.
Tips for Success: For smaller spaces or balcony gardens, focus on dwarf varieties and utilize vertical growing techniques with container-grown specimens. Consider espalier fruit trees against walls or fences to maximize space efficiency.
In urban settings, choose thornless varieties for easier maintenance, and incorporate climbers like hardy kiwi or grape vines to add vertical interest without taking up ground space. Remember to position taller plants where they won’t overshadow neighboring gardens or properties.
Water Gardens With Aquatic Edibles
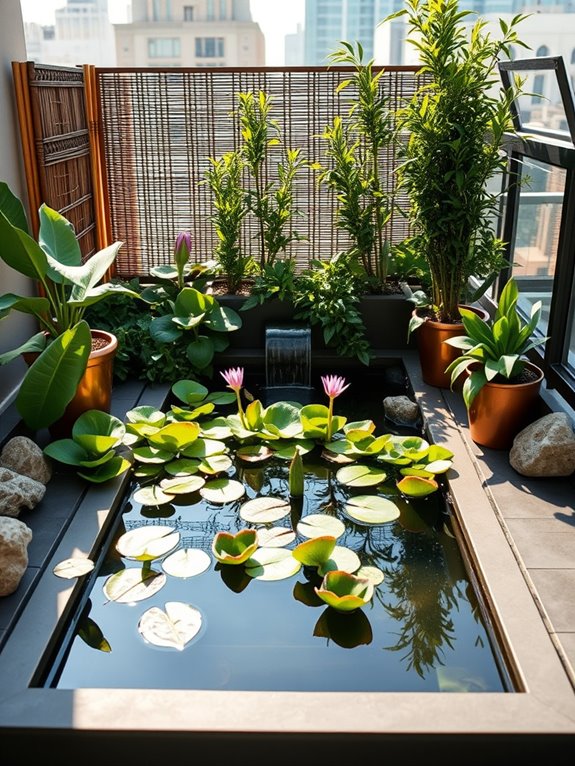
Transform your outdoor space into a serene oasis with a water garden that doubles as a living pantry. Imagine crystal-clear pools dotted with floating water chestnuts and vibrant watercress, their green leaves dancing on the surface while delicate lotus flowers rise majestically above.
The gentle sound of moving water creates a peaceful backdrop as koi fish gracefully swim beneath edible water lilies, their pads providing natural shade and vertical interest. This aquatic ecosystem combines beauty with functionality, offering a unique take on sustainable gardening.
Terraced containers cascade with chocolate mint and water celvis, while taro plants anchor the corners with their dramatic elephant-ear leaves. The varying heights and textures create visual drama, while strategically placed rocks and bamboo fountains add both aesthetic appeal and the soothing sounds of flowing water.
Essential Elements:
- Water-tight containers or pond liner
- Submersible pump and filtration system
- Aquatic soil or planting baskets
- Edible water plants (watercress, water chestnuts, lotus)
- Decorative rocks and pebbles
- Water-safe lighting
- Fish (optional)
- Floating plants
- Water testing kit
- Aquatic fertilizers
Creating a water garden begins with selecting the right location that receives 6-8 hours of sunlight daily. Install a properly sized pond liner or arrange water-tight containers at varying heights.
Layer the bottom with aquatic soil and carefully position plants according to their water depth requirements – marginal plants along the edges, deep-water plants in the center, and floating varieties on the surface. Install a reliable filtration system and maintain proper water chemistry through regular testing and adjustment.
Smart design adaptations can make water gardens possible in any space. For small balconies, consider compact container water gardens using waterproof pots or half-barrels.
Focus on smaller varieties of aquatic edibles and use vertical elements like bamboo water features to maximize space. Always ensure your structure can support the weight of water-filled containers, and position them where they’ll receive adequate sunlight while being protected from strong winds.