
8 Garden Ideas for Easy Harvesting
You’ll find that smart garden design can transform your harvesting routine from a backbreaking chore into an enjoyable daily activity. Whether you’re growing juicy tomatoes, crisp lettuce, or fragrant herbs, the right layout and tools make collecting your bounty both efficient and comfortable. From elevated beds that spare your back to rolling carts that keep supplies within reach, these practical ideas will help you create a garden that’s as easy to harvest as it is to maintain.
Contents
- 1 Design Raised Beds at the Perfect Height
- 2 Create Wide, Accessible Pathways
- 3 Implement Vertical Growing Systems
- 4 Organize Plants by Harvest Time
- 5 Choose Compact and Container-Friendly Varieties
- 6 Install Rolling Garden Carts and Storage
- 7 Set Up Strategic Garden Zones
- 8 Add Ergonomic Harvesting Stations
Design Raised Beds at the Perfect Height
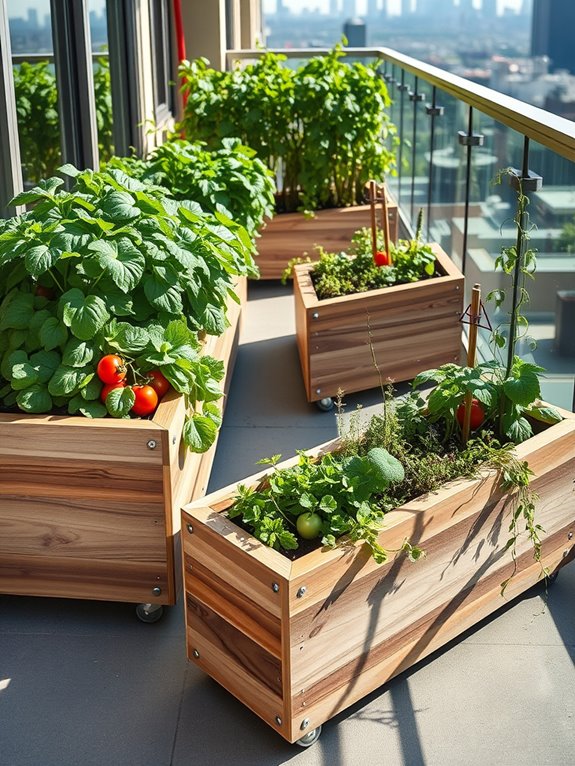
Thoughtfully designed raised beds stand like natural pedestals in the garden, their clean lines and varying heights creating an architectural display that’s both beautiful and practical. Rich soil spills over weathered cedar edges, while leafy vegetables cascade down the sides, creating a lush tapestry of greens, purples, and golds.
The beds rise from the ground at perfect waist height, transforming the garden into an accessible outdoor workspace where harvesting becomes as simple as reaching out to pluck a ripe tomato or snip fresh herbs.
These elevated growing spaces blend form and function, with smooth-planed wooden sides weathering gracefully into silver-gray patinas that complement both modern and rustic garden styles. Strategically placed beds create natural pathways between them, while their height eliminates the need to bend or kneel, making gardening a joy rather than a strain.
The raised design also provides excellent drainage and soil warming, extending the growing season and improving crop yields.
Key Elements:
- Pressure-treated lumber or cedar boards
- Corner brackets and hardware
- Quality topsoil and compost mix
- Landscape fabric
- Gravel for drainage
- Support posts
- Level
- Measuring tape
- Power drill
- Irrigation system components
- Plant supports and trellises
Construction begins with selecting a sunny location and establishing proper bed heights—typically 30-36 inches for comfortable standing access. Build rectangular frames using weather-resistant wood, securing corners with brackets and adding support posts every 4 feet.
Install landscape fabric at the base, add a layer of gravel for drainage, then fill with high-quality soil mixture. Space multiple beds approximately 3 feet apart to create comfortable working aisles.
For optimal soil depth, ensure beds are at least 12 inches deep for most vegetables, with 18-24 inches being ideal for root crops. Install drip irrigation systems before filling with soil, running lines along bed tops with adjustable emitters for targeted watering.
Consider incorporating vertical growing elements like trellises on the north sides to maximize growing space while maintaining sun exposure.
The beauty of raised bed designs lies in their adaptability—shorter beds can work well against walls or fences, while narrower versions fit perfectly on patios or decks.
Consider L-shaped configurations for corner spaces, or create tiered designs for sloped areas. For small spaces, focus on compact varieties of vegetables and incorporate vertical growing techniques.
Add wheels to smaller beds for mobility, and consider hinged covers to extend the growing season in colder climates.
Create Wide, Accessible Pathways
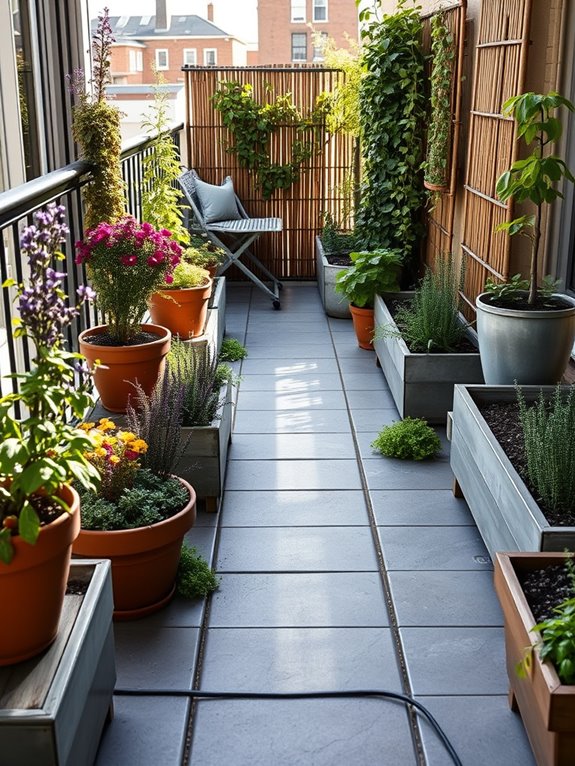
A network of gracefully winding pathways flows through the garden like gentle streams, creating an inviting landscape that beckons you to explore. These wide, stone-lined paths, measuring at least 3 feet across, allow easy access to raised beds bursting with tomatoes, peppers, and climbing beans. The pathways’ clean lines contrast beautifully with the organic shapes of sprawling squash vines and feathery carrot tops, while providing ample space for garden carts and wheelbarrows.
Natural materials like crushed gravel, flagstone, or compressed bark create a stable surface that remains mud-free in wet weather while complementing the garden’s aesthetic. Strategic placement of aromatic herbs like creeping thyme and chamomile between pathway stones adds sensory appeal, releasing pleasant fragrances when stepped upon. Solar-powered path lights illuminate the walkways at dusk, transforming them into magical ribbons of light that guide evening harvesting.
Key Elements:
- Path material (gravel, stone, or bark)
- Edge borders (brick, stone, or metal)
- Path width minimum 3 feet
- Level ground foundation
- Proper drainage materials
- Weed barrier fabric
- Path lighting
- Ground cover plants
- Corner turning radius (minimum 4 feet)
- Storage space for garden tools
Begin implementation by marking pathway locations with stakes and string, ensuring paths connect all major garden areas and maintain gentle curves for easy navigation.
Excavate the path area to a depth of 4-6 inches, adding a layer of crushed stone for drainage, followed by landscape fabric to prevent weed growth. Install edging materials securely along both sides before filling with your chosen path material, tamping down layers progressively to create a firm, level surface.
Design Considerations: Include wider nodes at pathway intersections to accommodate resting spots with benches or tool storage.
For limited spaces, create a minimum 30-inch wide path that can still accommodate a garden cart, using vertical growing techniques along pathway edges to maximize growing space. Consider incorporating modular paving materials that can be easily adjusted or removed as garden needs change, and ensure pathway slopes don’t exceed a 1:20 ratio for safe navigation in all weather conditions.
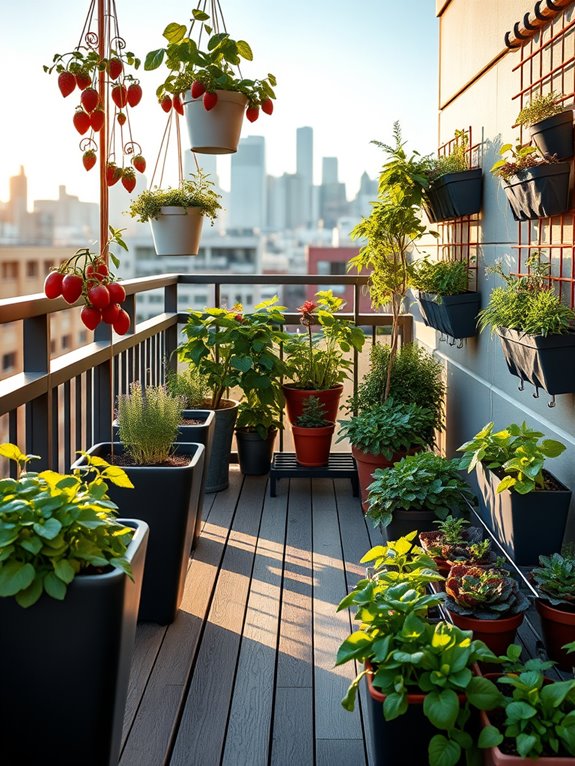
Implement Vertical Growing Systems
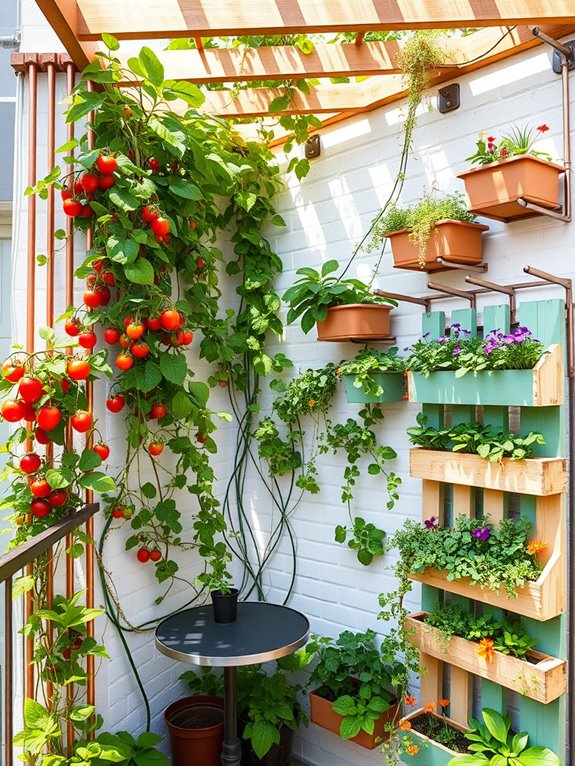
Transform your garden into a living wall of abundance with a vertical growing system that defies traditional gardening constraints. Climbing vines of sweet peas and morning glories weave through copper-toned trellises, while cascading strawberry plants spill from tiered planters like a fruited waterfall.
Mounted herb boxes overflow with fragrant basil, thyme, and oregano, creating an aromatic tapestry that beckons both pollinators and gardeners alike. The vertical space comes alive with an artful arrangement of repurposed wooden pallets painted in weathered pastels, supporting thriving columns of cherry tomatoes and climbing cucumbers.
Pocket planters fashioned from recycled materials house compact lettuce varieties and trailing nasturtiums, their edible flowers adding splashes of orange and yellow against the green canvas. The overall effect is both practical and aesthetically pleasing, transforming blank walls and fences into productive growing spaces.
Key Elements:
- Sturdy mounting hardware and brackets
- Vertical growing structures (trellises, grids, or lattices)
- Tiered or cascading planters
- Pocket planters or hanging containers
- Irrigation system with drip lines
- Growing medium appropriate for vertical systems
- Plant support clips and ties
- Weather-resistant materials
- Proper lighting fixtures (if needed)
- Drainage collection system
Begin implementation by assessing your wall or fence for structural integrity and sun exposure. Install mounting brackets at regular intervals, ensuring they can support the weight of fully mature plants and wet soil.
Create a framework of support structures, incorporating both permanent features like mounted planters and removable elements such as hanging pots and trellises. Install an irrigation system from top to bottom, utilizing gravity for efficient water distribution.
Position plants strategically, placing larger varieties at the bottom and lighter ones toward the top. Consider the mature size and growth habits of each plant when spacing them. Ensure all containers have adequate drainage and that water runoff is properly collected or redirected.
When designing your vertical garden, factor in seasonal changes and plant rotation needs. For smaller balconies, focus on modular systems that can be easily reconfigured or expanded.
Include access points for harvesting and maintenance, and consider incorporating foldable or removable sections for spaces that serve multiple purposes. Choose compact varieties of vegetables and herbs specifically bred for container growing, and remember that vertical systems may require more frequent watering and fertilization than traditional gardens.
Organize Plants by Harvest Time
A garden organized by harvest time transforms your outdoor space into a living calendar, with distinct zones blooming and bearing fruit in perfect succession. Early spring crops like lettuce and peas create a vibrant green welcome in the foreground, while summer tomatoes and peppers stand tall in the middle ground, their sturdy cages adding vertical interest. Fall squash and root vegetables fill the background with their sprawling vines and abundant foliage, creating a natural progression that’s both beautiful and practical.
The garden’s layout follows the sun’s path, with shorter spring crops positioned to avoid shadowing later-season plants. Decorative elements like painted stakes and harvest baskets mark each zone, while rustic signs indicate expected harvest dates. Winding pathways between sections invite exploration while making harvesting accessible, and the organized progression creates a sense of anticipation as each area comes into its prime.
Key Elements:
- Zone markers or signs
- Succession planting schedule
- Graduated height placement
- Wide access paths
- Season-specific irrigation
- Vertical growing supports
- Harvest baskets or collection stations
- Plant labels with harvest dates
- Soil amendments by zone
- Edge barriers between sections
Begin implementation by mapping your garden into three main zones: spring, summer, and fall/winter crops. Position these zones from south to north, ensuring taller, later-season plants won’t shade earlier crops.
Install permanent pathways between zones, making them wide enough for wheelbarrows and harvest baskets. Add vertical supports and irrigation systems specific to each zone’s needs before planting, and establish clear boundaries between sections using physical markers or companion plants.
Plant each zone according to your local frost dates, starting with cold-hardy spring crops. Summer and fall crops can be started indoors and transplanted at appropriate times. Maintain dedicated tools and supplies for each zone to prevent cross-contamination and make maintenance more efficient.
For smaller spaces or balcony gardens, this concept can be adapted using container groupings or vertical systems. Use stackable planters to create distinct growing zones, and focus on dwarf varieties suitable for container growing.
Consider mobile containers that can be repositioned as needed, and utilize wall space for vertical growing systems. Even a small balcony can support a succession of crops when properly organized by harvest time, maximizing both space and yield throughout the growing season.
Choose Compact and Container-Friendly Varieties
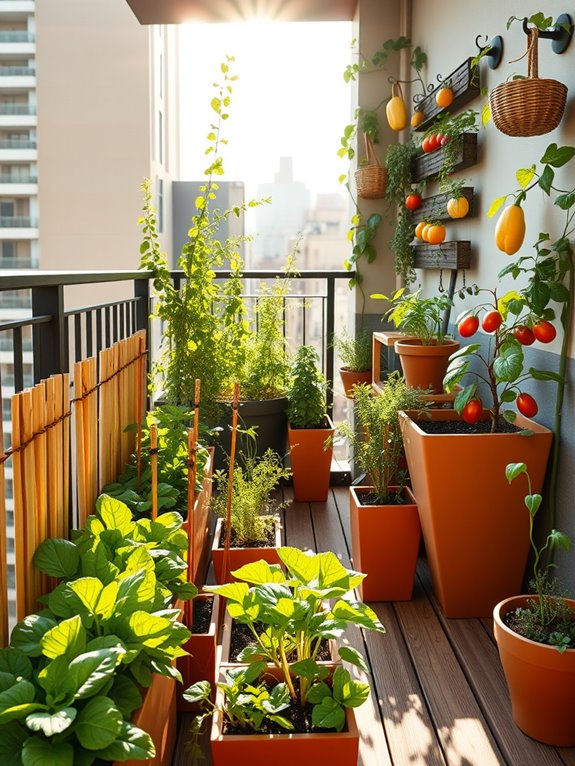
Imagine stepping onto your balcony or patio where an array of vibrant containers burst with life, each one carefully chosen to maximize your growing space. Dwarf tomatoes climb compact trellises, their red fruits dangling at perfect picking height, while cascading strawberry plants spill over the edges of hanging baskets. Neat rows of lettuce varieties create a living tapestry in rectangular planters, their different shades of green and purple adding visual interest without taking up precious square footage.
The garden feels both organized and abundant, with vertical elements drawing the eye upward through stacked herb planters and tiered container systems. Mini bell peppers and compact bush beans thrive in self-watering containers, while space-saving varieties of cucumbers grow on narrow trellises against walls. The arrangement creates an intimate ecosystem where every plant is within arm’s reach, making daily harvesting a joy rather than a chore.
Key Elements:
- Self-watering containers in various sizes
- Vertical trellises and support systems
- Tiered plant stands
- Hanging baskets
- Window boxes
- Dwarf vegetable varieties
- Compact herb plants
- Container-specific soil mix
- Drip irrigation system
- Plant casters or wheels
- Multi-pocket growing bags
- Folding harvest baskets
Begin by mapping your available space, considering sun exposure and weight limitations of your structure. Place larger containers along walls or corners, installing trellises first as anchor points.
Create levels using plant stands or stepped shelving, positioning taller plants toward the back and cascading varieties at the edges. Group plants with similar water needs together, and ensure all containers have adequate drainage and high-quality potting mix specifically formulated for containers.
Design your space with maintenance in mind by leaving walking paths between containers and installing an automatic watering system if possible. Position frequently harvested plants like herbs and lettuce in easily accessible spots, while allowing vining plants to grow upward on space-saving structures. Regular pruning and tidying will keep plants compact and productive.
Consider using lightweight fabric pots for upper levels and heavier ceramic containers at ground level. For smaller balconies, focus on vertical growing systems and hanging options to maximize growing space. Incorporate varieties bred specifically for container growing, such as determinate tomatoes and bush cucumbers, which naturally stay compact.
Remember that container gardens dry out faster than ground beds, so monitor moisture levels daily and adjust watering schedules seasonally.
Install Rolling Garden Carts and Storage
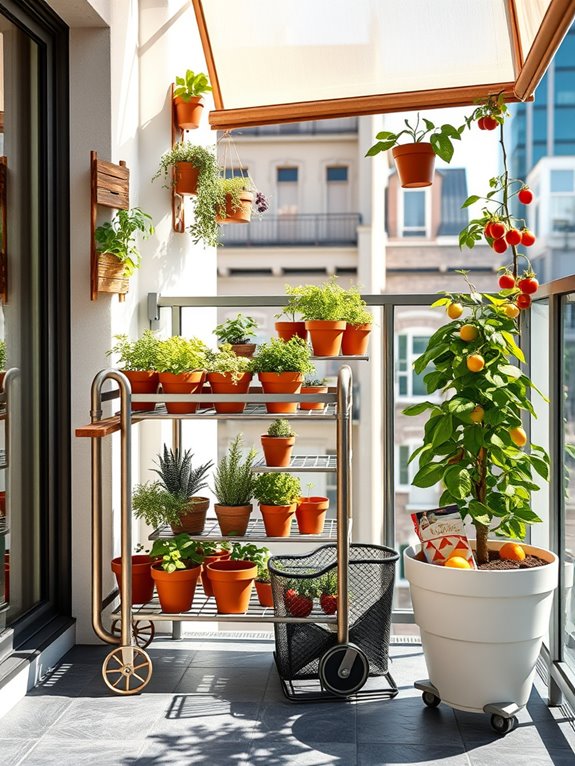
A well-organized garden with rolling carts and storage solutions transforms a typical growing space into an efficient harvest hub. Sleek metal carts with multiple shelves glide smoothly between raised beds, while wooden storage boxes double as convenient seating areas. Climbing vegetables like pole beans and tomatoes cascade from vertical supports attached to mobile trellises, creating a dynamic environment where productivity meets aesthetic appeal.
The garden’s organization revolves around accessibility, with wide pathways accommodating cart movement and strategically placed tool storage. Weather-resistant cabinets in muted greens and browns blend naturally with the surroundings, while clear vinyl covers protect delicate seedlings on rolling greenhouse shelves. The overall effect combines industrial efficiency with garden charm, featuring both ornamental and edible plants arranged in easily reachable zones.
Key Elements:
- Rolling garden carts with multiple tiers
- Weather-resistant storage cabinets
- Mobile tool organizers
- Wide pathways (minimum 36 inches)
- Vertical growing supports
- Lockable wheel mechanisms
- Pull-out storage drawers
- Portable potting stations
- Retractable shade covers
- Heavy-duty casters
Implementation begins with establishing a solid, level surface using crushed gravel or pavers to ensure smooth cart movement. Position storage units along the garden’s perimeter, creating designated zones for tools, supplies, and harvest containers. Install vertical supports and trellises with wheels at their bases, allowing for seasonal adjustments and optimal sun exposure.
Arrange raised beds with adequate spacing to accommodate cart width, incorporating built-in shelf attachments for temporary storage during harvest times. Design adaptations can accommodate various space constraints, from sprawling gardens to compact balconies. For smaller areas, choose collapsible carts and wall-mounted storage solutions that fold away when not in use.
Consider multi-functional pieces, such as storage benches that open to reveal tool compartments or rolling planters with built-in compost bins. Weather-proof materials and proper drainage systems ensure longevity, while strategic placement of storage units can create micro-climates for sensitive plants.
Set Up Strategic Garden Zones
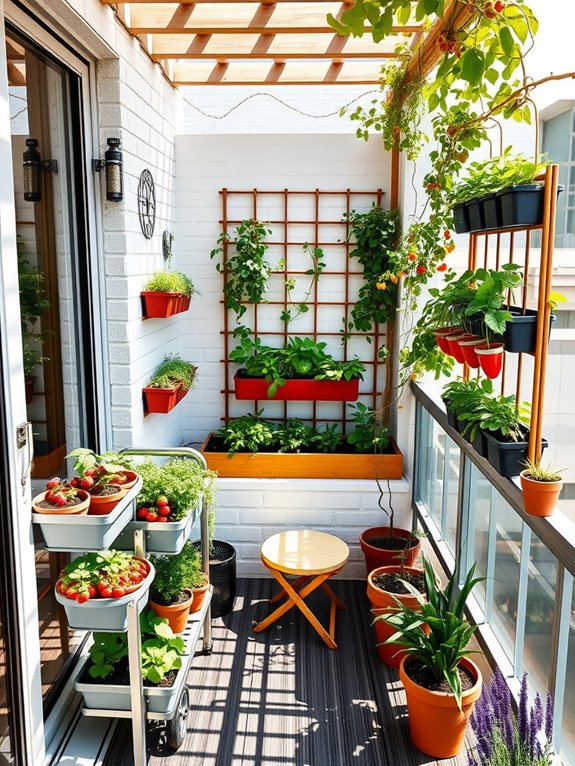
A strategically zoned garden transforms your growing space into an efficient, living pantry where every plant is thoughtfully positioned for optimal access. Tall trellised vegetables like pole beans and tomatoes create natural walls along the back, while cascading herbs and compact greens form aromatic borders at easily reachable heights. The methodical arrangement of plants, from tallest to shortest, creates a natural amphitheater effect that’s both visually striking and practical for harvesting.
The garden paths weave between raised beds and container groupings, offering clear sightlines to ripening produce and comfortable reaching distances. Each zone transitions smoothly into the next, with frequently harvested herbs and salad greens positioned closest to the house, followed by seasonal vegetables in the middle ground, and long-term crops like root vegetables and winter squash occupying the outer reaches. This thoughtful organization creates a peaceful efficiency that makes daily harvesting feel less like a chore and more like a meditative garden walk.
Key Elements:
- Raised beds of varying heights
- Wide, stable pathways
- Strategic plant groupings by harvest frequency
- Vertical growing structures
- Clear sightlines
- Dedicated tool storage areas
- Accessible water sources
- Plant markers and zone labels
- Comfortable reaching distances
- Multiple entry points
Implementation begins with mapping your garden space and dividing it into distinct zones based on harvesting frequency. Position the most frequently harvested crops within arm’s reach of main pathways and close to the house or garden entrance.
Create paths at least 3 feet wide between beds to accommodate wheelbarrows and allow comfortable movement. Install vertical growing structures along the northern edge to prevent shading, and arrange plants in height-graduated rows, keeping taller varieties behind shorter ones.
Consider mobility and accessibility when designing your zones. Raised beds should be no wider than 4 feet to allow easy reach from both sides, with higher beds (24-36 inches) placed closer to main pathways for crops requiring frequent attention. Include resting spots and tool storage within each zone to minimize trips back and forth, and ensure irrigation systems can reach all areas efficiently.
Adaptation Tips: For smaller spaces or balcony gardens, use vertical zoning with wall-mounted planters and tiered containers. Create micro-zones within container groupings, keeping daily-use herbs and greens at waist height and less frequently harvested plants below or above.
Utilize corners for vertical growing systems, and incorporate mobile planters that can be easily relocated as needed. Remember that zones can be as small as a single container garden – the key is organizing plants by harvest frequency and maintaining comfortable access to each group.
Add Ergonomic Harvesting Stations
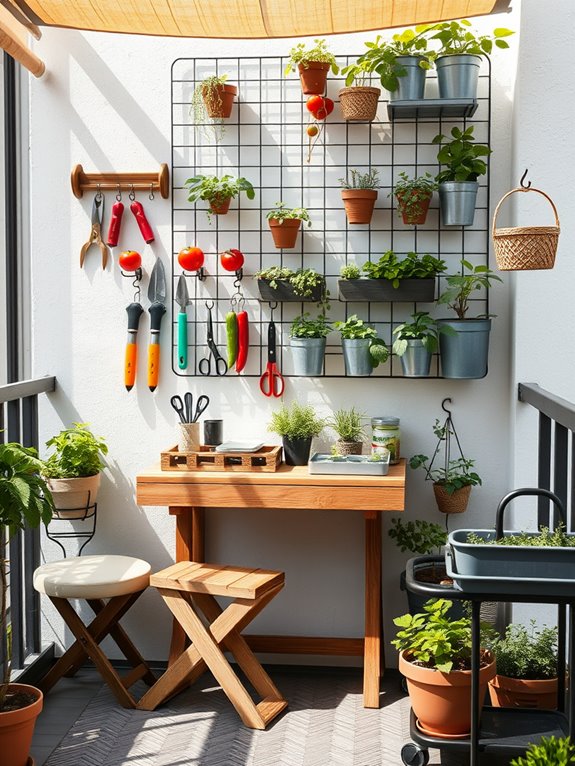
A thoughtfully designed harvesting station transforms a typical garden into an efficient outdoor workspace where gathering fruits and vegetables becomes a joy rather than a chore.
Wooden potting benches with built-in storage, strategically placed near raised beds, create convenient spots to collect and sort produce. The station’s weathered cedar complements climbing beans on nearby trellises, while galvanized metal bins and vintage harvest baskets add rustic charm while serving practical purposes.
The space features ergonomic touches that make harvesting more comfortable, with cushioned kneeling benches positioned at key points and tool storage within easy reach.
Plants are arranged in graceful layers, with shorter herbs and vegetables in front graduating to taller specimens behind, creating a natural workflow. A pergola overhead provides partial shade while supporting hanging baskets of cherry tomatoes and cucumbers that can be harvested at eye level.
Key Elements:
- Potting bench with storage compartments
- Cushioned kneeling benches
- Tool storage hooks and racks
- Sorting bins and harvest baskets
- Ergonomic pruners and gathering tools
- Height-varied planting beds
- Vertical growing systems
- Weather-resistant work surface
- Hand-washing station
- Collection containers in various sizes
Implementation begins with positioning the main workstation in a central location that provides easy access to growing areas.
Install the potting bench on a level, stable surface, preferably on concrete pavers or gravel for drainage. Arrange raised beds in a U-shape around the station, keeping paths wide enough for wheelbarrows.
Install tool storage on the bench or nearby walls, ensuring frequently used items are within arm’s reach.
Create zones for different harvesting tasks: cleaning, sorting, and packaging. Consider including a simple sink or wash station connected to a garden hose.
Position vertical growing elements like trellises and hanging systems to minimize reaching and bending.
Regular maintenance includes keeping tools clean and organized, replacing cushions as needed, and treating wooden elements annually to prevent weather damage.
Gardens of any size can incorporate harvesting stations by scaling elements appropriately.
Balcony gardens might use a fold-down table mounted to the wall, with vertical storage solutions and compact tool storage.
For smaller spaces, choose multi-functional furniture and prioritize essential tools only.
Consider mobile elements that can be tucked away when not in use, and focus on crops that can be harvested easily in confined spaces, such as container vegetables and herbs in vertical planters.