
8 Garden Ideas for Creating Garden Rooms
Your backyard can transform from an open space into a series of enchanting destinations, and your garden can evolve from a single vista into multiple captivating experiences. When you’re ready to reimagine your outdoor living areas, the concept of garden rooms offers endless creative possibilities through strategic design choices. From cozy nooks wrapped in flowering vines to sun-drenched Mediterranean terraces, you’ll discover how simple elements like pathways, plants, and structures can define distinct spaces that invite exploration and enjoyment.
Contents
- 1 Define Zones With Strategic Plant Placement
- 2 Create Natural Walls Using Hedges and Screens
- 3 Install Pergolas and Archways as Transitions
- 4 Design Pathways to Connect Garden Spaces
- 5 Establish Distinct Themes for Each Room
- 6 Incorporate Water Features as Room Focal Points
- 7 Use Different Levels and Elevation Changes
- 8 Add Structure With Garden Buildings and Furniture
Define Zones With Strategic Plant Placement
Strategic plant placement transforms a garden room into a series of intimate, purposeful spaces that flow naturally from one to another. Tall ornamental grasses like Miscanthus and Pennisetum create subtle barriers between areas, while flowering shrubs like hydrangeas and viburnums establish clear boundaries without building walls. The layered effect of varying plant heights creates a sense of discovery, leading visitors through distinct zones for dining, relaxation, and contemplation.
The thoughtful arrangement of plants not only defines spaces but also builds atmosphere through color and texture. A meditation area might feature soft, silvery plants like Russian sage and lamb’s ear, while an entertaining space could be energized by bold tropical foliage and bright flowering perennials. The strategic positioning of aromatic plants like lavender and rosemary adds sensory cues that help distinguish different zones.
Key Elements:
- Tall ornamental grasses (Miscanthus, Pennisetum, Calamagrostis)
- Medium-height flowering shrubs
- Low-growing border plants
- Container plants for flexibility
- Structural elements (trellises, obelisks)
- Path-defining plants
- Accent plants for focal points
- Varying foliage textures
- Sequential blooming varieties
Begin implementation by mapping out your garden room’s primary functions and traffic patterns. Place the tallest plants at the back of each zone, creating natural backdrops and barriers. Work forward with progressively shorter plants, ensuring sight lines remain open where desired and blocked where privacy is needed.
Consider seasonal changes when selecting plants, ensuring year-round structure with evergreens while incorporating deciduous plants for seasonal interest.
Pay attention to maintenance requirements when establishing zones. Group plants with similar water and sunlight needs together for efficient care. Consider mature plant sizes to avoid overcrowding and maintain clear boundaries between zones. Use container plants strategically to adjust spaces as needed and provide immediate impact while permanent plantings establish themselves.
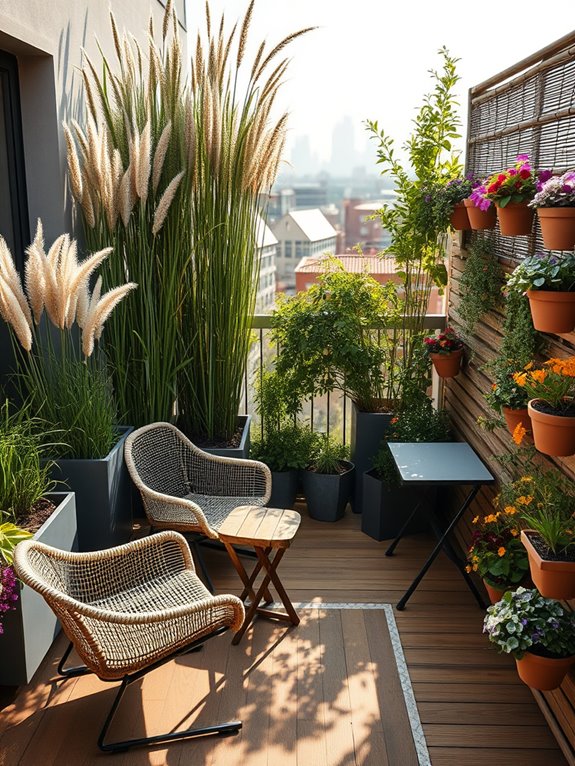
For smaller spaces or balconies, utilize vertical elements and dwarf varieties to create distinct zones without consuming precious floor space. Consider mobile planters on wheels for flexibility, and incorporate multi-functional plants that provide both screening and edible or aromatic benefits.
Focus on creating mini-zones that can serve multiple purposes, such as a herb garden that doubles as a privacy screen or a compact seating area surrounded by fragrant climbers.
Create Natural Walls Using Hedges and Screens
Transform your garden room into a secluded retreat by creating natural walls with lush hedges and living screens. Evergreen hedges like boxwood, yew, or privet form elegant, year-round boundaries while climbing plants such as jasmine, clematis, and ivy add vertical interest and depth. These living walls create an intimate atmosphere, offering privacy while maintaining a connection to nature through their organic textures and gentle movement in the breeze.
The layered effect of different plant heights and varieties creates a rich tapestry of greens punctuated by seasonal blooms. Bamboo screens provide instant height and a contemporary Asian-inspired feel, while mixed native hedging brings wildlife-friendly diversity. The natural walls can be enhanced with architectural elements like lattice panels or metal frameworks, offering additional support for climbing plants and creating fascinating shadow patterns throughout the day.
Key Elements:
- Evergreen hedge plants (boxwood, yew, privet)
- Climbing plants (jasmine, clematis, ivy)
- Bamboo screens or reed panels
- Trellis or lattice frameworks
- Support structures and wire systems
- Mixed native hedging plants
- Container plants for instant impact
- Decorative posts or pillars
- Growth medium and mulch
- Irrigation system
Implementation begins with planning the desired height and width of your natural walls, considering sun exposure and mature plant sizes. Install strong support structures first, whether traditional posts and wire systems for climbers or sturdy frames for hedge containment.
Plant evergreen hedges at recommended spacing for optimal growth, typically 18-24 inches apart, while climbing plants should be positioned near their supports with rich, well-draining soil and regular watering during establishment.
Create instant impact by combining fast-growing species with mature container plants, and layer different heights to achieve immediate screening while permanent elements develop. Maintain clean lines through regular trimming of hedges during growing seasons, and train climbing plants along their supports as they grow.
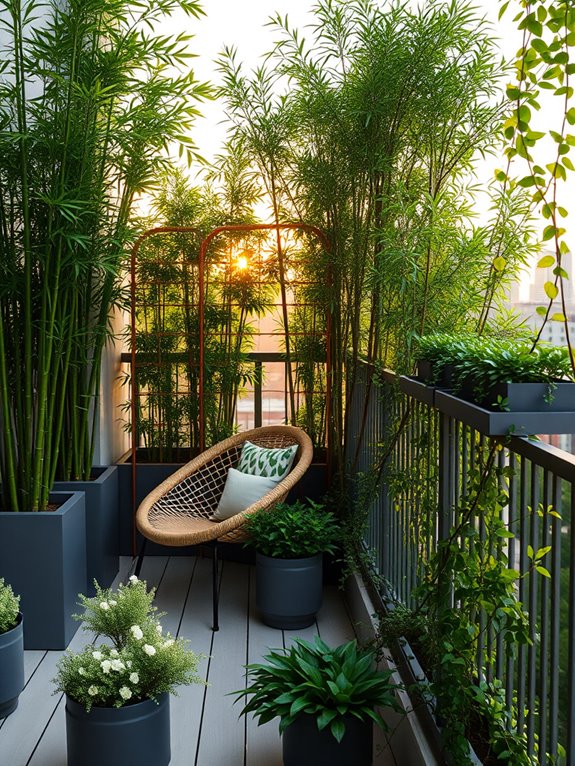
Extra Tips: Consider using columnar plants for narrow spaces and dwarf varieties for small gardens or balconies. For balcony gardens, use lightweight containers with built-in trellises and select compact climbers. Incorporate evergreen and deciduous plants for year-round interest while managing seasonal maintenance needs.
Install automatic irrigation systems to ensure consistent moisture levels, particularly crucial for container-grown screening plants in exposed positions.
Install Pergolas and Archways as Transitions

Pergolas and archways create enchanting transitional spaces that guide visitors through your garden while adding vertical drama and romantic appeal. These architectural elements frame garden views and create inviting pathways, whether adorned with climbing roses, wisteria cascades, or delicate clematis vines.
The interplay of light and shadow beneath these structures adds depth and mystery, while the overhead canopy of flowers and foliage creates an intimate, enclosed feeling. The combination of sturdy structural elements with soft, flowing plant material transforms ordinary garden paths into magical corridors.
Morning sunlight filtering through vine-covered pergolas casts intricate shadow patterns on the ground, while archways act as graceful portals between different garden rooms. These transitions can be enhanced with hanging lanterns, wind chimes, or decorative bird feeders, creating multi-sensory experiences as visitors move through the space.
Key Elements:
- Wooden or metal pergola structure
- Decorative archways
- Climbing vines and flowering plants
- Support cables or trellising
- Path materials (gravel, stepping stones, or pavers)
- Accent lighting
- Plant ties and training materials
- Weather-resistant hardware
- Foundation materials
- Complementary ground cover plants
Installation begins with careful placement planning, ensuring pergolas and archways align with natural walking paths and sight lines. Structures should be firmly anchored with proper foundations, using weather-resistant materials suitable for supporting mature vines.
Plant selection should consider growth rates and ultimate size, with fast-growing annuals like morning glory providing quick coverage while permanent vines establish themselves. Regular maintenance includes pruning, training vines, and checking structural integrity.
For smaller spaces or balconies, consider free-standing arch elements or modular pergola systems that can be scaled to fit available space. Wall-mounted half-pergolas can create similar effects in narrow areas, while container-grown climbers can be trained up simple metal arches.
Choose compact climbing varieties like clematis ‘Nelly Moser’ or annual sweet peas for limited spaces, and ensure structures are properly secured against wind exposure at higher elevations.
Design Pathways to Connect Garden Spaces
Meandering pathways through garden spaces create an enchanting journey that connects different outdoor rooms while building anticipation for what lies around each corner.
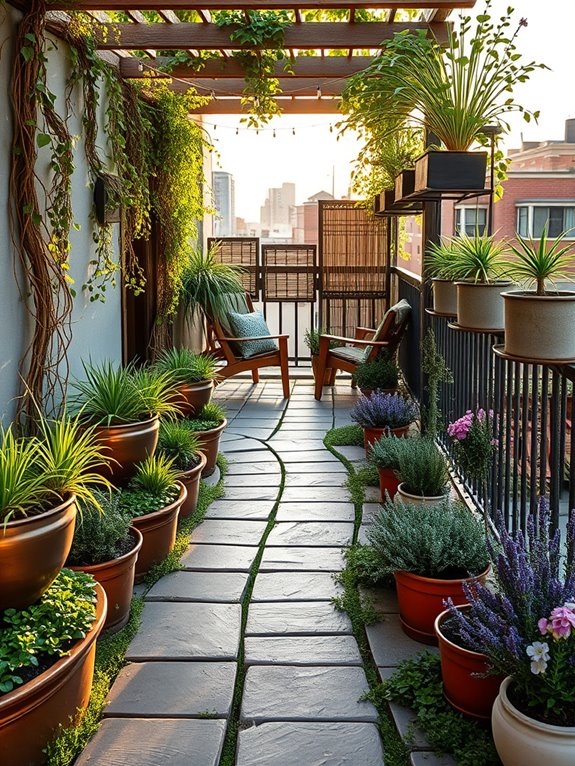
Natural stone pavers nestled among creeping thyme and Irish moss form inviting walkways, while ornamental grasses like Mexican feather grass and Japanese forest grass sway gently along the edges. Strategic placement of flowering perennials such as lavender, salvia, and catmint provide bursts of color and fragrance as visitors traverse the space.
The pathways themselves become artistic elements, with varying widths and materials creating visual rhythm and flow. Wider sections featuring circular nodes or geometric patterns serve as mini destinations, while narrower passages through dense plantings create a sense of discovery.
Solar-powered path lights illuminate the way during evening hours, casting magical shadows and extending the garden’s usability into twilight hours.
Key Elements:
- Pavers (natural stone, brick, or concrete)
- Ground cover plants (thyme, moss, creeping jenny)
- Border plants (ornamental grasses, low-growing perennials)
- Path lighting
- Focal points or destination features
- Edge materials (metal edging, stones, or timber)
- Drainage materials
- Geometric patterns or designs
- Multi-level elements
- Transitional plants between spaces
Implementation begins with mapping the desired flow between garden rooms, considering both practical movement patterns and aesthetic appeal.
Start by laying out the path’s general direction using rope or garden hoses, then mark the edges and excavate to a depth of 6-8 inches. Install proper drainage materials, followed by a compacted base layer of crushed stone. Set pavers or chosen materials in a stable bedding material, ensuring proper spacing for ground cover plants.
Edge containment should be installed to maintain path integrity, while strategic plantings along the borders help soften transitions.
When designing garden pathways, consider maintenance requirements and seasonal changes. Choose materials that complement your climate and lifestyle, incorporating adequate width for comfortable passage and any equipment needed for garden maintenance.
For smaller spaces, create the illusion of length through curved paths rather than straight lines, and use scaled-down materials that don’t overwhelm the space. Consider permeable surfaces in areas prone to water accumulation, and plan for proper lighting placement during initial installation to avoid disturbing established plantings later.
Establish Distinct Themes for Each Room
Creating distinct themes for each garden room transforms an ordinary outdoor space into a captivating journey through multiple environments, each with its own personality and purpose.
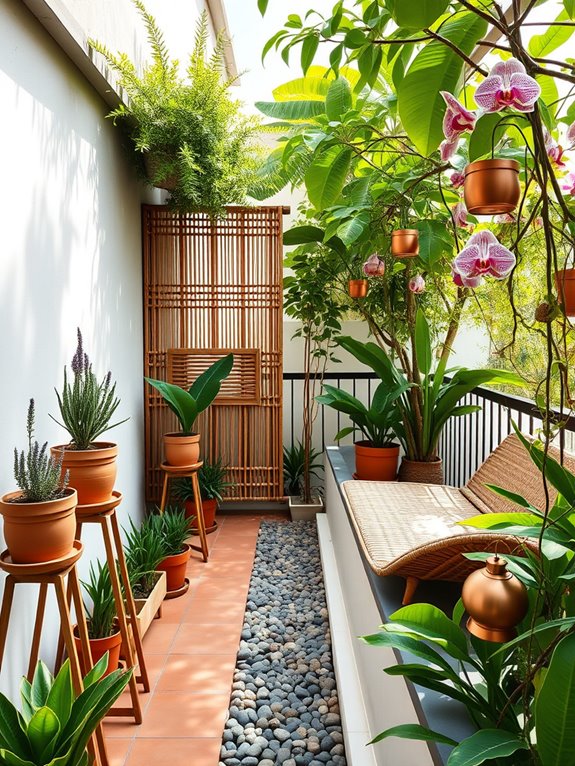
A Mediterranean-themed room might feature lavender, olive trees, and terra cotta pots amid gravel pathways, while adjacent spaces could transport visitors to a tropical paradise with bamboo, bird of paradise flowers, and lush ferns beneath a wooden pergola. The thoughtful separation between themes creates anticipation and surprise as one moves through the garden.
These themed transitions can be achieved through strategic placement of architectural elements like archways, changes in paving materials, or subtle shifts in plant heights and textures. A formal English garden room might showcase symmetrical boxwood hedges and climbing roses, leading into a zen-inspired space with cloud-pruned evergreens and carefully placed rocks surrounded by raked gravel. Each area evokes distinct emotional responses and serves different functional purposes.
Key Elements:
- Architectural dividers (screens, arbors, hedges)
- Theme-specific plants for each space
- Appropriate hardscaping materials
- Themed furniture and decorative elements
- Transitional elements between spaces
- Lighting specific to each theme
- Water features that match the style
- Container plantings
- Theme-appropriate pathways
- Focal points for each room
To implement distinct garden rooms, begin by sketching a master plan that divides your space into logical sections, considering natural traffic flow and existing features.
Install structural elements first, such as pergolas or screening plants, to create the basic framework for each room. Layer in hardscaping elements that reflect each theme, followed by larger plants and trees. Complete each space with appropriate furniture, lighting, and accessories that reinforce the chosen theme.
When designing themed garden rooms, consider seasonal changes and maintenance requirements for each space. Mediterranean gardens need excellent drainage and full sun, while woodland themes require shade and moisture-retentive soil.
For smaller spaces or balconies, focus on creating micro-versions of your chosen themes using container gardens and vertical elements, and ensure that adjacent themes complement rather than clash with each other.
Incorporate Water Features as Room Focal Points
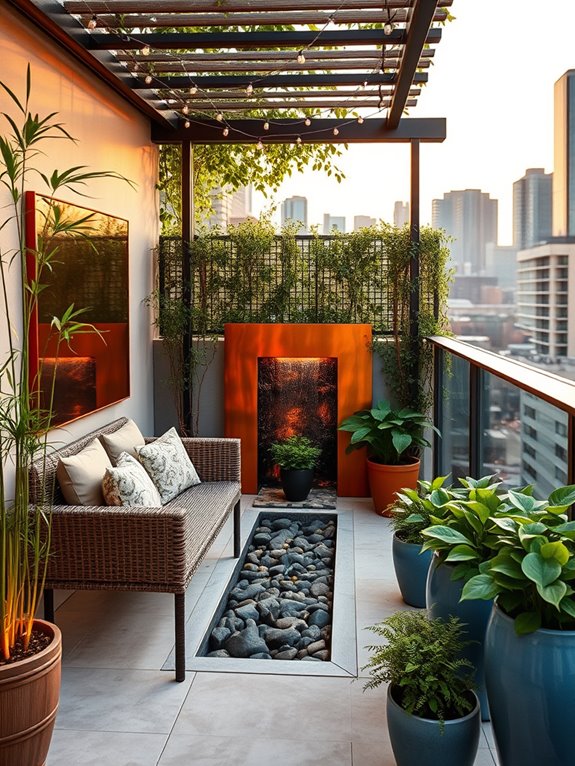
Transform your garden room into a tranquil oasis by incorporating a stunning water feature as its centerpiece. Whether it’s a classical tiered fountain, a contemporary water wall, or a naturalistic pond, the sight and sound of flowing water instantly creates a sense of serenity and draws the eye to a captivating focal point. Surrounding your chosen water feature with moisture-loving plants like Japanese iris, hostas, and ferns creates a lush, coordinated environment that enhances the water’s natural appeal.
The magical combination of water movement and strategic lighting creates an enchanting atmosphere that transitions beautifully from day to night. During daylight hours, sunlight dances on the water’s surface, while evening illumination transforms the space into a mystical retreat. The gentle sound of cascading water masks urban noise and creates a peaceful backdrop for outdoor entertaining or quiet contemplation.
Key Elements:
- Water feature (fountain, pond, or water wall)
- Submersible pump and filtration system
- Waterproof lighting fixtures
- Moisture-loving plants
- Natural stone or decorative edging
- Seating arrangements
- Electrical outlet access
- Drainage system
- Water-safe ground surface
- Maintenance tools
Installing a water feature requires careful planning and proper infrastructure. Begin by selecting a level location with access to electricity and ensuring proper drainage.
Install a sturdy base or foundation that can support the weight of your chosen water feature and its contents. Create zones around the feature for plantings, incorporating different heights and textures to maintain visual interest. Ensure all electrical components are properly rated for outdoor use and protected from the elements.
The success of your water feature depends largely on regular maintenance and seasonal care. Keep pumps clean and functioning, monitor water levels, and treat the water to prevent algae growth. In regions with freezing winters, prepare the feature for cold weather by draining systems or installing heaters as needed. Consider installing an automatic fill system to maintain consistent water levels and reduce daily maintenance.
Extra Tips: Scale your water feature to your available space – small self-contained fountains work well in intimate corners, while larger features can command more expansive areas.
For balcony gardens, consider wall-mounted water features or tabletop fountains that don’t require complex plumbing. Use submersible LED lights to create dramatic evening effects without extensive electrical work, and consider incorporating aquatic plants in larger features to help maintain water quality naturally.
Always check local building codes and weight restrictions before installing any water feature, especially in elevated or confined spaces.
Use Different Levels and Elevation Changes
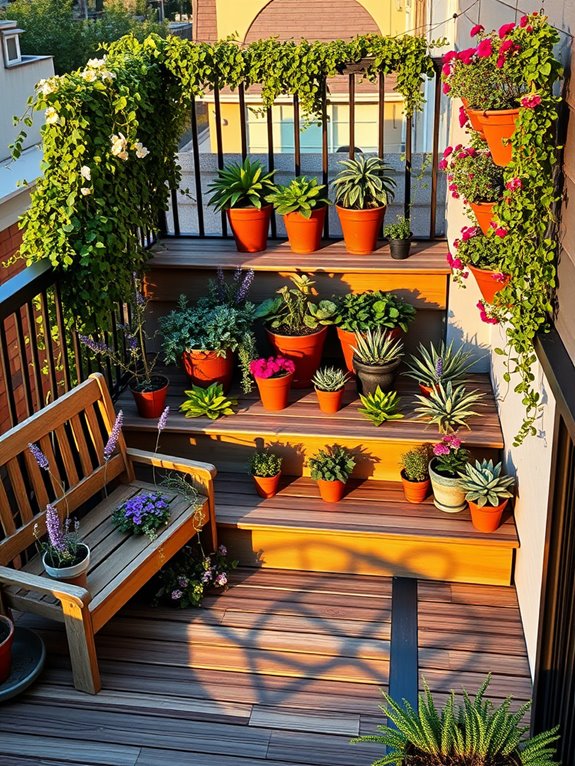
Multiple levels and elevation changes transform an ordinary garden room into a dynamic, multi-dimensional retreat that draws the eye upward and creates visual intrigue at every turn.
Stepped planters cascade with trailing vines like ivy and nasturtiums, while raised beds showcase eye-catching specimens such as ornamental grasses and flowering perennials. The varied heights create natural zones for different activities, from sunken meditation spaces to elevated dining areas, all connected by graceful stone steps or natural wooden platforms.
The layered approach allows for a rich tapestry of textures and colors, with tall architectural plants like bamboo or tree ferns providing screening at the highest points, medium-height flowering shrubs filling the middle ground, and ground covers carpeting the lower levels. Water features can be incorporated to flow between levels, creating soothing sounds and reflecting light throughout the space, while strategic lighting highlights the vertical elements after dark.
Key Elements:
- Retaining walls
- Steps or platforms
- Multi-level planters
- Terraced beds
- Built-in seating at different heights
- Path lighting
- Drainage systems
- Support structures for climbing plants
- Weather-resistant materials
- Level-appropriate plant selections
Creating effective elevation changes requires careful planning and proper construction techniques.
Begin by mapping out the desired levels and ensuring proper drainage throughout the space. Install robust retaining walls using materials that complement your garden’s style, such as natural stone, wood, or concrete blocks. Ensure each level has adequate soil depth for intended plantings and incorporate irrigation systems during construction to reach all areas effectively.
When selecting plants, consider their mature size and growth habits relative to their position in the elevation scheme.
Place larger specimens at the back of raised areas and trailing plants near edges where they can cascade downward. Incorporate permanent structural elements like built-in seating or storage beneath raised sections to maximize space utilization.
For smaller spaces or balconies, vertical gardening techniques can create the illusion of multiple levels without extensive construction.
Use wall-mounted planters, hanging baskets at varying heights, or free-standing plant towers. Consider lightweight materials and modular systems that can be easily modified or relocated as needed. Always verify weight restrictions and waterproofing requirements, particularly for elevated or rooftop gardens, and ensure all structures are securely anchored to withstand wind and weather conditions.
Add Structure With Garden Buildings and Furniture
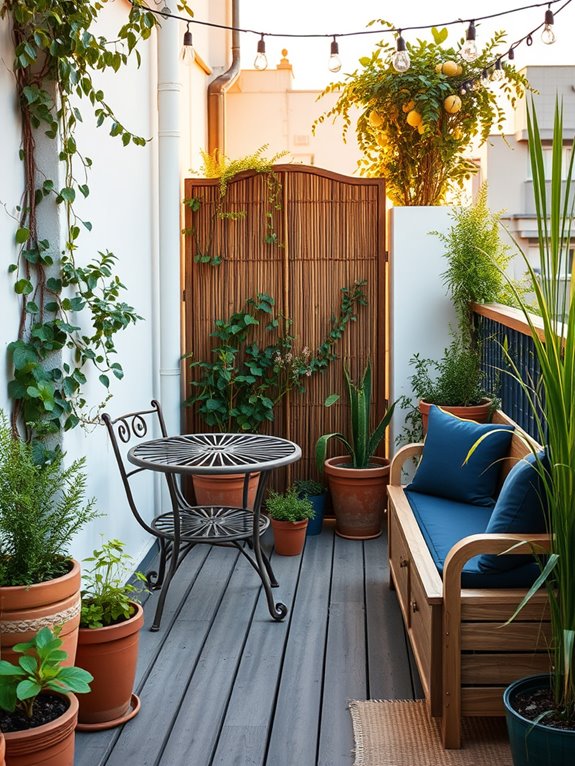
The thoughtful placement of garden buildings and furniture transforms an ordinary outdoor space into a structured, living extension of your home. Elegant pergolas draped with climbing roses and wisteria create natural ceilings, while strategically positioned arbors frame pathways and define distinct areas within the garden.
Weathered wooden benches, classic wrought-iron seating, and contemporary rattan furniture sets establish inviting conversation areas that beckon visitors to pause and enjoy the surroundings.
Stone pathways wind between carefully positioned structures, leading to charming focal points like a rustic potting shed adorned with vintage tools or a modern greenhouse that gleams in the sunlight. The interplay of hard and soft landscaping elements creates a balanced composition, with climbing plants softening architectural elements and container gardens adding bursts of color around seating areas.
Strategic lighting transforms these spaces after dark, casting warm glows through pergola beams and illuminating garden buildings.
Key Elements:
- Pergola or arbor
- Garden shed or greenhouse
- Outdoor seating set
- Path lighting
- Weatherproof storage solutions
- Decorative screens or trellises
- All-weather cushions and textiles
- Container plants
- Pathway materials
- Outdoor side tables
- Garden ornaments
- Weather-resistant paint or sealant
Begin by creating a scaled plan of your space, marking sunny and shaded areas to determine optimal placement for structures and seating. Install larger elements first, such as pergolas or garden buildings, ensuring proper foundations and drainage.
Create clear pathways between different zones, using consistent materials to maintain visual flow. Position furniture to take advantage of views and natural shelter, arranging conversation areas to accommodate comfortable movement between spaces.
When selecting and arranging elements, consider year-round functionality and maintenance requirements. Choose weather-resistant materials appropriate for your climate, and ensure adequate protection for wooden structures and furniture. Incorporate storage solutions that blend seamlessly with your design, such as benches with hidden compartments or decorative garden boxes.
Design Adaptations: For smaller spaces, opt for fold-away furniture and vertical growing solutions to maximize space efficiency. Consider multi-functional pieces like storage benches or convertible tables.
In urban settings, use lightweight, movable structures and ensure all installations comply with local regulations and weight restrictions. Paint larger structures in light colors to create an illusion of space, and use mirrors strategically to amplify light and create depth in confined areas.