
8 Garden Ideas With Water-Saving Tips
You’ll discover that creating a water-wise garden doesn’t mean sacrificing beauty for sustainability. When you combine smart plant choices, efficient irrigation systems, and thoughtful design strategies, you can transform your outdoor space into a vibrant, low-maintenance oasis. From selecting native plants that thrive in your local climate to implementing innovative watering techniques, these eight practical tips will help you cultivate a stunning landscape while conserving one of Earth’s most precious resources.
Contents
Choose Native and Drought-Resistant Plants
Transform your outdoor space into a vibrant tapestry of resilient beauty with native and drought-resistant plants that celebrate your local ecosystem. Imagine sweeping waves of purple sage, golden yarrow, and russet blanket flowers dancing in the breeze, while architectural agaves and decorative grasses add structure and movement.
Natural stone pathways weave through clusters of desert marigolds and black-eyed susans, creating an enchanting display that attracts butterflies and hummingbirds while requiring minimal water.
The garden comes alive with textures and layers – tall verbena and salvias provide height, while ground-hugging sedums and native groundcovers create living carpets between stepping stones.
Ornamental grasses like blue fescue and feather reed grass catch the light and sway gracefully, adding motion and sound. Strategic placement of boulder clusters and weathered driftwood creates natural focal points that complement the drought-tolerant plantings.
Key Elements:
- Native flowering perennials (salvias, penstemons, coneflowers)
- Ornamental grasses
- Succulents and cacti
- Natural stone pathways
- Boulder clusters
- Gravel or mulch
- Drip irrigation system
- Weather-resistant container plants
- Native groundcovers
- Local wildflowers
Begin implementation by analyzing your site’s sun exposure and soil conditions. Group plants with similar water needs together, creating hydrozones that maximize irrigation efficiency.
Install a drip system before planting, then add larger specimens first, such as ornamental grasses and structural plants. Work outward with medium-sized perennials, finally filling gaps with groundcovers and smaller plants.
Maintain 2-3 inches of mulch around plants to retain moisture and suppress weeds.
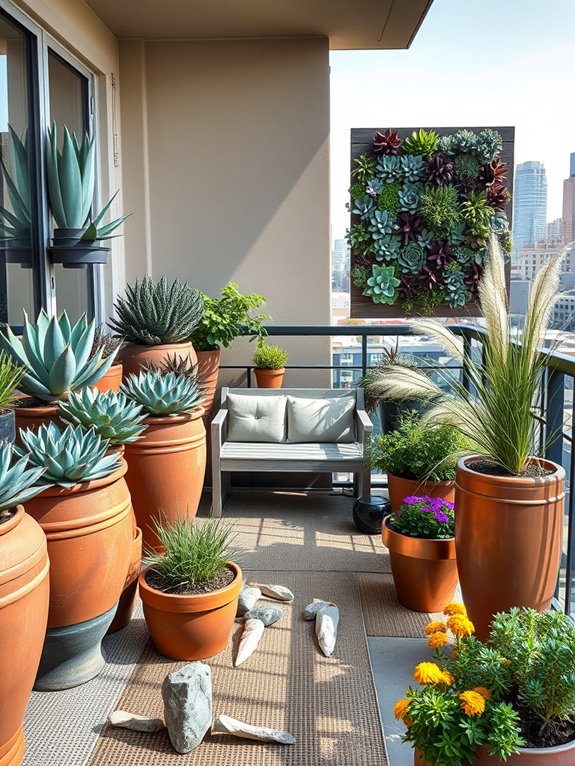
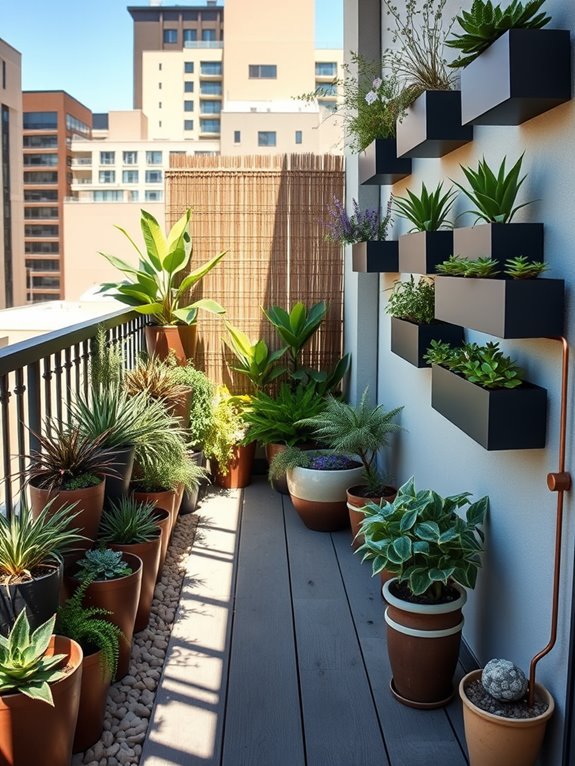
For balcony gardens, focus on container-friendly native plants and succulents in lightweight, drought-resistant pottery. Small spaces benefit from vertical elements like wall-mounted succulent gardens or climbing vines on trellises.
Consider wind exposure at different heights and protect delicate plants accordingly. Group containers to create humidity pockets and use self-watering planters to maintain consistent moisture levels.
Remember that balcony microclimates can be more extreme than ground-level gardens, so choose extra-hardy varieties suited to your specific conditions.
Install Smart Irrigation Systems
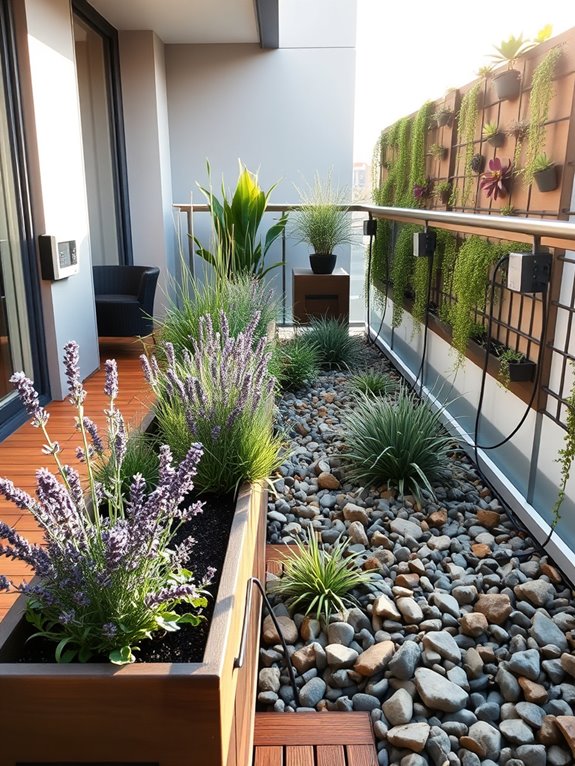
A smart irrigation garden combines modern technology with natural beauty, creating an effortlessly lush landscape that thrives with minimal water waste. Drought-resistant plants like lavender, sage, and ornamental grasses sway gracefully alongside native flowering species, their colors enhanced by precise water delivery that keeps them at optimal hydration levels.
Solar-powered sensors nestled discreetly among the foliage monitor soil moisture, while sleek control panels blend seamlessly with contemporary garden fixtures.
The garden’s efficiency is matched by its aesthetic appeal, with strategically placed drip lines disappearing beneath a layer of decorative mulch or gravel. Water-wise groundcovers spread between stepping stones, while moisture-sensing hanging baskets showcase cascading plants like trailing petunias and ivy geraniums.
The subtle hum of automated systems working in harmony with nature creates a sense of technological sophistication while maintaining the garden’s natural serenity.
Key Elements:
- Smart irrigation controller with WiFi capability
- Soil moisture sensors
- Rain sensors
- Drip irrigation lines
- Soaker hoses
- Zone control valves
- Weather station
- Smart phone app integration
- Water-efficient sprinkler heads
- Pressure regulators
- Timer controls
- Moisture-retaining mulch
Installation begins with a thorough assessment of the garden’s different watering zones, considering sun exposure, soil type, and plant water requirements.
The smart controller should be installed in a protected location with access to power and WiFi, while moisture sensors are placed strategically throughout the garden zones. Drip lines and soaker hoses are laid following plant groupings, ensuring each area receives appropriate water amounts.
The system requires regular maintenance checks to ensure sensors are functioning correctly and irrigation lines remain clear of debris.
Seasonal adjustments to watering schedules can be programmed through the smart controller, which should be calibrated to account for rainfall and temperature changes.
Many systems also offer mobile alerts for leaks or system malfunctions, allowing for immediate response to potential issues.
For smaller spaces or balcony gardens, consider investing in self-contained smart irrigation systems that connect to standard outdoor faucets.
Container gardens can benefit from specialized drip emitters and moisture sensors designed for pots, while vertical gardens may require custom irrigation zones with different pressure settings.
Regular system updates and sensor calibration will ensure optimal performance regardless of garden size, and grouping plants with similar water needs will maximize the system’s efficiency.
Create Effective Mulching Strategies
A thoughtfully mulched garden creates a polished, professional appearance while serving as nature’s protective blanket. Rich cedar mulch in warm auburn tones contrasts beautifully with emerald groundcovers, while chocolate-colored cocoa hulls provide an elegant backdrop for flowering perennials. The varied textures of mulching materials – from smooth river rocks to chunky bark – add visual interest and create natural pathways that guide visitors through the landscape.
The layered mulching approach transforms ordinary beds into water-wise havens where plants thrive with minimal irrigation. Ornamental grasses peek through blankets of straw mulch, their delicate plumes dancing in the breeze, while drought-resistant salvias and lavender stand proudly against a backdrop of natural wood chips. This strategic mulching creates a garden that appears both carefully planned and effortlessly natural.
Key Elements:
- Organic mulch materials (bark, wood chips, straw)
- Inorganic mulch options (river rocks, gravel)
- Landscape fabric or cardboard
- Edge restraints or borders
- Drought-resistant plants
- Soaker hoses or drip irrigation
- Garden tools (rake, wheelbarrow, shovel)
- Mulch calculator
Begin implementation by clearing the target area of weeds and debris, then laying down a weed barrier such as landscape fabric or several layers of cardboard. Create defined edges using plastic, metal, or stone borders to contain the mulch. Apply organic mulch in a 2-3 inch layer, keeping it several inches away from plant stems and tree trunks to prevent rot.
For areas prone to erosion or high-traffic zones, consider using heavier inorganic mulches like river rocks or gravel. Layer mulch materials strategically, using finer materials around delicate plants and coarser options in pathways or under larger shrubs. Maintain mulch depth by adding fresh material annually, typically in spring before the growing season begins. Monitor moisture levels beneath the mulch, adjusting irrigation as needed since mulched beds require less frequent watering.
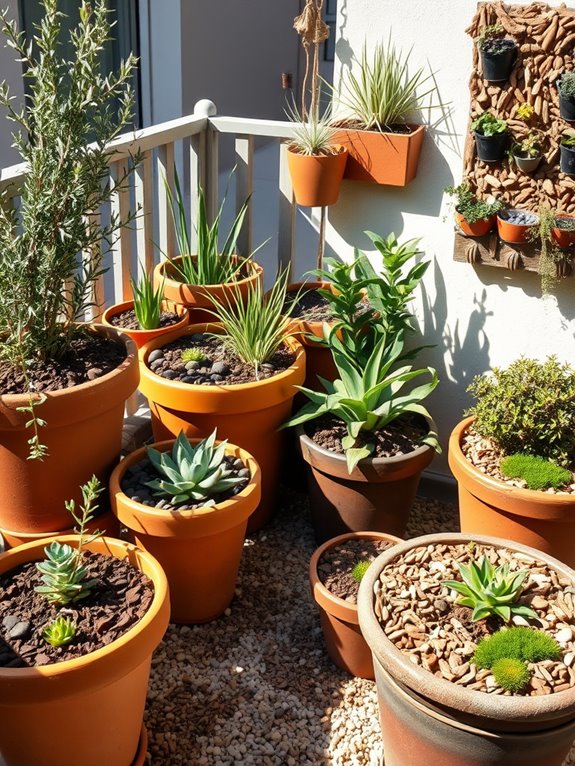
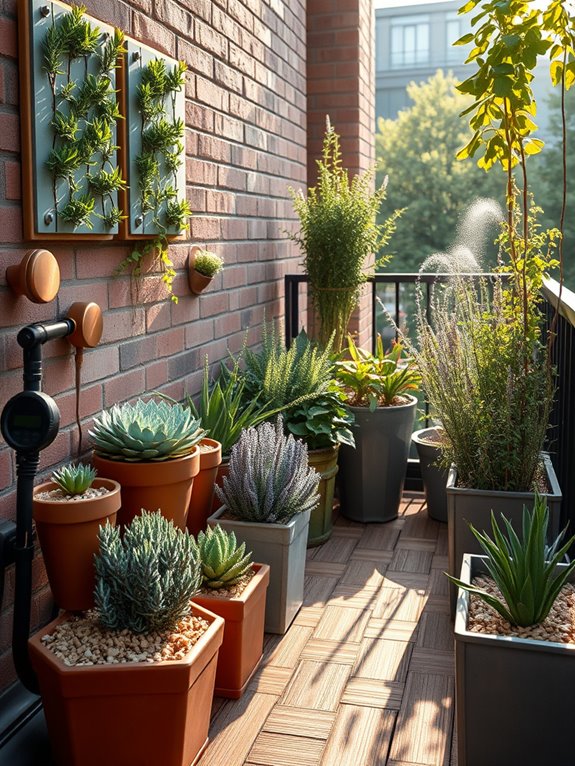
Extra Tips: For small spaces or balcony gardens, use lightweight mulch materials and consider vertical mulching techniques, such as mulching wall-mounted planters or stacked containers. Container gardens benefit from a thin mulch layer to retain moisture and regulate soil temperature.
In windy areas, use heavier mulch materials or anchor lighter mulches with a top layer of decorative stones. For year-round appeal, combine different mulch types to create interesting patterns and focal points that maintain their aesthetic value even when plants are dormant.
Design a Rain Garden
A rain garden transforms an ordinary landscape into a vibrant, eco-conscious sanctuary where native plants create a natural depression that captures and filters rainwater. Swaying ornamental grasses like switchgrass and little bluestem dance alongside deep-rooted perennials such as black-eyed susans and purple coneflowers, creating a meadow-like appearance that attracts butterflies and birds.
The subtle bowl-shaped design seamlessly integrates with the surrounding landscape, offering year-round visual interest through varied textures and heights. The garden comes alive during rainfall, when water temporarily pools in the shallow basin, creating a dynamic ecosystem that evolves with each weather pattern.
Layers of carefully selected plants work in harmony, from moisture-loving sedges and rushes in the deepest areas to drought-tolerant natives along the outer edges. Natural stone borders and stepping stones add structure while allowing easy access for maintenance and appreciation of the garden’s beauty.
Key Elements:
- Native perennial plants with deep root systems
- Moisture-tolerant plants for basin center
- Drought-resistant plants for edges
- Permeable soil mix
- Gravel or stone drainage layer
- Natural stone borders
- Downspout connection or water source
- Strategic slope grading
- Mulch layer
- Wildlife-attracting plants
Creating a rain garden begins with selecting a location at least 10 feet from building foundations, where natural water flow occurs. Excavate a shallow depression 4-8 inches deep, incorporating a soil mixture of 50% sand, 30% topsoil, and 20% compost to ensure proper drainage.
Install plants in concentric circles, starting with the most water-tolerant species in the center and gradually transitioning to drought-resistant varieties along the edges. Layer 2-3 inches of mulch between plants to prevent soil erosion and maintain moisture levels.
For smaller spaces or balcony adaptations, consider creating a modified rain garden using containers with drainage holes and overflow outlets. Use lightweight soil mix and select compact varieties of native plants.
Incorporate rain chains or direct downspouts into collection barrels to manage water flow. Install overflow mechanisms to prevent water damage, and ensure container weight limits are respected for balcony installations. Consider vertical elements like climbing plants or cascading species to maximize space usage while maintaining the rain garden’s functional benefits.
Collect and Store Rainwater

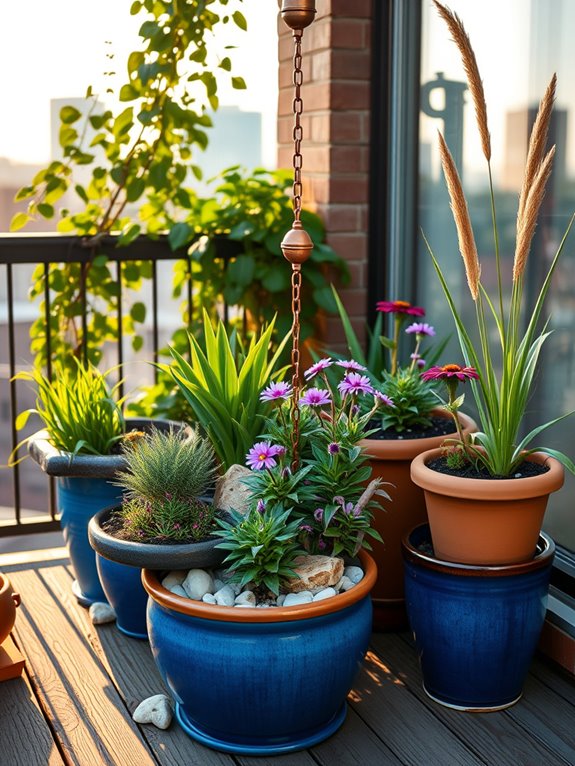
Imagine a thoughtfully designed garden where elegant rain chains cascade down from copper gutters, leading to a collection of stylishly arranged rain barrels adorned with climbing jasmine and moonflowers.
Artistic water features blend seamlessly with natural stone pathways, while decorative rain gardens filled with purple coneflowers, black-eyed susans, and native grasses create stunning focal points that serve both form and function.
The garden feels alive with purpose, each element working in harmony to capture and utilize nature’s precious gift of rain.
The space transforms during rainfall, becoming a mesmerizing display of water management artistry. Stone-lined channels guide excess water to underground storage tanks concealed by lush plantings of ferns and hostas.
Permeable pathways sparkle with moisture while rain gardens temporarily pool with water, creating ephemeral reflecting pools that attract birds and butterflies.
The garden demonstrates how water conservation can be both beautiful and sustainable.
Key Elements:
- Rain barrels or cisterns
- Rain chains
- Permeable pavers
- Underground storage tanks
- Rain gardens
- Water-directing channels
- Moisture-loving plants
- Drought-resistant plants
- Mulch and ground cover
- Proper drainage system
- Gutters and downspouts
- Collection basins
Begin implementation by assessing your property’s natural water flow and identifying optimal placement for collection points.
Install gutters and downspouts strategically, incorporating decorative rain chains where visible. Position rain barrels or underground storage tanks at collection points, ensuring proper overflow mechanisms are in place.
Create rain gardens in natural depressions or dig shallow basins in areas where water naturally collects, layering appropriate soil mixtures and selecting plants based on moisture tolerance zones.
Connect collection points with attractive channels lined with river rock or permeable materials.
Install overflow systems that direct excess water to rain gardens or other appropriate drainage areas. Maintain proper grading away from structures and ensure all storage systems are securely covered and childproof.
When designing a rainwater collection system, consider your climate’s typical rainfall patterns and adjust storage capacity accordingly.
For smaller spaces or balconies, utilize vertical storage solutions like wall-mounted rain barrels or slim-line tanks.
Incorporate multiple small rain gardens rather than one large one to maximize space efficiency, and choose compact varieties of moisture-loving plants.
Remember to check local regulations regarding rainwater harvesting and ensure all systems comply with building codes.
Group Plants by Water Needs
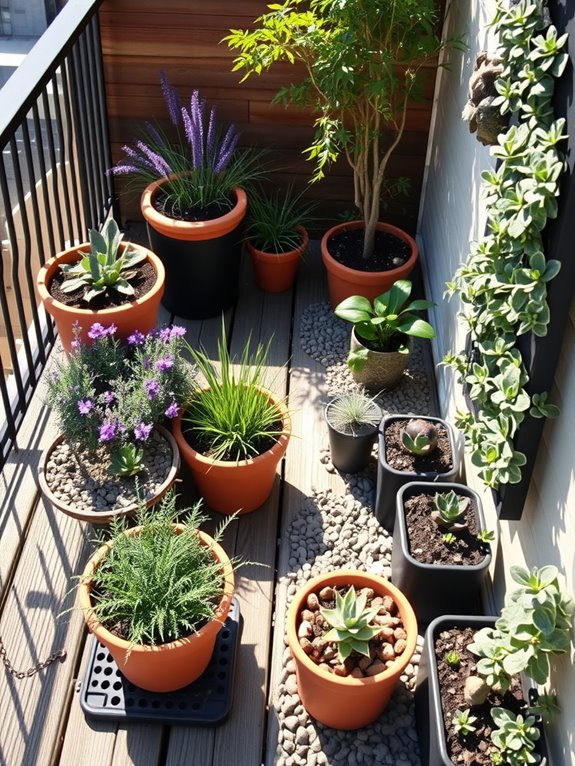
A thoughtfully planned garden with plants grouped by water needs creates stunning visual harmony while maximizing water efficiency. Lush, water-loving plants like ferns and hostas cluster together in shaded alcoves, creating cool, peaceful retreats.
Meanwhile, drought-resistant Mediterranean herbs and native wildflowers form vibrant patches of color in sunnier spots, their silver-green foliage catching light and dancing in the breeze.
The natural flow between different water-need zones creates distinct garden rooms, each with its own character. A tranquil bog garden featuring iris and cardinal flowers transitions seamlessly into a xeriscape area where lavender, sage, and ornamental grasses wave gracefully.
Stone pathways and decorative borders clearly define these spaces, while artistic placement of rocks and garden art unifies the overall design.
Key Elements:
- Plants with similar water requirements
- Clear zone boundaries (stones, borders, or pathways)
- Soil amendments specific to each zone
- Efficient irrigation system with separate controls
- Mulch appropriate for each area
- Plant markers or zone identifiers
- Decorative elements (rocks, sculptures, benches)
- Shade structures where needed
Begin implementation by mapping your garden’s natural moisture zones, considering factors like shade, slope, and existing drainage patterns. Install a smart irrigation system with separate zones before planting, ensuring each area can be watered independently.
Prepare the soil in each zone to match plant needs – adding organic matter for moisture-loving plants and improving drainage for drought-resistant varieties. Place taller plants at the back of each zone, graduating to shorter specimens in front, maintaining clear sight lines and natural transitions between areas.
When designing a water-wise grouped garden for different spaces, consider vertical gardening options for small areas and balconies. Use self-watering containers to maintain consistent moisture levels, and install drip irrigation systems with timers for each zone.
Select compact varieties of plants with similar water needs, and remember that even tiny spaces can accommodate multiple water-requirement zones when properly planned and executed.
Optimize Watering Schedule and Timing
Smart water management creates a garden that thrives in harmony with nature’s rhythms. Morning dewdrops glisten on carefully positioned drought-resistant plants like lavender, sage, and ornamental grasses, while automated drip systems deliver precise amounts of water to deep-rooted perennials.
The garden pulses with life during the golden hours of dawn and dusk, when strategic watering schedules transform the space into a refreshing oasis. Stone pathways wind through clusters of native plants that have naturally adapted to local rainfall patterns, creating a sustainable landscape that requires minimal intervention.
Mediterranean herbs and succulents dot the garden beds, their silvery foliage reflecting sunlight and adding texture to the design. Moisture-retaining mulch blankets the soil, while rain sensors stand ready to adjust watering schedules based on natural precipitation.
Key Elements:
- Automated irrigation system with smart controllers
- Drought-resistant plant varieties
- Rain sensors and soil moisture meters
- Timer-controlled drip lines
- Water-retention mulch
- Rainwater collection system
- Zone-specific sprinkler heads
- Weather-based programming interface
- Soil moisture retention crystals
- Deep-rooted perennials
Begin implementation by conducting a site analysis to identify sun exposure patterns and natural water flow. Install a smart irrigation controller as the central hub, connecting it to carefully positioned moisture sensors throughout the garden.
Group plants with similar water needs into hydrozones, ensuring efficient water distribution. Layer the soil with organic matter and water-retaining mulch, then install drip lines or micro-sprinklers according to each zone’s requirements. Program the irrigation system to water during early morning hours, allowing optimal absorption while minimizing evaporation.
For successful adaptation to various spaces, consider vertical gardening systems with built-in irrigation for small balconies, or containerized gardens with self-watering reservoirs. Incorporate rain barrels or condensation collectors to supplement water supply, and use reflective surfaces or light-colored containers to reduce evaporation.
Remember that even the smallest space can benefit from smart watering technology – scale your system to match your garden’s size while maintaining the principles of efficient water management.
Maintain Healthy Soil Structure
A garden with healthy soil structure radiates vitality from the ground up, displaying lush plantings that seem to burst with life despite minimal water usage. Dark, crumbly soil peeks through a protective layer of organic mulch, while deeply-rooted native plants like yarrow, sage, and black-eyed susans create a tapestry of colors and textures.
Stone pathways wind through the space, their edges softened by creeping thyme that releases its fragrance with each step.
The garden’s structure reveals itself in layers, from ground covers that protect the soil to mid-height perennials and ornamental grasses that sway in the breeze. Deciduous trees like honey locust provide dappled shade while allowing their leaves to decompose naturally into the soil below.
Compost bins tucked discretely into corners promise future soil enrichment, while rain barrels collect precious water for dry spells.
Key Elements:
- Organic mulch (wood chips, straw, or leaf litter)
- Native drought-resistant plants
- Permeable pathways
- Compost system
- Rain collection system
- Soil testing kit
- Garden fork or broadfork
- Deep-rooted plants
- Ground cover varieties
- Deciduous trees or large shrubs
Creating a garden with healthy soil structure begins with testing your existing soil and amending it appropriately with organic matter. Layer compost and mulch at least 3 inches deep, keeping it away from plant stems to prevent rot.
Install pathways using permeable materials like gravel or stepping stones set in sand, allowing water to seep into the soil rather than run off.
Arrange plants in communities that share similar root depths and water needs, positioning deeper-rooted species where they can access groundwater and act as natural soil aerators. Maintain the soil structure by avoiding compaction – use designated paths and stepping stones when working in beds.
Practice no-till gardening methods, allowing roots and soil organisms to create natural channels for water and air.
Adapt this garden style to different spaces by using raised beds with optimized soil mixes for smaller areas or balconies. Consider vertical gardening techniques with soil pockets that maintain moisture, and install drip irrigation systems beneath mulch layers for efficient watering.
For extremely small spaces, focus on container gardening with self-watering planters and moisture-retaining soil amendments like coconut coir or biochar.