
8 Garden Ideas for Balconies With Limited Sun
If your balcony isn’t exactly sun-kissed, you’re not alone in seeking ways to create a thriving garden oasis. You’ll find that limited sunlight doesn’t mean limited possibilities when it comes to transforming your outdoor space. From deep green ferns that flourish in the shadows to clever vertical gardening solutions that maximize every inch, there’s a world of shade-loving plants and smart design strategies waiting to help you craft your perfect balcony retreat. Let’s explore how you can turn those challenging conditions into your garden’s greatest advantage.
Contents
- 1 Choose the Right Shade-Tolerant Plants
- 2 Master Container Gardening for Low Light
- 3 Optimize Your Space With Vertical Gardens
- 4 Create a Lush Fern Sanctuary
- 5 Incorporate Light-Reflecting Elements
- 6 Design With Decorative Foliage Plants
- 7 Establish a Moss and Ground Cover Garden
- 8 Install Strategic Lighting Solutions
Choose the Right Shade-Tolerant Plants
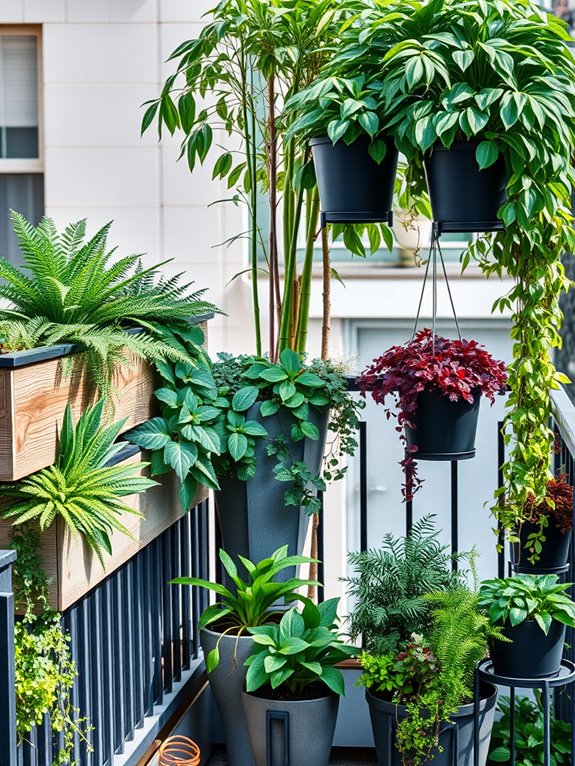
Transform your shaded balcony into a lush sanctuary with an array of shade-tolerant plants that thrive in limited sunlight. Deep green ferns cascade over railings, while delicate Japanese forest grass sways gently in the breeze. Hostas display their magnificent foliage in varying shades of green and blue, creating a peaceful atmosphere reminiscent of a woodland garden.
The combination of different leaf textures and shapes adds visual interest even without abundant flowers. Painted ferns provide silvery highlights, while coral bells offer burgundy and purple tones that pop against darker foliage. Add height with tall bamboo plants in decorative containers, and incorporate hanging baskets filled with trailing plants like Swedish ivy and begonias to maximize vertical space.
Essential Elements:
- Large containers with drainage holes
- Shade-loving ferns (Boston, Bird’s Nest, Maidenhair)
- Hostas varieties
- Japanese forest grass
- Coral bells (Heuchera)
- Trailing plants (Swedish ivy, begonias)
- Bamboo varieties
- Quality potting soil
- Container mulch
- Self-watering systems
- Plant stands of varying heights
Begin by assessing your balcony’s light conditions throughout the day, as even shade-tolerant plants need some indirect light. Position larger containers along walls or corners, using them as anchors for your design.
Layer plants by height, with taller specimens at the back and trailing varieties near the edges. Group plants with similar water needs together to simplify maintenance. Install a simple irrigation system or self-watering containers to ensure consistent moisture levels, as container plants in shade can dry out unexpectedly.
Adapt your shade garden to any balcony size by focusing on vertical gardening techniques. For smaller spaces, utilize wall-mounted planters and hanging baskets to maximize growing area. Consider removable trellises for climbing varieties, and use lightweight containers that can be easily moved.
Monitor plant growth carefully, as shade-loving plants in containers may need more frequent division or pruning than their in-ground counterparts. During winter months, protect container plants from freeze damage by moving them closer to the building or adding insulation around pots.
Master Container Gardening for Low Light
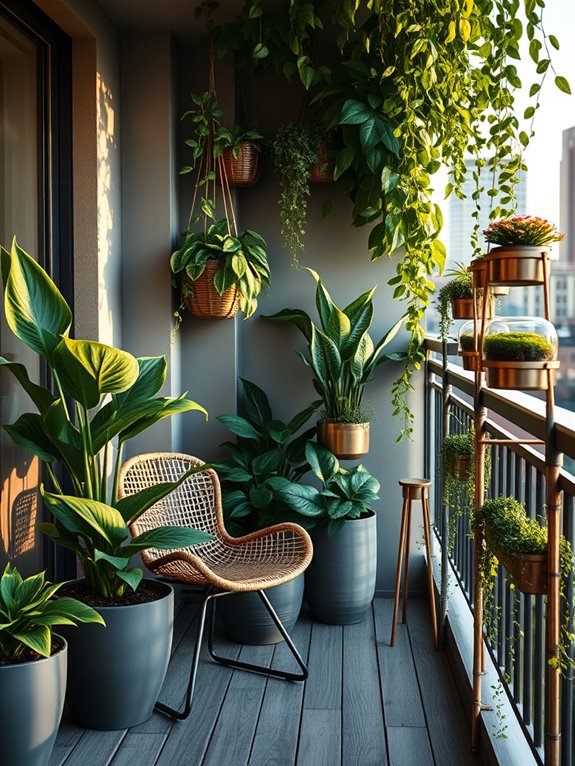
Imagine stepping onto your balcony and being greeted by a lush oasis of deep greens and varying textures, despite the limited natural light. Graceful ferns cascade from wall-mounted planters, while peace lilies stand tall in elegant ceramic containers, their white blooms glowing like moonlight against the emerald backdrop. Snake plants add architectural interest with their strong vertical lines, complemented by the heart-shaped leaves of pothos trailing along decorative trellises.
The space transforms into a tranquil retreat where shade-loving plants thrive in carefully curated containers of different heights and materials. Copper-toned planters reflect ambient light, while dark stone containers create dramatic contrast. Glass terrariums house delicate moss gardens, adding an enchanting element to coffee tables or shelving units, while LED grow lights strategically placed among the foliage create a magical evening ambiance.
Key Elements:
- Large ceramic planters (various sizes)
- Wall-mounted planters
- Decorative trellises
- LED grow lights
- Glass terrariums
- Shade-tolerant plants (ferns, peace lilies, pothos, snake plants)
- Moisture-retaining potting soil
- Copper or metallic finish containers
- Multi-level plant stands
- Self-watering containers
Begin by assessing your balcony’s light patterns throughout the day, identifying the brightest spots for plants that can tolerate moderate shade. Arrange larger containers along walls and corners, creating a foundational backdrop with taller plants like snake plants and peace lilies.
Install wall-mounted planters at varying heights, ensuring they’re securely fastened and have proper drainage systems. Position LED grow lights to supplement natural light, especially during darker months.
Layer your garden by placing medium-sized containers on plant stands, creating visual interest and maximizing space. Use self-watering containers for consistent moisture levels, particularly important for shade-loving plants. Group plants with similar water needs together, and maintain proper spacing to allow air circulation, preventing fungal issues common in low-light environments.
For balconies of different sizes, adapt the design by scaling container sizes appropriately. Smaller balconies can focus on vertical gardening with wall-mounted systems and hanging baskets, while larger spaces can incorporate seating areas surrounded by grouped containers.
Consider using lightweight containers on upper floors, and always check weight restrictions. For extremely low-light conditions, incorporate more artificial lighting and choose plants rated for deep shade, such as ZZ plants and Chinese evergreens.
Optimize Your Space With Vertical Gardens
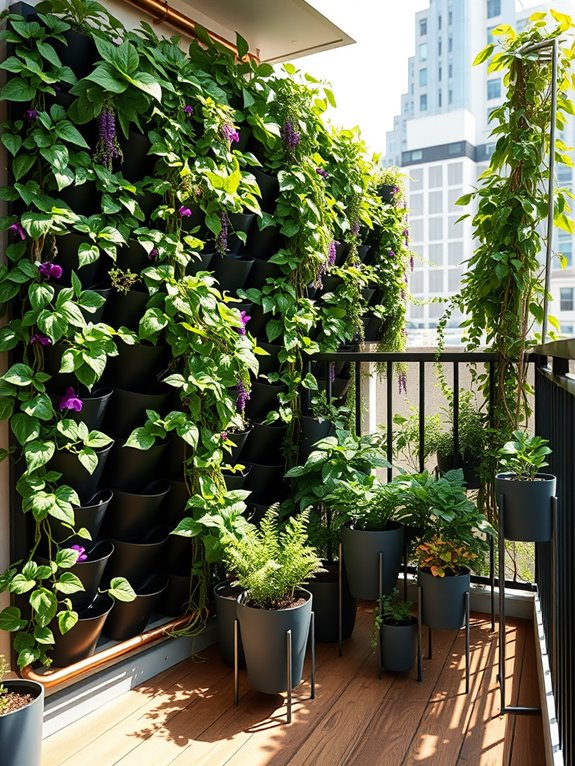
Transform your balcony into a lush, living wall of greenery with a thoughtfully designed vertical garden. Cascading vines of ivy and pothos create an emerald waterfall effect, while compact herb gardens and flowering plants add bursts of color and texture at varying heights. Wall-mounted pocket planters showcase a tapestry of succulents, ferns, and trailing petunias, making every inch of vertical space come alive with natural beauty.
The vertical design creates an intimate green sanctuary that maximizes your balcony’s potential while maintaining precious floor space. Climbing jasmine and morning glories weave through trellises, offering natural privacy screens that perfume the air with their delicate fragrances. Strategic lighting placement among the foliage creates enchanting evening ambiance, transforming your vertical garden into a magical retreat as the sun sets.
Essential Elements:
- Wall-mounted planters or pocket systems
- Sturdy trellises or garden grids
- Drip irrigation system
- Plant support clips and ties
- Growing medium appropriate for vertical systems
- Selection of climbing plants and trailing varieties
- LED grow lights (for shadier areas)
- Moisture-resistant wall barriers
- Container plants for ground level
- Small water collection system
Begin installation by securing a moisture barrier to protect your walls, then mount your vertical growing system according to weight specifications and wall type. Install the irrigation system before adding plants, ensuring even water distribution throughout the vertical space.
Place larger container plants at the base, then work upward, positioning climbing plants near support structures and filling pocket planters with appropriate species based on light exposure and water needs.
The key to successful vertical garden maintenance lies in establishing proper watering schedules and regular pruning routines. Check structural supports monthly and adjust ties as plants grow. Monitor soil moisture levels frequently, as vertical gardens can dry out more quickly than traditional gardens.
Rotate plants seasonally to maintain visual interest and replace any struggling specimens promptly to maintain the garden’s lush appearance.
For smaller balconies, focus on modular systems that can be expanded over time, and choose compact plant varieties that won’t overwhelm the space. Larger balconies can incorporate multiple growing systems and heavier structural elements like pergolas or archways.
Consider incorporating fold-down or movable elements for flexibility, and always check weight restrictions before installation. Mix shallow-rooted plants with deeper options to maximize the vertical growing space while maintaining structural integrity.
Create a Lush Fern Sanctuary
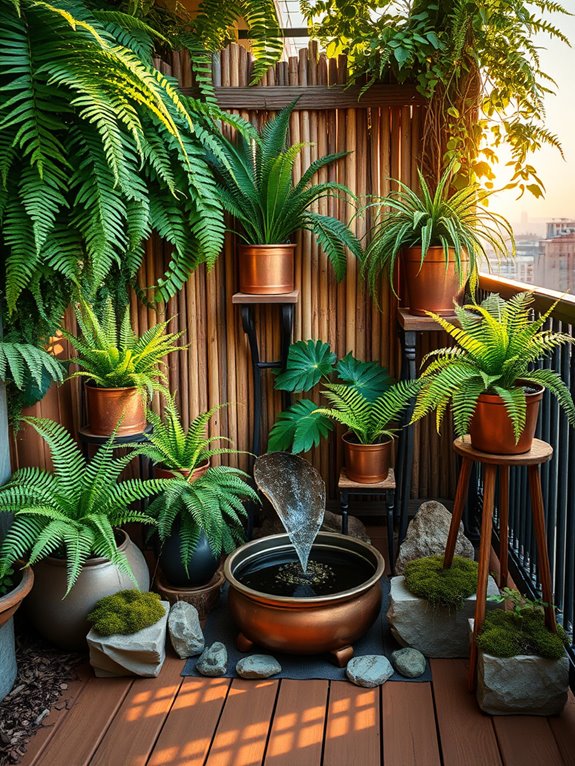
Transform your balcony into a verdant oasis with a collection of lush, cascading ferns that create a peaceful, woodland-inspired retreat. Boston ferns, maidenhair ferns, and bird’s nest ferns bring varying textures and shades of green, while their delicate fronds dance in the gentle breeze. The layered effect of different fern varieties creates a natural canopy that provides both privacy and a sense of escape from urban surroundings.
This sanctuary style draws inspiration from forest floors and shaded glens, where ferns naturally thrive in filtered light. Complement the greenery with natural elements like weathered wood planters, moss-covered stones, and perhaps a small tabletop water feature that provides gentle background sounds. The combination creates a cool, calming atmosphere that feels particularly refreshing during warm summer months.
Key Elements:
- Variety of ferns (Boston, Maidenhair, Bird’s Nest, Japanese Painted)
- Wooden or natural fiber planters
- Organic mulch
- Humidity tray
- Misting bottle
- Shade cloth or screening
- Natural stone decorations
- Small water feature
- Plant stands of varying heights
- Organic fertilizer
Start by assessing your balcony’s light conditions and installing appropriate screening if needed, as most ferns prefer indirect light. Arrange larger ferns in corners and along walls, using plant stands to create height variation. Position humidity-loving varieties like maidenhair ferns near each other, where they can benefit from shared moisture.
Install a simple drip irrigation system or group plants on humidity trays filled with pebbles and water. Place your water feature centrally where it can be easily accessed for maintenance, and arrange smaller ferns and decorative elements around it. Regular misting, especially during dry periods, will help maintain the humid environment ferns crave.
Rotate plants quarterly to ensure even growth, and trim away any brown fronds to maintain the lush appearance. For smaller balconies, focus on vertical growing solutions and wall-mounted planters to maximize space. Consider starting with just three to four fern varieties and expanding gradually.
In particularly windy locations, create windbreaks using bamboo screens or strategic placement of larger plants. For year-round appeal in colder climates, include some hardy fern varieties like Japanese Painted Ferns, and be prepared to move tender specimens indoors during winter months.
Incorporate Light-Reflecting Elements
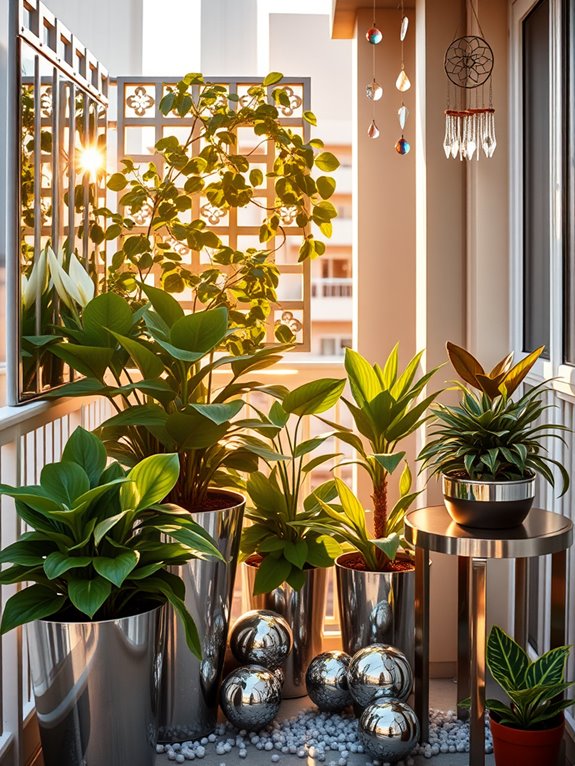
Transform your balcony into a shimmering oasis by incorporating light-reflecting elements that create an enchanting play of light throughout the day. Mirror-finished planters, metallic wind chimes, and crystal sun catchers dance with natural sunlight, making your space feel larger and more dynamic. The strategic placement of reflective surfaces amplifies both natural and artificial lighting, turning even the smallest balcony into a magical retreat that sparkles from dawn to dusk.
Glass mosaic tiles, metallic garden stakes, and polished steel decorative elements work in harmony with glossy-leaved plants like peace lilies and rubber plants to maximize light reflection. This combination creates an ever-changing display of gentle sparkles and subtle gleams that bring life to shaded areas while adding depth and dimension to sunny spots. The result is an atmospheric garden that feels both sophisticated and whimsical.
Key Elements:
- Mirror-backed trellises
- Metallic planters and containers
- Glass mosaic decorations
- Crystal sun catchers
- Chrome or stainless steel furniture
- Plants with glossy foliage
- Metallic wind chimes
- Reflective garden stakes
- Mirrored garden balls
- Glass pebbles or marbles
Begin implementation by mapping out your balcony’s light patterns throughout the day. Position larger reflective elements like mirror-backed trellises against walls where they can capture and redirect sunlight into shadowy corners. Arrange metallic planters and decorative elements at varying heights, ensuring they don’t create harsh glare or hot spots that could damage plants.
Install light-catching elements securely, considering wind conditions at height, and ensure all hanging items are properly anchored. When designing a light-reflecting balcony garden, consider the seasonal changes in sun position and intensity. For smaller balconies, focus on vertical reflective elements and limit floor-standing items to maximize space.
Choose weather-resistant materials that won’t tarnish or fade, and regularly clean reflective surfaces to maintain their effectiveness. Consider incorporating smart lighting solutions that complement your reflective elements, creating a magical atmosphere after sunset.
Design With Decorative Foliage Plants
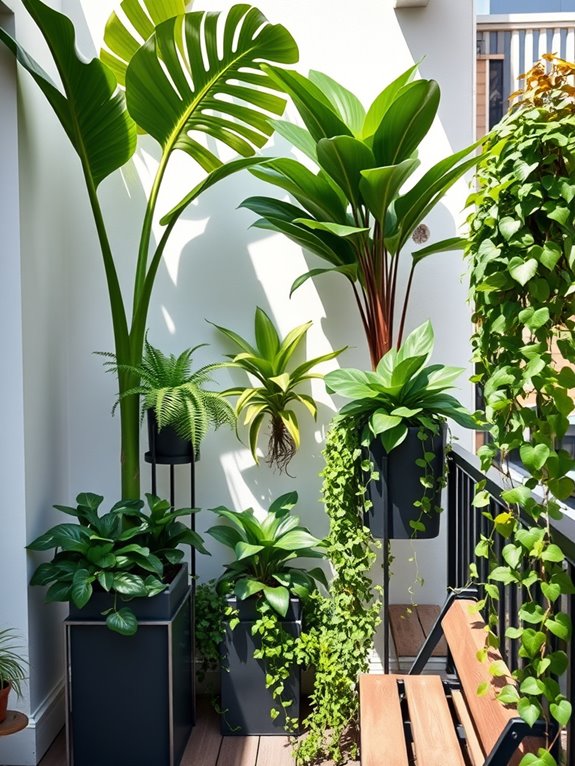
Transform your balcony into a lush urban oasis with decorative foliage plants that create depth, texture, and year-round visual interest. Bold-leafed plants like Japanese fatsia and bird’s nest ferns provide dramatic focal points, while cascading varieties such as trailing pothos and string of pearls add flowing movement to the space. The varied shades of green, from deep emerald to silvery sage, create a sophisticated palette that remains striking throughout every season.
When thoughtfully arranged, decorative foliage plants create distinct layers of interest, from ground level to eye height and above. Combine different leaf shapes and sizes – large paddle-shaped leaves contrast beautifully with delicate, fern-like fronds. Mix in plants with variegated patterns or burgundy undertones, such as coleus or caladiums, to add depth and visual excitement to your green sanctuary.
Essential Elements:
- Large statement plants (monstera, rubber plant, bird of paradise)
- Medium-sized textural plants (ferns, prayer plants, Chinese evergreen)
- Trailing plants (pothos, ivy, string of hearts)
- Decorative containers in varying heights
- Plant stands or shelving units
- Quality potting soil
- Drainage materials
- Watering can or irrigation system
- Plant supports or trellises
Start by positioning your largest plants against walls or in corners, creating a backdrop for smaller specimens. Layer medium-sized plants in front, varying their heights using stands or risers to create visual depth.
Place trailing plants near the balcony’s edge or in hanging baskets to soften boundaries and maximize vertical space. Ensure all containers have proper drainage and use high-quality potting mix specifically formulated for container gardens. Group plants with similar water and light requirements together to simplify maintenance.
For successful adaptation to any balcony size, consider the mature size of plants and their growth habits. Small balconies can focus on vertical gardening with wall-mounted planters and hanging baskets, while larger spaces can accommodate multiple groupings and larger specimens.
Use lightweight containers on upper floors, and always check weight restrictions. In windy locations, secure tall plants and ensure hanging elements are properly anchored. Consider creating a microclimate by grouping plants together, which helps maintain humidity and protects more delicate specimens.
Establish a Moss and Ground Cover Garden
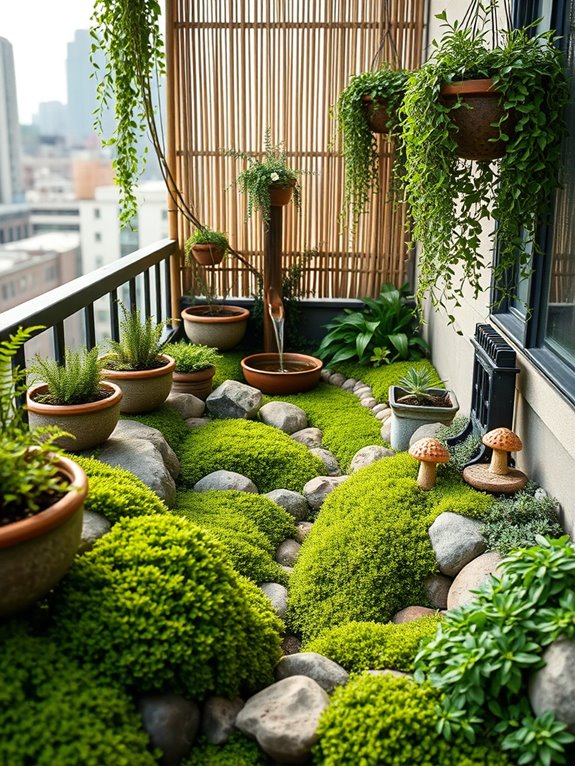
Transform your balcony into a lush, enchanting retreat with a moss and ground cover garden that brings the mystical essence of a forest floor to your urban space. Irish moss, creeping thyme, and delicate baby tears create a soft, undulating carpet of various green hues, punctuated by the occasional flowering stonecrop or creeping phlox. The textural interplay between different ground covers creates a mesmerizing tapestry that shifts and changes with the seasons.
When complemented with weathered stones, miniature ceramic mushrooms, and perhaps a small water feature, this garden style evokes the tranquil atmosphere of a woodland sanctuary. The low-growing nature of moss and ground covers makes them perfect for balcony gardens, as they won’t obstruct views while still providing maximum visual impact. Small ferns and shade-loving miniature plants can emerge from this living carpet, adding vertical interest without overwhelming the space.
Key Elements:
- Moss varieties (Sheet moss, Cushion moss, Irish moss)
- Ground covers (Creeping thyme, Baby tears, Stonecrop)
- Shallow containers or trays
- Decorative stones and pebbles
- Small water feature or mister
- Shade-providing structures
- Miniature garden ornaments
- Wood or stone edging materials
- Moisture-retaining soil mix
To implement this garden style, start by creating a proper foundation with shallow, well-draining containers filled with acidic soil mix. Layer the containers across your balcony floor, ensuring they’re slightly elevated for proper drainage.
Begin planting your moss patches and ground covers in groups, allowing space for them to spread naturally. Install a simple misting system or place a small fountain nearby to maintain necessary humidity levels.
The key to success lies in creating proper growing conditions. Position shade cloth or umbrellas to protect delicate plants from direct sunlight, and establish a regular misting schedule. Layer your ground covers strategically, placing taller varieties toward the back and creeping varieties near the edges where they can cascade over container sides.
Additional considerations: For smaller balconies, focus on creating a single, cohesive carpet effect using just two or three plant varieties, and incorporate vertical elements through wall-mounted containers. Larger balconies can accommodate multiple themed sections or incorporate stepping stones to create pathways through the living carpet. Consider your balcony’s microclimate – morning sun exposure is ideal, while afternoon sun may require additional shade protection.
Monitor moisture levels carefully in the first few weeks until plants establish themselves.
Install Strategic Lighting Solutions
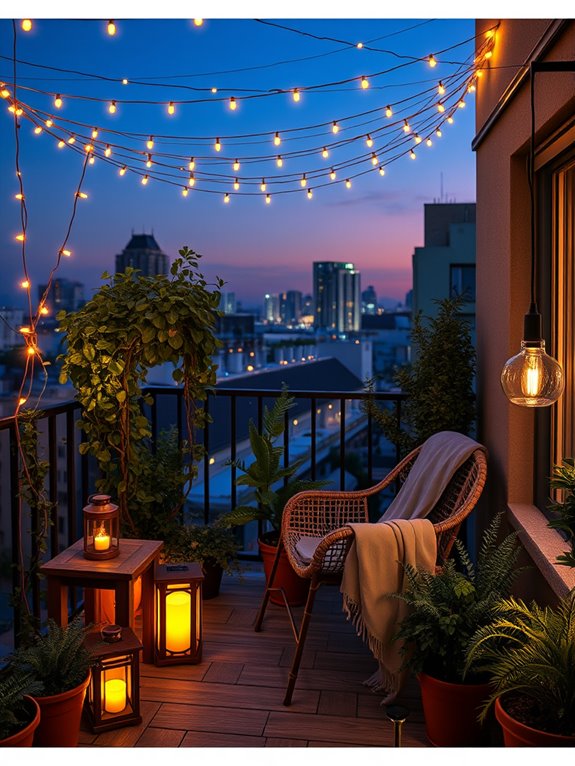
Transform your balcony into a magical evening retreat with strategic lighting that creates an enchanting atmosphere after sunset. Twinkling string lights weave through climbing vines and potted plants, casting gentle shadows that dance across your outdoor space.
Solar-powered lanterns nestled between herb containers provide warm, ambient lighting while highlighting the natural beauty of your garden elements. The combination of up-lighting for tall plants and down-lighting for ground coverage creates depth and dimension in even the smallest balcony space.
The layered lighting approach turns your balcony into an extension of your indoor living space, perfect for evening entertaining or peaceful nighttime relaxation. LED strip lights tucked beneath railings provide subtle illumination, while decorative pendant lights suspended from above create an intimate dining atmosphere.
Battery-operated candle lanterns scattered among potted ferns and flowering plants add a romantic touch, making your balcony garden an inviting sanctuary long after the sun sets.
Essential Elements:
- Solar-powered string lights
- LED strip lighting
- Battery-operated lanterns
- Solar stake lights
- Decorative pendant lights
- Light-reflecting plants (silver-leaved varieties)
- Timer switches
- Weather-resistant extension cords
- Light clips and hanging hardware
- Dimmer controls
Begin your lighting installation by mapping out your power sources and planning the primary lighting zones. Install permanent fixtures first, such as LED strips under railings and overhead pendant lights, ensuring all electrical connections are weather-protected.
Layer in string lights in a zigzag pattern across the space or wrapped around railings, using proper outdoor-rated clips and hooks. Position solar lights strategically to charge during the day and illuminate key plants or seating areas at night. Consider creating separate lighting zones that can be controlled independently for different moods and occasions.
Tips For Success: Combine different light temperatures (warm and cool) to create visual interest, but stick to similar styling for a cohesive look. For smaller balconies, focus on vertical lighting solutions and avoid cluttering floor space with standing fixtures.
Consider using smart bulbs or automated systems to control lighting remotely and create pre-set scenes for different occasions. Remember to position lights to minimize glare into neighboring apartments and check local regulations regarding outdoor lighting installations.